
Setting up a soundbar with your TV is easy! This guide covers choosing the right soundbar, connecting it with HDMI or optical cables, and optimizing your audio for an immersive home theater experience, even if you’re a beginner. We’ll help you get fantastic sound without the fuss.
Is your TV’s built-in sound leaving you flat? Many flat-screen TVs produce tinny audio that just doesn’t cut it for movies, shows, or games. You’ve heard about soundbars – sleek bars that sit in front of your TV and offer a huge audio upgrade. But with so many options, where do you even start? Don’t worry, making the switch to a better sound system is simpler than you think. This guide will walk you through everything you need to know, from picking the perfect soundbar to getting it hooked up and sounding amazing. Get ready for a home theater experience that truly surrounds you!
Choosing Your Soundbar: Not All Bars Are Created Equal

Before we talk about plugging things in, let’s figure out which soundbar is right for you. Think of it like picking a new pair of headphones; you want something that fits your ears and your budget. There are a few key things to consider:
1. Your Space Matters
How big is your TV and the room you watch in? A tiny soundbar might get lost in a large living room, while a massive one can overwhelm a small bedroom. For most standard living rooms (10-15 feet away from the TV), a soundbar around 30-40 inches long is usually a good fit.
2. Soundbar Types: From Simple to Surround
Soundbars come in different flavors, each offering a unique audio experience:
- Basic Stereo Soundbars: These are your entry-level models. They have two main speakers (left and right) and do a good job of widening the soundstage compared to TV speakers. Great for casual viewing.
- Soundbars with a Subwoofer: Many soundbars come with a separate wireless subwoofer. This box handles the low-end bass frequencies, making explosions rumble and music thump. It’s a significant upgrade for movie lovers and gamers.
- Surround Sound Soundbars (Virtual & True): Some soundbars aim to replicate true surround sound.
- Virtual Surround: These use advanced processing to bounce sound off your walls, tricking your ears into thinking there are speakers behind you. Results can vary based on room acoustics.
- True Surround (with Rear Speakers): For the ultimate immersive experience, some soundbars come with wireless rear satellite speakers that you place behind your seating area. This is the closest you’ll get to a full home theater system without messy wires.
- Soundbases: These are wider and flatter than soundbars, designed to sit under your TV. They sometimes offer better bass than basic soundbars due to their larger enclosure.
3. Connectivity: How Will It Talk to Your TV?
This is super important. You need to make sure your soundbar can connect to your TV. The most common and best methods are:
- HDMI ARC (Audio Return Channel): This is the gold standard. One HDMI cable can send audio from your TV to the soundbar and video to your TV. It also often allows your TV remote to control the soundbar’s volume. You’ll need an HDMI ARC port on both your TV and soundbar. Look for the label “ARC” on the HDMI port.
- HDMI eARC (Enhanced Audio Return Channel): This is a newer, more powerful version of ARC. It supports higher-quality audio formats like Dolby Atmos and DTS:X, which deliver incredibly detailed and immersive sound. If both your TV and soundbar support eARC, it’s the best option.
- Optical (TOSLINK): This is a digital audio connection that uses a fiber-optic cable. It’s very common on older TVs and soundbars. It’s a good alternative to HDMI ARC if your devices don’t support it, but it doesn’t support newer, high-bitrate audio formats as well as HDMI.
- 3.5mm Auxiliary (AUX): This is a simple analog connection. It’s found on some older soundbars and devices. Audio quality is generally lower than digital connections (HDMI, Optical), so it’s usually a last resort.
- Bluetooth: Many soundbars offer Bluetooth to stream audio wirelessly from your phone or tablet. While convenient for music, it’s not ideal for TV audio due to potential lag (lip-sync issues).
4. Features to Look For
Beyond the basics, consider these:
- Voice Control: Some soundbars have built-in Alexa or Google Assistant.
- Multi-room Audio: Can you sync it with other speakers in your home?
- Dolby Atmos / DTS:X Support: If you want the most immersive, three-dimensional sound, look for soundbars that support these advanced formats. They often use upward-firing speakers to bounce sound off your ceiling.
- DTS Virtual:X™: A competitor to Dolby Atmos, offering virtualized 3D sound.
- HDR Compatibility: If you have a 4K HDR TV and plan to connect streaming devices or game consoles directly to the soundbar, ensure it passes through HDR video signals (like HDR10, Dolby Vision).
Soundbar Setup With TV: Step-by-Step Guide

Alright, you’ve picked out your soundbar! Now let’s get it connected and sounding great. This process is pretty straightforward, so take a deep breath, and let’s do this together.
Step 1: Unboxing and Placement
Carefully unbox your soundbar and any accessories (subwoofer, remote, cables). Read the quick start guide that comes with it – it’s usually very helpful!
Soundbar Placement:
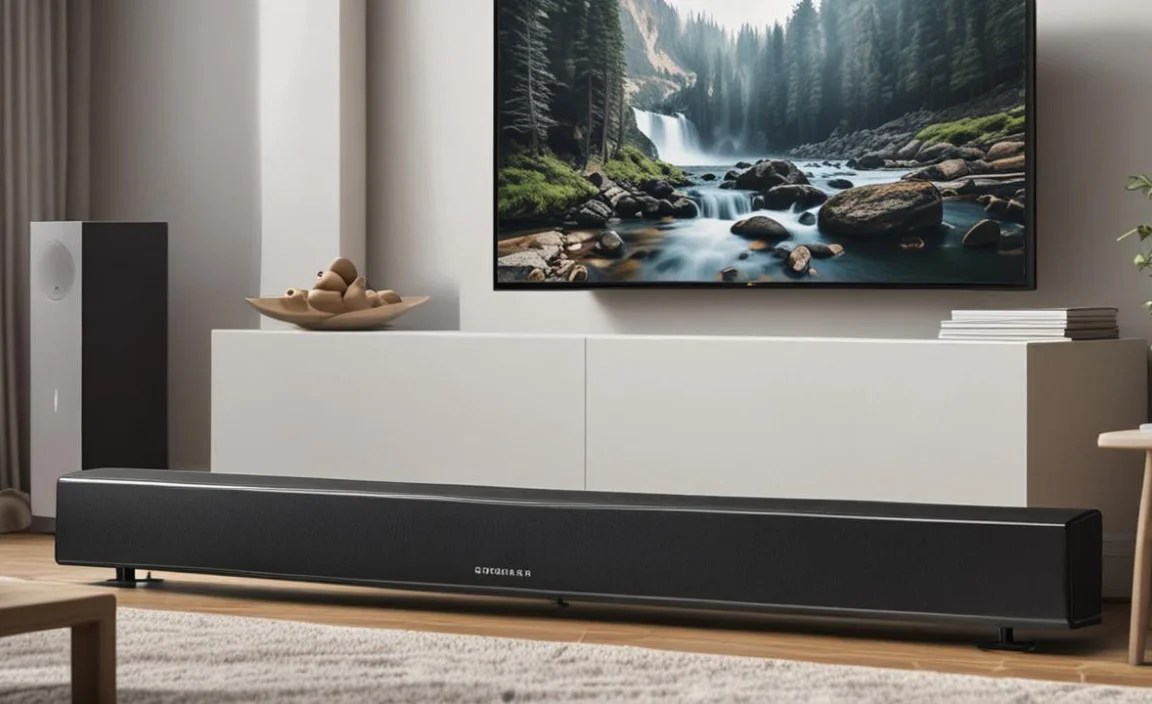
- In Front of the TV: The most common spot. Make sure it’s not blocking the TV’s remote sensor. If it is, you might need a wall mount for the TV or soundbar, or you can place the soundbar on a shelf above the TV.
- Below the TV: Some people prefer this look. Ensure it’s stable and won’t vibrate too much.
- Wall-Mounted: If you have a wall-mounted TV, consider wall-mounting the soundbar below it using a compatible bracket.
Subwoofer Placement:
- Subwoofers are flexible. They don’t need to be placed near the soundbar.
- The “subwoofer crawl” is a great trick: Place the subwoofer in your main listening position (where you sit). Play some bass-heavy music or movie scenes, then crawl around your room at the subwoofer’s height until you find a spot where the bass sounds best. Place the subwoofer there, then connect it to the soundbar (usually wirelessly, but sometimes with an audio cable).
Step 2: Connect Your Sources (TV and Devices)
This is where we make the “magic happen.” You’ll need an audio cable. The best options, in order of preference, are:
Option A: HDMI ARC (Recommended)
This is the easiest and often best-quality connection.
- Check Your Ports: Find the HDMI port labeled “ARC” or “eARC” on your TV. Find the HDMI port labeled “ARC” or “OUT” on your soundbar.
- Connect the Cable: Use a high-speed HDMI cable. Plug one end into the TV’s ARC port and the other end into the soundbar’s ARC port. (If you’re using eARC, make sure both devices and the cable support it).
- Enable ARC on Your TV: This is crucial! Go into your TV’s settings menu. Look for options like “HDMI-CEC,” “Anynet+” (Samsung), “Bravia Sync” (Sony), “SimpLink” (LG), “Viera Link” (Panasonic), or “Consumer Electronics Control (CEC).” Enable it. Then, find the specific “ARC” setting (sometimes it’s automatically enabled when CEC is on, or it might be a separate toggle) and make sure it’s turned ON.
- Select the Correct Input: On your soundbar, use the remote to select the “HDMI ARC” input.
Why HDMI ARC? It simplifies connections (one cable for audio), supports uncompressed audio, and can allow your TV remote to control the soundbar’s volume and power (via HDMI-CEC). For more on HDMI-CEC, check out HDMI’s official FAQ on CEC.
Option B: Optical Cable (TOSLINK)
If HDMI ARC isn’t an option, optical is a solid digital choice.
- Check Your Ports: Find the “Optical Out” port on your TV and the “Optical In” port on your soundbar. These ports usually have a small flap or cover on them.
- Prepare the Cable: Remove the small plastic protective caps from both ends of the optical cable. Be careful not to touch the fiber-optic tip.
- Connect the Cable: Plug one end into the TV’s optical out and the other into the soundbar’s optical in. You should feel a slight click when they’re seated properly.
- Select the Correct Input: On your soundbar, use the remote to select the “Optical” or “Digital Audio” input.
Note: Optical cables don’t support the highest-end audio formats like Dolby Atmos, and they don’t usually allow volume control with your TV remote. You’ll need to use the soundbar’s remote for volume.
Option C: Bluetooth (For convenience, not primary TV audio)
Use this for streaming from your phone or tablet, not usually for TV sound due to potential delays.
- Put Soundbar in Pairing Mode: Press and hold the Bluetooth button on your soundbar or remote until you see a flashing light or hear a prompt.
- On Your TV/Device: Go to the Bluetooth settings on your TV (if it has Bluetooth output) or your phone/tablet, and select your soundbar from the list of available devices.
- Pair: Follow any on-screen prompts to complete the pairing.
Step 3: Configure Your TV Settings
Once physical connections are made, you need to tell your TV to send audio to the soundbar.
For HDMI ARC:
- Go back into your TV’s Sound/Audio settings.
- For “Audio Output” or “Speaker Select,” choose “HDMI ARC,” “Audio System,” or “External Speaker.”
- If you enabled HDMI-CEC, your TV might automatically switch audio to the soundbar.
For Optical:
- Go into your TV’s Sound/Audio settings.
- For “Audio Output” or “Speaker Select,” choose “Optical,” “Digital Audio Out,” or “External Speaker.”
- You might see an option for “Audio Format” or “Digital Audio Output.” For optical, “PCM” is usually safest. If your soundbar supports Dolby Digital or DTS, selecting those might offer better quality, but PCM is universally compatible.
Step 4: Configure Your Soundbar Settings
Now, let’s tweak the soundbar itself.
- Volume: Start with the volume low and gradually increase it.
- Sound Modes: Most soundbars have preset modes like “Movie,” “Music,” “Game,” or “Standard.” Experiment with these to see which sounds best for what you’re watching.
- Bass/Treble: Some soundbars allow you to adjust bass and treble levels. If the sound is too boomy, turn down the bass. If it’s too sharp, try lowering the treble.
- Surround Settings: If your soundbar has virtual surround, play with its on/off settings. Sometimes, virtual surround sounds great; other times, it can make dialogue sound distant or muffled.
- Dialogue Enhancement: Many soundbars have a “Clear Voice” or “Dialogue Enhancement” feature. This boosts the mid-range frequencies where voices reside, making dialogue easier to understand. It’s a lifesaver for action movies!
Step 5: Test Everything!
Put on a familiar movie scene, a favorite song, or play a game. Listen for:
- Clear Dialogue: Can you easily hear what characters are saying?
- Balanced Sound: Does the bass feel punchy but not overwhelming? Are the highs (like cymbals) clear but not sibilant (hissy)?
- Surround Effect (if applicable): If you have a surround soundbar, do you feel immersed?
- Lip Sync: Is the audio in sync with the video? If not, check HDMI-CEC settings, switch cables, or look for an “AV Sync” setting on your TV or soundbar.
Troubleshooting Common Soundbar Setup Issues
Even with the best guides, sometimes things don’t work perfectly the first time. Here are common hiccups and how to fix them:
| Problem | Possible Solution |
|---|---|
| No Sound |
|
| Sound is Muffled or Distorted |
|
| Lip Sync Issues (Audio/Video Lag) |
|
| Remote Control Issues (TV remote not controlling soundbar) |
|
| Subwoofer Not Working |
|
Essential Soundbar Buying Guide: Key Takeaways
To sum up, here’s what you should remember when buying and setting up your soundbar:
When Buying:
- Consider your room size and the size of your TV.
- Decide on the sound experience: Basic, with a subwoofer, or full surround.
- Prioritize connectivity: HDMI ARC/eARC is best, followed by Optical. Ensure your TV and soundbar have compatible ports.
- Look for features that matter to you, like Dolby Atmos or voice control.
- Read reviews! See what other users say about sound quality and ease of setup for specific models. Reputable tech sites like Rtings.com offer detailed reviews and comparisons.
When Setting Up:
- Placement is key for both the soundbar and subwoofer.
- HDMI ARC is your friend for simplicity and quality.
- Don’t skip TV settings: Enable HDMI-CEC and set the correct.