
Unlock the clearest, most immersive TV audio with simple, expert sound settings adjustments, all easily managed from your remote. Stop struggling with fuzzy dialogue and booming explosions – discover how to fine-tune your TV’s sound for a truly cinematic experience at home.
Ever watch your favorite show and strain to hear the dialogue, only for the next scene to blast you with thunderous sound effects? It’s a common frustration! Many of us assume our TV’s default sound settings are good enough, but a few simple tweaks can make a world of difference. You don’t need to be an audio engineer or have a fancy soundbar to enjoy crystal-clear sound. This guide will walk you through the best TV sound settings, all controllable right from the comfort of your couch with your remote. We’ll demystify those confusing audio menus and show you how to get the most out of your TV’s sound. Get ready to hear everything, from the subtlest whisper to the loudest action scene, with perfect clarity.
Understanding Your TV’s Audio Settings: The Basics

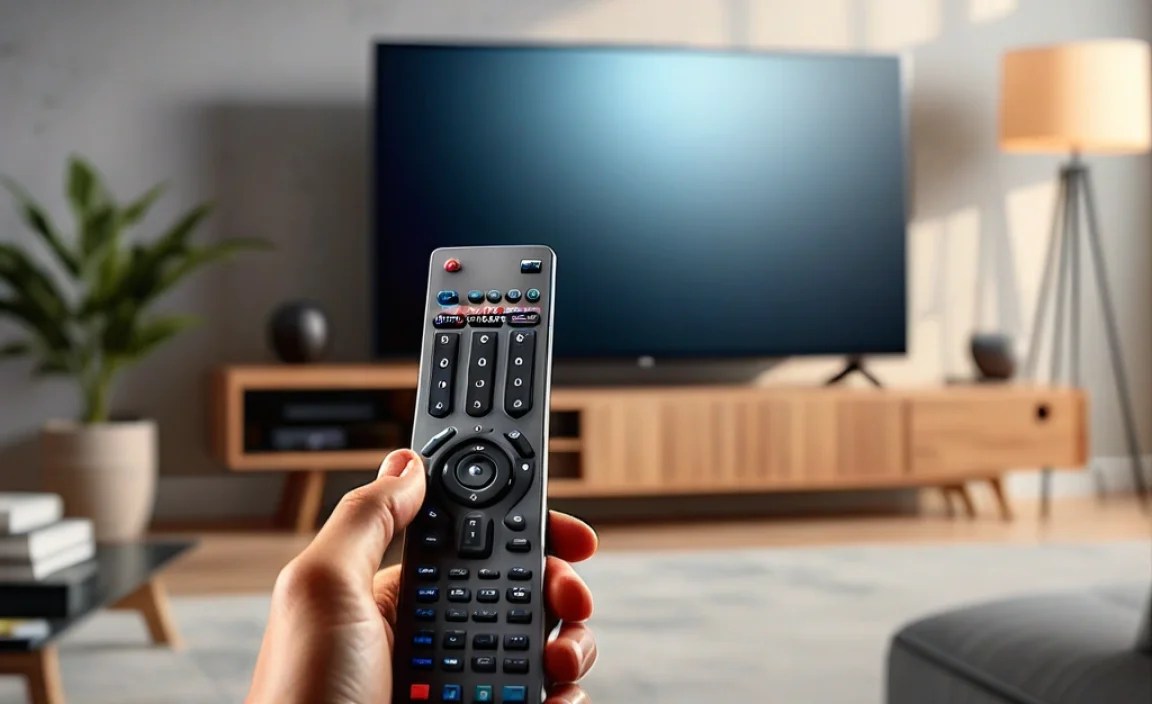
Your TV remote is more powerful than you think. Beyond changing channels and adjusting volume, it’s your key to unlocking a vastly improved audio experience. Most modern TVs come equipped with a range of sound settings designed to cater to different types of content and viewing environments. But navigating these can feel like deciphering a secret code. Let’s break down the essential terms and concepts so you can confidently adjust your TV’s sound.
Common Sound Modes at Your Fingertips
TV manufacturers include pre-set sound modes to simplify the process. Think of these as one-click solutions for common scenarios. While brand names might differ, the underlying principles are the same.
- Standard/Normal: This is your TV’s default setting. It aims for a balanced sound profile, suitable for general viewing. It’s often a good starting point, but rarely the best.
- Movie/Cinema: This mode emphasizes bass and surrounds sound effects, creating a more immersive, theater-like experience. Great for action flicks and dramas where atmosphere matters.
- Music: Designed to bring out the clarity and richness of music. It often boosts mid-range frequencies, making vocals and instruments stand out.
- Sports: This mode typically enhances crowd noise and commentary, making live events feel more vibrant and engaging.
- Game: Optimized for gaming, this mode often aims for quicker response times and clear audio cues, helping you react faster in fast-paced games.
- Clear Voice/Dialogue Enhancement: A game-changer for many! This setting specifically boosts the frequencies associated with human speech, making dialogue much easier to understand, especially in noisy scenes or for those with hearing impairments.
Advanced Sound Settings: A Deeper Dive
Beyond the pre-set modes, there are more granular controls that can really fine-tune your audio. You won’t always need to touch these, but knowing they exist is powerful.
- Equalizer (EQ): This is like a graphic equalizer on a stereo system. You can manually adjust the levels of different audio frequencies (bass, midrange, treble). Rtings.com offers great insights into how EQ sliders affect sound.
- Surround Sound (Virtual Surround): Many TVs simulate surround sound using just their built-in speakers. It can add a sense of spaciousness, but often lacks the precision of a dedicated surround system.
- Balance: This setting allows you to shift the sound output more to the left or right speaker. Useful if you’re consistently sitting off-center.
- AVL (Automatic Volume Leveler) / Auto Volume: Designed to prevent sudden jumps in volume, like between commercials and the program. It tries to keep the loudness consistent.
- HDMI-CEC (Consumer Electronics Control): This allows one remote to control multiple devices connected via HDMI. It can enable features like an AVR or soundbar remote to control your TV’s volume.
Finding Your TV’s Sound Settings Menu

The exact path to your TV’s sound settings will vary depending on the brand and model. However, the general process is quite similar across most devices. Grasping these steps will make navigating your remote a breeze.
Step-by-Step Navigation Guide
- Press the ‘Menu’ or ‘Settings’ Button: Look for a button on your remote that says “Menu,” “Settings,” “Home,” or has a gear icon (⚙️). Press it.
- Navigate to ‘Sound’ or ‘Audio’: Once the on-screen menu appears, use the arrow keys on your remote to highlight and select the “Sound,” “Audio,” or “Speaker” option.
- Explore Sound Modes: Within the sound menu, you’ll typically find options like “Sound Mode,” “Audio Mode,” or “Sound Presets.” Select this to cycle through or choose from the available modes (Standard, Movie, Music, etc.).
- Adjust Advanced Settings: Look for sub-menus like “Advanced Sound Settings,” “Expert Settings,” or “Audio Settings.” Here you’ll find options like the equalizer, surround sound toggle, and dialogue enhancement.
- Experiment and Listen: Don’t be afraid to try different settings! Play a familiar piece of content (a movie scene, a song, a sports clip) and listen to how each adjustment changes the sound.
Common Remote Button Layouts
While each remote is unique, here are some common icons and button names you’ll encounter:
- Navigation Pad: A four-way directional pad (up, down, left, right) usually surrounds a central “OK” or “Enter” button.
- Back/Return: An arrow pointing left or text like “Back” or “Return.”
- Home/Smart Hub: Often a house icon or the brand’s smart platform name (e.g., “Smart Hub” for Samsung, “Google TV” for Android TVs).
- Volume Control: Usually +/- buttons, often labeled “Vol.”
- Mute: A speaker icon with a slash through it.
Optimizing for Different Viewing Experiences
The “best” sound setting isn’t a one-size-fits-all answer. It depends entirely on what you’re watching and your listening environment. Think about where you sit and what you want to emphasize.
For Crystal Clear Dialogue
This is where many users seek improvement. If characters sound muffled or get lost in the background noise, focus on these settings:
- Engage “Clear Voice” or “Dialogue Enhancement”: This is the single most effective setting for improving dialogue clarity. Found in most TV audio menus.
- Adjust the Treble (High Frequencies): If “Clear Voice” isn’t enough, slightly increasing the “Treble” slider in the equalizer can help. Be careful not to overdo it, as it can make sounds harsh.
- Select “Standard” or “Music” Mode: These modes often prioritize mid-range and treble frequencies, which are crucial for vocal clarity. Avoid “Movie” mode if dialogue is your main concern, as it often prioritizes bass.
- Consider “AVL” Off: Sometimes, Automatic Volume Leveling can reduce the dynamic range, which might make quiet dialogue harder to hear. Experiment with it on and off.
For Immersive Movie Nights
When you want to feel like you’re in the theater, these settings will transport you:
- Select “Movie” or “Cinema” Mode: These modes are specifically designed to enhance bass and create a more dramatic, enveloping soundscape.
- Turn Up the Bass (Low Frequencies): If your TV has an equalizer, gently increase the low-frequency sliders. Be mindful not to make it boomy or muddy.
- Enable “Virtual Surround” (if available): This can add a sense of width and immersion, making sounds feel like they’re coming from beyond your screen.
- Ensure Volume is Adequate: These modes often have a wider dynamic range, meaning quiet parts are quieter and loud parts are louder. Adjust the overall volume to a comfortable, yet impactful, level.
For Vibrant Music Playback
To get the most out of your favorite artists, aim for clarity and balance:
- Select “Music” Mode: This mode generally offers a more balanced sound profile, often boosting mid-range frequencies where vocals and instruments shine.
- Use the Equalizer Wisely: If “Music” mode isn’t perfect, use the equalizer to bring out specific instruments or vocals. A slight boost in the mid-range (around 1kHz to 4kHz) can improve clarity.
- Ensure Stereo Separation: If your TV offers a “Stereo” or “Surround” option, ensure it’s set to “Stereo” for the most accurate music reproduction from integrated speakers.
For Engaging Sports Viewing
Feel the roar of the crowd and catch every announcer’s call:
- Select “Sports” Mode: This mode is often tuned to boost commentary and crowd noise, making live events feel more dynamic.
- Boost Mid-Range and Treble: Similar to dialogue, clear commentary requires good mid-range and treble frequencies.
- Experiment with “Clear Voice”: If commentary is still hard to discern, try enabling this as well.
Troubleshooting Common Sound Issues with Remote Control

Even with the best settings, you might encounter hiccups. Fortunately, many common sound problems can be resolved using just your remote and basic settings adjustments.
My TV Sound is Too Loud or Too Quiet
The most basic fix is your volume buttons! But if you’re experiencing inconsistent loudness:
- Check “AVL” or “Auto Volume”: Ensure this is turned ON to smooth out volume fluctuations between channels or content. If it sounds unnatural, try turning it OFF.
- Adjust Volume Levels per Input: Some TVs allow you to set specific volume levels for each input (HDMI 1, HDMI 2, etc.). If one device is consistently quieter, check its input’s volume setting.
- Avoid Extreme EQ Settings: Overly boosted bass or treble can make the sound seem overly loud or distorted at moderate volumes.
Dialogue is Muffled or Unintelligible
This is a frequent complaint, but easily fixable:
- Use “Clear Voice” / “Dialogue Enhancement”: This is the primary solution. Make sure it’s activated and test different levels if available.
- Increase Treble: In the equalizer, a small boost to treble frequencies (e.g., 8kHz and above) can make consonants sharper and easier to hear.
- Select “Standard” or “Music” Mode: “Movie” modes often emphasize bass, which can mask dialogue.
Sound Feels Flat or Lacks Depth
If your audio lacks impact or doesn’t fill the room:
- Enable “Virtual Surround”: If your TV has this feature, try turning it on to create a wider soundstage.
- Adjust Bass: Use the equalizer to add a bit more low-end punch. Be cautious not to overdo it, as it can lead to muddiness.
- Check “Sound Mode”: “Movie” or “Music” modes are often better at creating depth than “Standard.”
My Remote Isn’t Controlling Sound Properly (HDMI-CEC Issues)
If your remote suddenly stops controlling the volume of a connected soundbar or AV receiver, it’s often an HDMI-CEC issue.
- Verify HDMI-CEC is Enabled: Go into your TV’s “System,” “General,” or “External Inputs” menu and look for settings like “HDMI-CEC,” “Anynet+” (Samsung), “Bravia Sync” (Sony), “Simplink” (LG), or “VIERA Link” (Panasonic). Ensure it’s switched ON on both the TV and your connected audio device.
- Check Device Compatibility: Not all HDMI-CEC implementations are perfect. Sometimes, devices from different manufacturers don’t communicate flawlessly. Consult your device manuals.
- Reconnect HDMI Cables: Sometimes, simply unplugging and re-plugging the HDMI cable between the TV and audio device can reset the connection.
- Restart Devices: Power cycle both your TV and your audio equipment by unplugging them from the wall for about 60 seconds and then plugging them back in.
When Built-in Settings Aren’t Enough: Considering TV Soundbars and Systems
While optimizing your TV’s built-in settings can significantly improve the audio, there comes a point where hardware upgrades offer the most substantial leap in sound quality. If you’ve tweaked every setting and still crave more, a soundbar or a dedicated home theater system might be the next step.
The Benefits of a Soundbar
Soundbars are a popular choice because they offer a considerable upgrade over TV speakers without the complexity of a full surround sound system. They typically provide:
- Improved Clarity and Volume: Generally offer better-designed speakers and amplifiers than TV internals.
- Enhanced Bass: Many come with a subwoofer for deeper, more impactful low-end frequencies.
- Simulated Surround Sound: Advanced models use clever audio processing to create a more immersive experience.
- Easy Setup: Often connect with a single HDMI ARC or optical cable.
- Remote Integration: Many can be controlled by your TV remote via HDMI-CEC.
The Power of a Home Theater System
For the ultimate cinematic experience, a full home theater setup with multiple speakers (front, center, surround, and subwoofer) is unmatched. This provides:
- True Surround Sound: Dedicated speakers placed around the room create an incredibly realistic and enveloping sound field.
- Superior Audio Fidelity: Allows for the most detailed and dynamic sound reproduction.
- Customization: You can choose speakers and an AV receiver that perfectly fit your room and preferences.
When considering these external systems, remember that your TV’s audio settings will still play a role in how the sound is processed and sent to the external device. Ensure you set your TV’s audio output correctly (often to “Bitstream” or “Passthrough” for external systems) to get the best results.
Frequently Asked Questions (FAQ)
What is the best TV sound setting for all around use?
For general viewing, the “Standard” or “Normal” mode is a reasonable starting point. However, if clear dialogue is important, you might find a mode with a “Clear Voice” or “Dialogue Enhancement” feature to be superior. Experiment by swapping between “Standard” and any dialogue-focused modes with content you watch frequently to see which you prefer.
How can I make dialogue clearer on my TV?
The most effective way is to find and enable your TV’s “Clear Voice,” “Dialogue Enhancement,” or “Vocal” sound setting. If your TV has an equalizer, slightly increasing the treble frequencies (around 8kHz and up) can also help make spoken words sharper. Using the “Standard” or “Music” sound modes, rather than “Movie,” often prioritizes vocal frequencies.
Should I use my TV’s built-in speakers or a soundbar?
For most people, a soundbar offers a significant upgrade in sound quality, volume, and clarity over built-in TV speakers. They provide richer bass and a more immersive experience. However, if your TV has particularly good speakers or you only need basic audio improvements, adjusting the TV’s settings might suffice. For the best possible sound, a dedicated home theater system is ideal, but soundbars offer a great balance of performance and convenience.
What does “Virtual Surround Sound” do?
Virtual surround sound uses psychoacoustic tricks and digital processing to make it seem like sound is coming from all around you, even though you might only have two speakers (or a single soundbar). It tries to bounce sound off walls or manipulate timing to create a wider, more immersive soundstage. The effect varies greatly by TV model; some do it well, while others can sound artificial.
My TV volume jumps unexpectedly. How can I fix this?
This is often caused by the “Automatic Volume Leveler” (AVL) or “Auto Volume” feature. Try turning it ON if it’s OFF, as it’s designed to prevent sudden volume changes. If it’s already ON and still causing issues, try turning it OFF, as sometimes AVL can create its own unnatural volume shifts.
Can I use my TV remote to control a soundbar’s volume?
Yes, often you can! This is typically achieved through a feature called HDMI-CEC (Consumer Electronics Control). Ensure HDMI-CEC is enabled on both your TV and your soundbar (names vary by brand, e.g., Anynet+, Bravia Sync, Simplink). If enabled, your TV remote should seamlessly control the soundbar’s volume when using the correct HDMI input.