
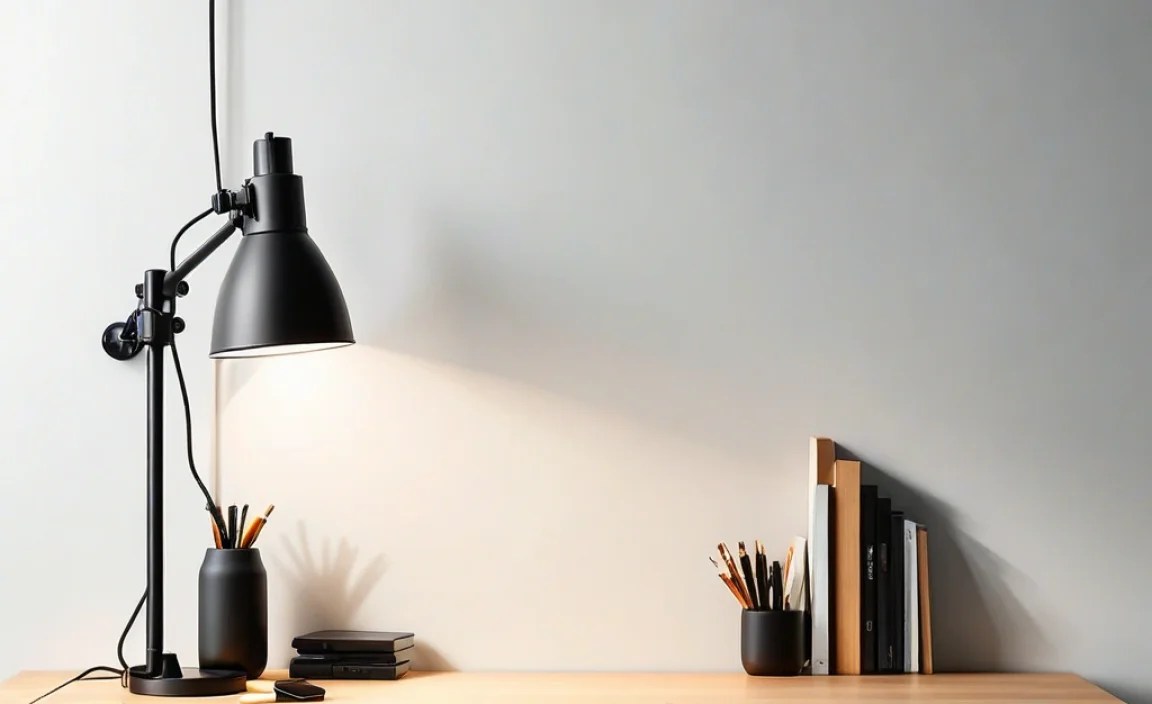
Mounting accessories like soundbars, game consoles, or routers to your wall is a great way to save space and declutter. This guide provides essential wall mounting tips for beginners, covering everything from choosing the right mount to safely installing your accessories for a clean, organized look.
Transform Your Space: The Ultimate Beginner’s Guide to Wall Mounting Accessories

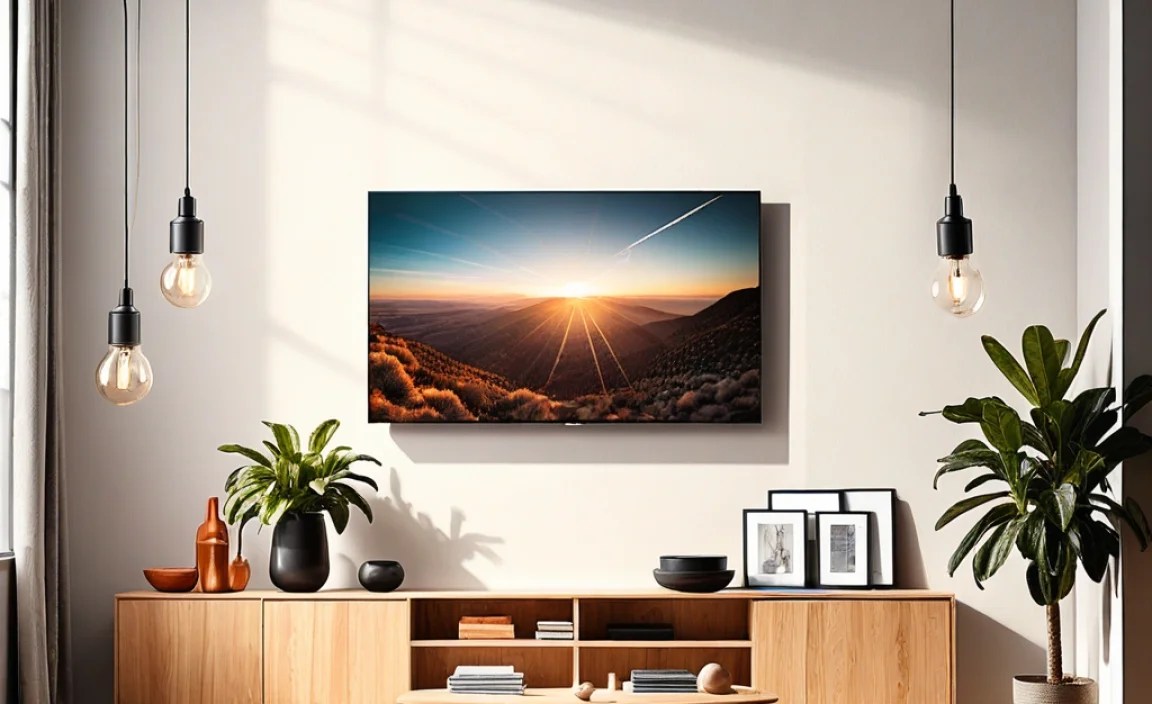
Ever looked at that tangle of cables behind your TV or that stack of devices taking up precious shelf space and wished for a cleaner, more organized look? You’re not alone! Wall mounting accessories like soundbars, game consoles, streaming devices, and even routers can dramatically Tidy up your living area, enhance your entertainment setup, and give your room a sleek, modern feel. It might seem daunting at first, but with the right guidance, you can confidently mount your gear and enjoy a clutter-free zone. This guide is here to walk you through every step, making wall mounting simple and stress-free.
Whether you’re a seasoned DIYer or picking up a screwdriver for the first time, we’ve got you covered. We’ll break down the process into easy-to-follow steps, explain the tools you’ll need, and share some expert tips to ensure a secure and stylish finish. Get ready to reclaim your space and elevate your home entertainment game!
Why Wall Mount Your Accessories? The Benefits You Can’t Ignore

Mounting accessories on the wall isn’t just about aesthetics; it brings a host of practical advantages. Let’s dive into why this is a smart move for any home:
- Space Saving: This is the big one! Free up valuable surface space on your entertainment center, shelves, or tables.
- Improved Aesthetics: A clean, mounted setup looks professional and modern. Say goodbye to visual clutter.
- Cable Management: Mounting often goes hand-in-hand with hiding wires, creating a much neater appearance.
- Optimal Placement: Position devices like soundbars or routers for the best performance and signal strength.
- Enhanced Safety: Keep electronics out of reach of small children or pets, reducing the risk of accidents or damage.
- Easy Cleaning: Less stuff on surfaces means quicker and easier dusting and cleaning.
Understanding Your Wall: What You’re Mounting Into

Before you drill, you need to know what’s behind your wall. This is crucial for ensuring your mount is securely fastened. The most common wall types in homes are:
1. Drywall with Studs
This is the ideal scenario. Drywall is the gypsum board most walls are made of, and behind it are wooden or metal studs. Mounting directly into studs is the strongest and safest method.
2. Drywall with No Studs (or difficult to find)
If you can’t find studs, or if you need to mount in a spot between them, you’ll rely on specialized drywall anchors. These expand or grip the back of the drywall to hold weight.
3. Plaster and Lath Walls
Older homes often have plaster and lath. These can be trickier to work with. Lath is thin strips of wood in the plaster. You’ll often need toggle bolts or a professional assessment for secure mounting.
4. Brick or Concrete Walls
These are very strong but require different hardware. You’ll need masonry anchors and a hammer drill. These are often found in basements or exterior walls.
Essential Tools for the Job
Gathering the right tools before you start will make the process smoother and safer. Here’s a checklist:
- Stud Finder: Electronic stud finders are the most accurate for locating studs behind drywall.
- Level: Essential for ensuring your mount (and whatever you mount on it) is perfectly straight.
- Drill: A good cordless drill with various drill bits is a must. You’ll need bits for pilot holes and potentially larger bits for anchors.
- Screwdriver: To drive in screws if not using the drill. A set with various head types (Phillips, flathead) is handy.
- Measuring Tape: For accurate placement and alignment.
- Pencil: To mark where you’ll drill.
- Safety Glasses: Protect your eyes from dust and debris.
- Gloves: For a better grip and to keep hands clean.
- Wall Anchors (if needed): If mounting into drywall without studs. Different types exist, so choose based on weight and wall type.
- Mounting Bracket: The specific bracket designed for your accessory.
Step-by-Step: Mounting Your Accessory
Let’s get mounting! Follow these steps for a successful installation.
Step 1: Choose the Right Mount
Not all mounts are created equal. For accessories like soundbars, routers, or game consoles, you’ll likely need a shelf-style mount, a bracket designed specifically for that device, or a universal multi-purpose bracket. Check the weight capacity of the mount and compare it with the weight of your accessory. Always err on the side of caution and choose a mount rated for more weight than you need.
Step 2: Determine the Perfect Location
Think about functionality and aesthetics. Where does the accessory need to be for optimal use? For a soundbar, it’s usually below the TV. For a router, it might be in a central location for good Wi-Fi coverage. Consider the height and distance from power outlets and any other necessary cables. You don’t want it to be too high to reach or too low to be a hazard. Use your level to mark a potential position lightly with your pencil.
Step 3: Locate Wall Studs (or Plan for Anchors)
This is critical for a secure mount.
Using a Stud Finder:
- Turn on your electronic stud finder and calibrate it according to the manufacturer’s instructions, usually by holding it flat against the wall.
- Slowly slide it horizontally across the wall where you want to mount.
- When it detects a stud, it will usually beep or light up. Mark the edges of the stud.
- Repeat to find the center of the stud. Aim to have your mount screwed into at least one stud, preferably two if the mount spans that distance.
If No Studs Are Available:
If you can’t find studs in your desired location, you’ll need to use heavy-duty drywall anchors. Common types include:
- Toggle Bolts: These have “wings” that open up behind the drywall.
- Molly Bolts: Similar to toggle bolts, they expand as you screw them in.
- Self-Drilling Anchors: These screw directly into the drywall and can hold moderate weight.
Always check the anchor’s weight rating. For peace of mind, research recommended anchors for your specific wall type and accessory weight. Organizations like the Federal Trade Commission offer advice on secure home repairs.
Step 4: Mark Your Mounting Holes
Hold the mounting bracket against the wall at your chosen location. Use your level to ensure it’s straight. Once you’re happy with the position, use your pencil to mark where the screw holes will go. If you’re mounting into studs, make sure your marks align with the center of the studs. Double-check your markings with the measuring tape and level.
Step 5: Drill Pilot Holes
This step makes screwing in the mounting screws much easier and prevents the wall material from cracking.
Into Studs: Choose a drill bit slightly smaller than the diameter of your mounting screws. Drill into your marked stud locations to the depth recommended for your screws.
Into Drywall (with Anchors): If you’re using drywall anchors, the anchor packaging will specify the correct drill bit size. Drill holes according to the anchor’s instructions. Ensure the hole is clean and the right size for the anchor to fit snugly.
Step 6: Install Wall Anchors (if applicable)
If you drilled holes for anchors, now is the time to install them. Follow the manufacturer’s instructions for your specific type of anchor. Some might push in, others might require a screw to set them. Ensure they are flush with the wall and secure.
Step 7: Attach the Mounting Bracket
Align the mounting bracket with the pre-drilled holes (or installed anchors). Using your drill or screwdriver, drive the mounting screws through the bracket and into the studs or anchors. Make sure the screws are long and strong enough to go deep into the stud or anchor. Tighten the screws firmly, but be careful not to overtighten, which can strip the screws or damage the wall. Use your level again to confirm the bracket is still straight as you tighten.
Step 8: Mount Your Accessory
Now for the exciting part! Carefully place your accessory onto the mounted bracket. Most accessory mounts will have a way to secure the device to the bracket itself, often with small screws or a locking mechanism. Refer to your accessory mount’s manual for specific instructions. Ensure it feels stable and secure before letting go.
Step 9: Connect Cables and Test
Connect all necessary cables (power, HDMI, audio, Ethernet, etc.). This is also a great time to manage those cables using zip ties, velcro straps, or cable raceways for a truly clean look. Once everything is connected, turn on your accessory and test its functionality. Make sure all ports are accessible and working as expected.
Tips for Specific Accessories
Soundbar Mounting
Position your soundbar roughly where your TV speakers would naturally be, often below the TV but at a height that doesn’t obstruct the view or IR sensor. Ensure it’s centered for optimal audio projection. Some soundbars come with their own specific mounting kits.
Game Console Mounting
Consider ventilation when mounting game consoles. They often generate heat, so ensure there’s airflow around them. Some wall mounts for consoles are designed with open frames for this purpose. Place them within easy reach for inserting discs or connecting controllers.
Router Mounting
For the best Wi-Fi signal, mount your router in a central location in your home, away from obstructions like thick walls or metal objects. Height can also play a role; mounting it higher up can sometimes improve coverage. Check the manufacturer’s recommendations for optimal placement.
Streaming Device/Media Box Mounting
These are often smaller and lighter. Many come with adhesive strips or small screw holes. The main consideration is proximity to the TV’s ports and ensuring you can still access the remote control sensor. Specialized mounts exist to attach them directly to the back of a TV mount or on the wall nearby.
How to Hide Cables for a Pro Finish
Wall mounting accessories is only half the battle if you still have a mess of cables. Here are a few ways to tackle that:
- Cable Raceways: These are plastic channels that stick to the wall or baseboard. You snap the cables inside them, and they can be painted to match your wall for a seamless look.
- Cord Covers: Similar to raceways, these are often more flexible and come in various sizes and colors.
- In-Wall Cable Management Kits: For a truly invisible solution, kits are available that allow you to run cables inside the wall. These often involve cutting small holes and using brush plates or pass-throughs. This is a more advanced DIY project and may require professional help, especially if dealing with electrical wires. Always follow local building codes and safety guidelines. For example, the Building Science Corporation discusses wall assembly principles that are relevant to safe in-wall installations.
- Zip Ties and Velcro Straps: For areas not in plain sight, these are simple and effective for bundling cables together.
Common Pitfalls to Avoid
Even with the best intentions, things can go wrong. Here are some common mistakes and how to steer clear of them:
- Not Finding Studs: Mounting in drywall without studs and relying on weak anchors is asking for trouble. Always prioritize studs for heavier items.
- Overestimating Wall Strength: Drywall anchors have weight limits. Don’t exceed them, even if marking says “up to X pounds.” Always leave a safety margin.
- Using the Wrong Hardware: Using indoor screws outdoors, or wall plugs designed for plaster in drywall. Always use hardware appropriate for your wall type and the load.
- Not Using a Level: A crooked mount looks unprofessional and can even affect how some devices function.
- Drilling Blind: Never drill directly into a wall without confirming there are no pipes or electrical wires behind it. Look for outlets and light switches as indicators of wiring pathways. If unsure, consult a professional.
- Overtightening Screws: This can strip the screw head, enlarge the hole, or crack the wall material.
- Ignoring Weight Limits: Always check the maximum weight capacity of your mount and any anchors used.
Mounting on Different Wall Types: A Quick Comparison
Here’s a handy table comparing mounting considerations for different wall types:
| Wall Type | Best Mounting Method | Required Hardware | Challenges |
|---|---|---|---|
| Drywall with Studs | Directly into studs | Wood screws (usually included with mount) | Finding exact stud location |
| Drywall (No Studs) | Using heavy-duty drywall anchors | Toggle bolts, molly bolts, or robust self-drilling anchors | Weight limitations, ensuring anchor is properly set |
| Plaster and Lath | Toggle bolts or specialized anchors | Toggle bolts, screw anchors designed for plaster | Can be brittle, requires careful drilling |
| Brick/Concrete | Masonry anchors | Masonry screws/bolts, expansion anchors | Requires a hammer drill, dust, precise hole sizing |
Frequently Asked Questions (FAQ)
Here are some answers to common questions beginners have about wall mounting.
Q1: How do I know how much weight a wall mount can hold?
A: Most reputable wall mounts will clearly state their maximum weight capacity on the packaging or in the product description. Always check this before purchasing and ensure it significantly exceeds the weight of the item you intend to mount.
Q2: Can I mount something heavy like a soundbar directly into drywall without studs?
A: It’s generally not recommended for heavy items. While heavy-duty drywall anchors exist, they have weight limits. For soundbars and similar accessories, it’s always best to locate studs for the most secure and reliable installation. If studs aren’t an option, consult the anchor’s weight rating carefully.
Q3: What’s the easiest way to find wall studs?
A: An electronic stud finder is the easiest and most accurate tool for this job. You can also try the “tap test” – tapping on the wall, studs tend to sound more solid than hollow drywall. Small nail holes left by previous fixtures can also indicate stud locations.
Q4: Do I need a special drill for mounting?
A: A standard cordless drill is usually sufficient for most wall mounting tasks. You will need various drill bits for pilot holes and possibly larger masonry bits if you’re drilling into brick or concrete, which might benefit from a hammer drill function.
Q5: Can I run cables inside my wall?
A: Yes, you can, but it requires caution. Use specialized in-wall cable management kits and ensure you are not drilling into electrical wires or plumbing. If you’re uncomfortable with this, consider professional installation or external cable concealment methods like raceways.
Q6: What should I do if I hit a pipe or wire when drilling?
A: Stop drilling immediately! If you suspect you’ve hit a wire, turn off the power to that circuit at your breaker box. If you hit a pipe, be prepared for water. It’s best to consult a professional plumber or electrician in these situations to avoid damage or injury.
Conclusion: Enjoy Your Tidy, Mounted Space!
Wall mounting your accessories doesn’t have to be a daunting task. By understanding your walls, gathering the right tools, and following these step-by-step tips, you can confidently install your accessories, declutter your space, and enjoy a cleaner, more organized home entertainment setup. Remember to always prioritize safety, check weight limits, and use appropriate hardware for your wall type.