
Quick Summary: A TV backlight LED strip remote control guide ensures you master color, brightness, and effects for immersive viewing. Learn to sync, set timers, and troubleshoot common issues for the best home theater experience.
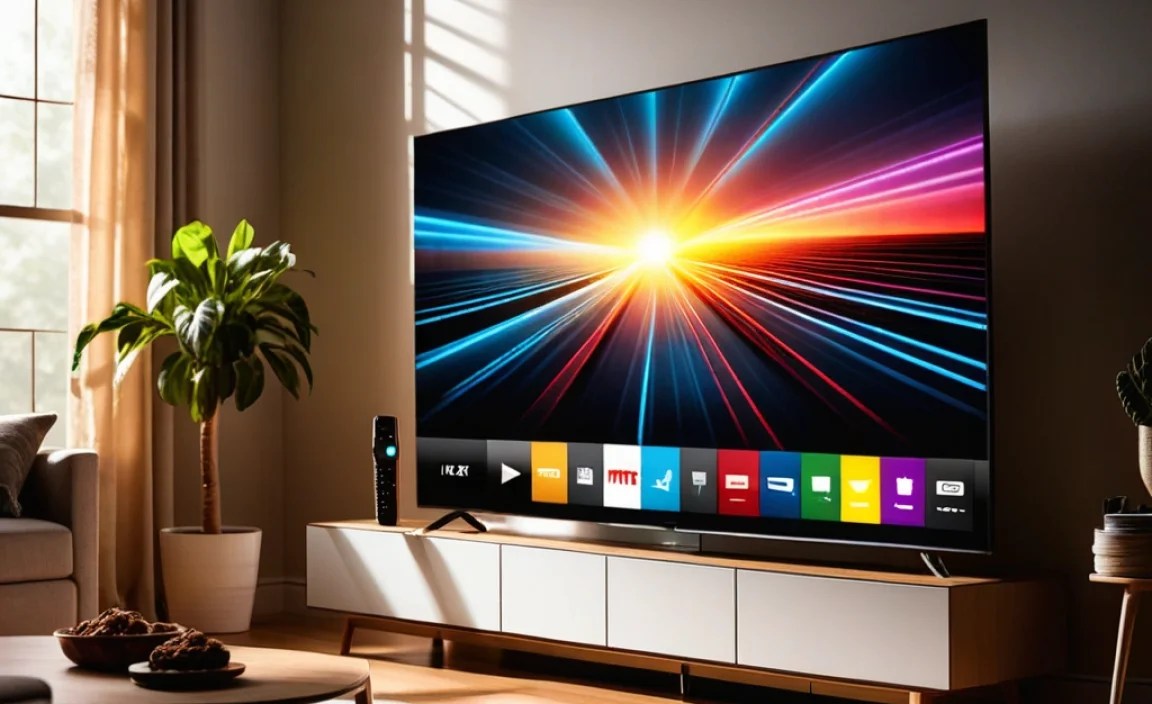
Hey everyone, Bob E Riley here from Aimguider! You’ve just gotten a snazzy LED strip for the back of your TV, and it’s ready to transform your viewing or gaming sessions. But wait, there’s a remote, and it looks like a mini spaceship control panel with all those buttons! Don’t let it overwhelm you. Learning to use your TV backlight remote is key to unlocking that amazing ambient lighting everyone talks about. We’ll break down exactly what those buttons do, how to get the most out of your new setup, and even solve some common hiccups. Get ready to ditch the confusing buttons and embrace some seriously cool lighting!
Why TV Backlighting and Remote Control Mastery Matters

Adding an LED strip to the back of your TV isn’t just for show; it’s about enhancing your whole entertainment experience. This technique, often called bias lighting, can reduce eye strain by creating a soft glow around your screen, making it easier on your eyes during long viewing sessions. It also makes the colors on your screen appear more vibrant and distinct from the surrounding darkness. The magic? It all happens through that little remote control. Understanding its functions allows you to fine-tune the ambiance, set the mood for movies, and even sync lights with your games. When you know your remote, you unlock the full potential of your setup. It turns a simple light strip into a dynamic part of your home theater.
Decoding Your TV Backlight LED Strip Remote: A Button-by-Button Breakdown
Most LED strip remotes look a bit similar, even if the specific icons or labels vary. The core functions are usually the same. Let’s demystify them so you can control your lights with confidence.
Common Remote Button Categories
We’ll group the buttons by their typical functions. This makes it easier to find just what you’re looking for. Think of these as your go-to categories for setting the perfect atmosphere.
Color Control Buttons
- Solid Color Selection: You’ll find a grid of colored buttons (red, green, blue, white, yellow, etc.). Pressing one of these will instantly set the strip to that specific solid color. Most remotes offer a good range of primary and secondary colors.
- Color Wheel/Slider (Advanced Remotes): Some remotes, especially those with app integration or more complex infrared (IR) or radio frequency (RF) capabilities, might have a touch-sensitive color wheel or sliders for finer color tuning. This allows you to create almost any shade imaginable.
- White Light Adjustment: Look for buttons labeled “W” or a dedicated white color button. Often, you can adjust the warmth of the white light, switching between cool blues and warm yellows. This is great for matching ambient room light or finding a comfortable viewing white.
Brightness and Dimming Controls
- Brightness Up (+): Increases the intensity of the light, making it brighter.
- Brightness Down (-): Decreases the intensity, making it dimmer. Many users prefer a lower brightness for TV backlighting to avoid overpowering the screen.
Dynamic Effects Modes
This is where the fun really begins! These buttons cycle through pre-programmed animations and effects:
-
- Mode/Effect Selection: Buttons labeled “Mode,” “Effect,” or with a star/magic wand icon typically cycle through various dynamic patterns.
- Speed Adjustment: Once a dynamic mode is selected, you’ll usually have buttons to increase or decrease the speed at which the effect plays. This lets you slow down a flashing pattern or speed up a color-changing fade for a more subtle or energetic effect.
Common Dynamic Effects to Explore:
-
- Fade/Gradient: Colors smoothly transition from one to another.
- Strobe: Flashes colors rapidly.
- Jump/Chaser: Segments of the LED strip light up sequentially.
- Music Sync: (If your strip supports it) Lights react to the beat of music or sounds from your TV.
Special Feature Buttons
- Power On/Off: The most essential button! Turns the LED strip on and off.
- Demo Mode: Some remotes have a demo button that cycles through all available modes and colors quickly so you can see what your strip can do.
- Timer/Sleep Function: Allows you to set the lights to turn off after a set period (e.g., 30 minutes, 1 hour). This is great for bedtime.
- DIY Color/Memory Slots: Advanced remotes might let you program custom colors or effects. You can often save these to specific memory buttons (e.g., M1, M2).
Getting Started: Setting Up Your LED Strip with the Remote
Once you’ve identified the buttons, it’s time to get your lights dialed in. Here’s a step-by-step approach.
Step 1: Powering On and Initial Check
First things first, ensure your LED strip is properly connected to its power source and the TV. For most USB-powered strips, this might mean plugging into a USB port on your TV, a smart plug, or a USB wall adapter. Then, press the power button on your remote. You should see the strip light up. If not, double-check your connections and ensure the batteries in the remote are fresh.
Step 2: Finding Your Ideal White Balance
For TV viewing, a neutral or slightly warm white is often best. It shouldn’t be too blue (which can look artificial) or too yellow (which can look dim or dated). Use the “W” button or dedicated white light adjustment buttons to find a comfortable white. If your remote doesn’t have specific warmth controls, you might need to cycle through colors or static white if available and see what looks best. A good starting point is often a brightness level around 30-50% of max.
Step 3: Adjusting Brightness for Optimal Viewing
The goal of bias lighting is to create a subtle glow, not to compete with your screen. Start with the brightness at its lowest setting and gradually increase it using the “+” button. Stop when you can clearly see a soft halo of light behind your TV, but it’s not so bright that it distracts you from the on-screen content. For many people, this is between 20% and 40% brightness. Experiment during different lighting conditions in your room.
Step 4: Exploring Static Colors (Mood Setting)
Ready to set a mood? Press the solid color buttons to see what each color looks like. Blues and purples can be great for relaxing movie nights, while warmer colors like oranges or reds might suit gaming. Experiment to find what complements your content and your room’s decor. If you have DIY color memory slots, read your strip’s manual to learn how to program your favorites for quick access.
Step 5: Engaging Dynamic Effects (When Appropriate)
While static colors are great for general viewing, dynamic effects can add a lot of excitement, especially for gaming or parties. Try out the different mode buttons and use the speed controls to find something that suits the activity. For watching movies, a slow, subtle fade between complementary colors (like blue and purple, or green and teal) often works best. For gaming or music, faster, more intense effects can be fun. Be mindful that overly distracting effects can pull you away from what’s on screen.
Step 6: Utilizing Special Features
Don’t forget the extra goodies! If your remote has a timer function, set it to turn off your lights after you’ve fallen asleep or when you usually leave the room. If you have a demo mode, use it to get a quick overview of all the possibilities. The “DIY” or memory functions are fantastic for saving your personal favorite settings.
Advanced Techniques and Considerations
Once you’ve mastered the basics, there are a few more things to consider to get the absolute most out of your LED setup.
Music and Gaming Synchronization: The Wow Factor
Many modern LED strips come with built-in microphones or connectivity to sync with audio. This allows the lights to pulse, change color, or flash in time with music or game sound effects. If your remote has a “Music” or “Mic” mode, find it and try it out. You might also be able to connect your strip to a smartphone app (often via Bluetooth or Wi-Fi), which usually offers more sophisticated control over these reactive modes.
For gamers, this can immerse you deeper into the game world. Driving games might show red and blue lights for sirens, while explosion sounds could trigger flashes of orange and red. It’s a subtle but powerful enhancement.
App Control vs. Remote Control
While the physical remote is convenient, many LED strips now pair with smartphone apps. These apps often offer:
- A wider color palette and custom color mixing.
- More complex pre-programmed effects and the ability to create your own.
- Scheduling and timer functions.
- Voice control integration (e.g., with Amazon Alexa or Google Assistant).
- Group control for multiple LED strips.
If your strip supports app control, it’s definitely worth exploring! You’ll usually need to download an app, put the LED strip into pairing mode (often by holding a button on the strip itself or a specific sequence on the remote), and follow the app’s instructions.
Powering Your LED Strip: What to Know
The power source for your strip matters. Most common TV backlights run on 5V USB power. Here are a few options:
| Power Source | Pros | Cons | Best For |
|---|---|---|---|
| TV USB Port | Convenient, turns on/off with TV | May not provide enough power for very long strips; limited by TV’s power output | Short to medium strips, basic functionality |
| USB Wall Adapter | Reliable power, independent of TV | Requires a free wall outlet, extra cable | Longer strips, consistent brightness |
| Smart Plug/Outlet | Remote control, scheduling, voice control (with smart home setup) | Requires Wi-Fi and a smart home hub or app | Advanced automation and control |
Ensuring adequate power is crucial for consistent brightness and performance of your LED strip. For example, a 10-meter strip might draw more power than a 3-meter strip, so choose your power adapter accordingly. Websites like Energy.gov offer general tips on lighting efficiency.
Mounting and Placement Tips
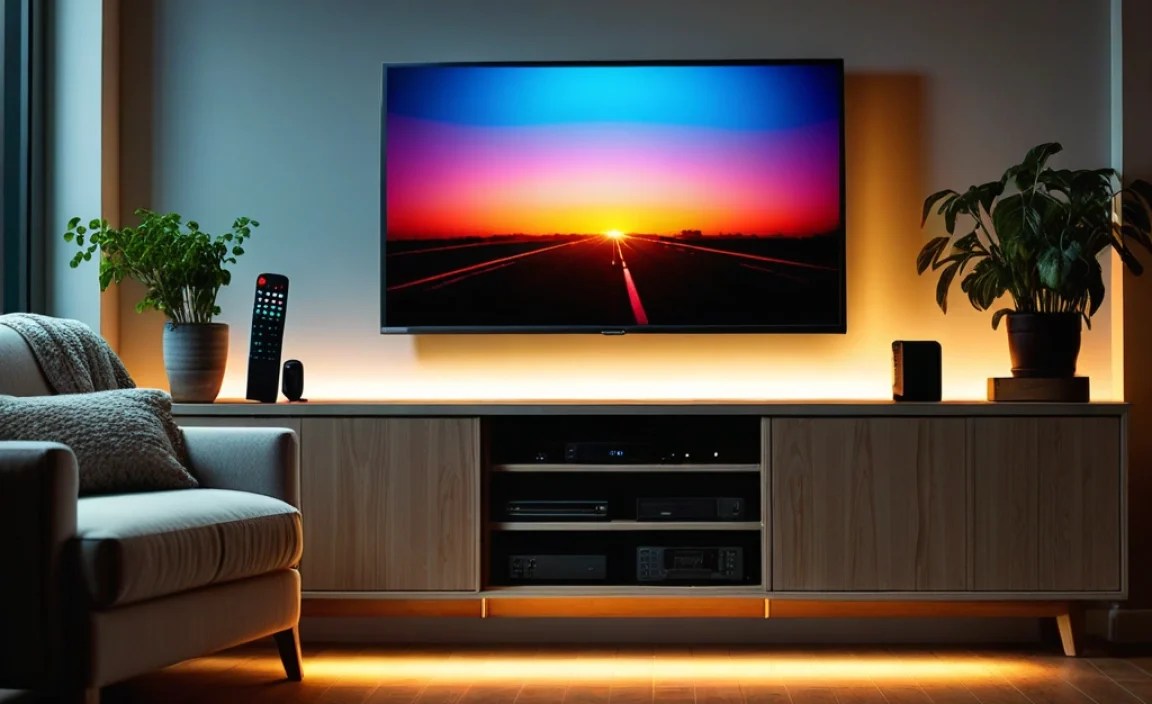
For the best effect, the LED strip should be placed along the outer edges of the back of your TV, typically along the top and sides, or all the way around. Avoid placing it directly behind the screen itself where it might create hotspots. The light should spill onto the wall behind the TV. Ensure the strip is securely affixed using its adhesive backing or provided clips. For longer runs, consider cable management solutions to keep things tidy.
Troubleshooting Common Remote and LED Strip Issues
Even with the best gear, things can sometimes go a bit awry. Here’s how to tackle the most frequent problems.
Issue 1: Remote Not Working
- Check Batteries: This is the most common culprit. Replace them with fresh ones. Ensure they’re inserted correctly.
- Line of Sight: If you have an infrared (IR) remote, ensure there’s a clear line of sight between the remote and the LED strip’s receiver. The receiver is usually a small black box or wire near the power connection.
- Distance: Make sure you are within the remote’s effective range.
- Re-pair (If Applicable): Some RF or Bluetooth remotes might lose their connection. Check your LED strip’s manual for re-pairing instructions (often involves holding a button on the strip or remote).
Issue 2: Lights Not Turning On
- Power Connection: Double-check that the power adapter is securely plugged into the wall and the LED strip.
- Correct Input: If you used a USB port on your TV, ensure it’s providing power even when the TV is in standby (some ports do, some don’t, or might be switchable).
- LED Strip Damage: Inspect the strip for any visible damage. If a section is out, it might be damaged.
- Controller/Receiver: The small control box that connects the strip to power and the receiver might be faulty.
Issue 3: Colors Are Wrong or Flickering
- Loose Connections: Ensure the cable connecting the LED strip to the controller is seated firmly.
- Damaged LEDs: If only a specific section is flickering or showing the wrong color, those LEDs might be damaged.
- Power Issues: Insufficient power can cause flickering or incorrect color representation. Try a more robust power adapter.
- Mode/Effect Glitch: Try switching to a solid color or a different mode to see if the issue persists. Sometimes a simple power cycle (unplugging and replugging) can fix a temporary glitch.
Issue 4: Remote Buttons Do Not Respond Correctly
- Incorrect Remote Type: Ensure you are using the remote that specifically came with your LED strip. Different models can have incompatible remotes.
- Firmware Glitch: For smart/app-controlled strips, try updating the firmware via the app if available.
- Reset the Strip: Consult your manual for a factory reset procedure for the LED strip itself.
Frequently Asked Questions (FAQ)
Q1: What is the best color to use for TV backlighting?
A1: A neutral or slightly warm white is often considered best for reducing eye strain and enhancing on-screen colors. However, feel free to experiment with blues and purples for a cinematic feel, or other colors that match your mood or content.
Q2: How bright should my TV backlight be?
A2: It should be subtle. Aim for a brightness that creates a soft glow behind the TV without being distracting or overpowering the image on the screen. Typically, 20-40% brightness is a good starting point.
Q3: My remote is working, but the colors are not matching what I press. What should I do?
A3: This could indicate a mismatch between the remote and the LED strip’s controller, or a faulty controller. Ensure you are using the correct remote for your specific strip and try resetting both the remote (fresh batteries) and the strip (unplug/replug).
Q4: Can I use my LED strip lights for something other than TV backlighting?
A4: Absolutely! LED strips are incredibly versatile. They can be used for accent lighting under cabinets, behind shelves, in gaming setups, around mirrors, or even for creative art projects.
Q5: How do I connect my LED strip to a smartphone app?
A5: Typically, you’ll need to download the specific app for your LED strip brand. Then, put the strip into pairing mode (check your manual) and follow the app’s instructions to connect via Bluetooth or Wi-Fi. You might need to press a button on the strip or a special sequence on the remote.
Q6: What does the “Music Sync” mode do?
A6: Music Sync mode uses a built-in microphone on the LED strip’s controller to detect sound. The lights will then flash, change color, or pulse in rhythm with the beat or melody of the music or any audio from your TV.
Q7: Do all LED strips come with a remote?
A7: Most do, but the type of remote can vary greatly – from simple infrared (IR) remotes with basic buttons to advanced radio frequency (RF) or Bluetooth remotes that pair with smartphone apps. Some very basic or integrated LED solutions might not include a separate remote but are controlled via an app or connected device.
Conclusion: Your Ambiance, Your Command
There you have it! Using your TV backlight LED strip’s remote control doesn’t need to be a mystery. We’ve covered everything from basic power and color selection to dynamic effects and even some troubleshooting tips. Remember, the goal is to enhance your viewing experience, reduce eye strain, and create the perfect atmosphere for your home entertainment. Experiment with the different settings, find what works best for you and your content, and don’t be afraid to play around.