
Get the best HDR TV experience with LED backlights! This guide covers choosing, installing, and optimizing HDR-compatible LED strips to boost contrast, color, and immersion, making your favorite movies and games truly pop without technical headaches.
Ever feel like your TV’s picture is missing something? Especially when watching those stunning HDR movies or playing the latest games? You’re not alone! Many of us want that cinematic wow factor right in our living rooms. The good news is, a simple upgrade – a TV backlight LED strip – can make a huge difference, especially when paired with HDR content. It’s like unlocking a hidden level of visual magic for your screen. But with so many options, picking the right one can feel a bit confusing. Don’t worry, I’m here to break it down. We’ll walk through everything you need to know, from what makes an LED strip HDR-ready to how to get it installed and working like a pro. Get ready to see your favorite shows in a whole new light!
Choosing the Right TV Backlight LED Strip for HDR

When we talk about High Dynamic Range (HDR) on your TV, we’re talking about a bigger difference between the brightest whites and darkest blacks, plus a wider range of colors. A good TV backlight is designed to enhance this. It’s not just about adding a splash of color; it’s about making your picture look even better by complementing what’s on screen.
What Makes an LED Strip “HDR-Compatible”?
This is where things get a little technical, but we’ll keep it simple! True HDR compatibility in an LED strip means it can effectively react to and enhance the wide range of colors and brightness levels that HDR content produces. This usually comes down to a few key features:
- Color Accuracy (CRI): High Color Rendering Index (CRI) values (90+ is excellent) mean the LED strip can display colors very accurately. This is crucial for HDR, where vibrant and true-to-life colors are a hallmark.
- Brightness and Dimming Capabilities: HDR content has very bright highlights and deep shadows. An ideal backlight needs to be able to adjust its own brightness accordingly to avoid washing out the picture or being too dim. Look for strips with a good range of dimming options.
- Color Temperature Adjustability: The ability to adjust the white balance (from warm yellow to cool blue hues) helps match the backlight to the content and your room’s ambient lighting. This is vital for the “bias lighting” effect that reduces eye strain and improves perceived contrast.
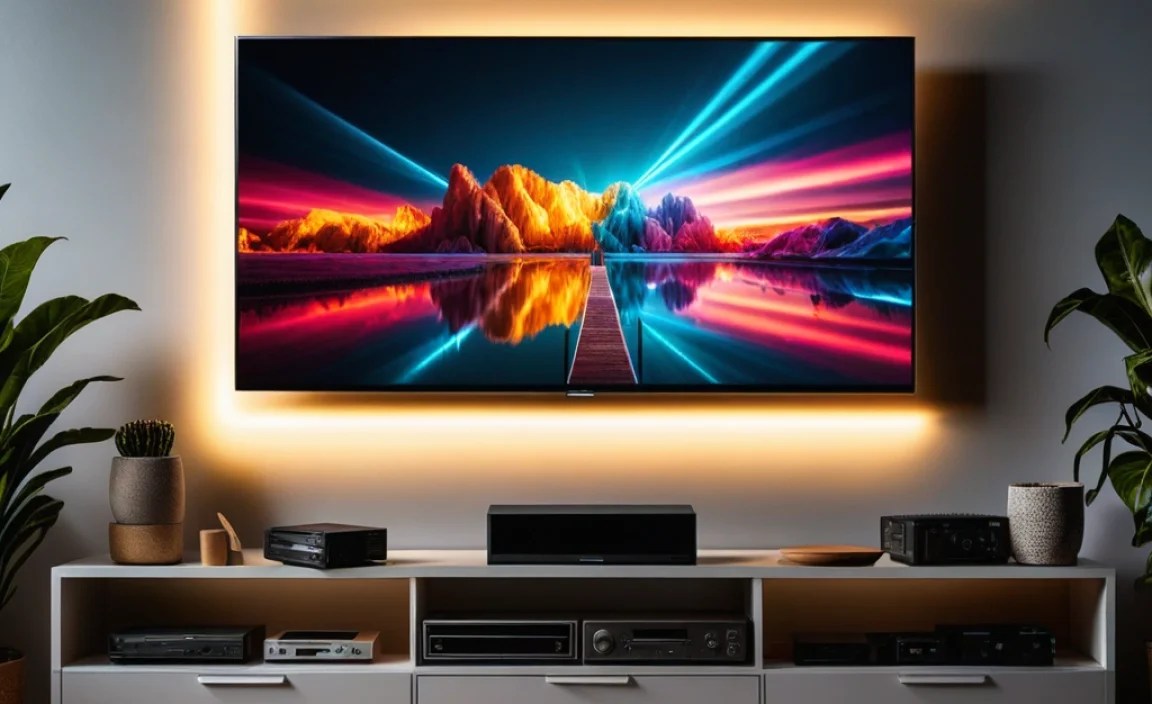
- Smart Features (Addressable LEDs): Some advanced LED strips use “addressable” LEDs. This means each LED can be controlled individually, allowing the backlight to dynamically change colors and brightness in sync with on-screen action. This is the ultimate for HDR immersion. Popular systems like Philips Hue Sync or Govee DreamView use this technology.
Key Features to Look For
Beyond HDR compatibility, here are other important things to consider when shopping:
Types of LED Strips
- RGB: These LEDs can produce red, green, and blue light, which can be mixed to create millions of colors. Good for mood lighting.
- RGBW: Adds a dedicated white LED to the mix. This provides a purer white light and better quality color mixing than RGB alone. Essential for bias lighting.
- Addressable / Digital RGB (DRGB/ aRGB): As mentioned, each LED can be controlled individually. This is what allows for dynamic, on-screen syncing effects.
Length and Cutability
Measure the back of your TV! You’ll want enough length to go around the perimeter. Most strips can be cut to size at designated points, making them flexible for different TV sizes.
Adhesive Quality
A good quality adhesive is important so your strip stays put. Look for 3M VHB tape or similar strong, reliable options.
Power Supply and Control
Ensure the included power adapter is sufficient for the length of the strip and that the controller (remote or app) is easy to use.
Understanding HDR and Bias Lighting
You might have heard of “bias lighting.” This is the practice of placing a soft, neutral light behind your TV. For HDR, this isn’t about adding colored ambiance (though that’s an option too!). It’s about creating a gentle, uniform glow that helps your eyes perceive deeper blacks and brighter whites on the screen. It reduces the strain of looking from a bright screen to a dark room and makes the picture contrast appear higher.
A bias light should ideally be a neutral white, around 6500K (daylight temperature), and not too bright. A properly configured bias light complements HDR by making your screen seem to float and enhancing its contrast ratio. You want it to be subtle, not distracting.
Installing Your TV Backlight LED Strip: A Step-by-Step Guide
Installing an LED strip is surprisingly straightforward. Most kits are designed for DIY installation, and it usually takes less than an hour.
Step 1: Gather Your Supplies
Before you start, make sure you have:
- Your chosen LED strip kit (including strip, power adapter, and controller)
- A clean cloth or microfiber towel
- Scissors (if you need to cut the strip)
- Measuring tape
- The TV itself!
Step 2: Plan Your Layout
Decide where you want the strip to go. The most common and effective placement is around the outer edge of the TV’s back panel. This ensures the light is diffused evenly. If your kit includes corner connectors or a flexible strip, you can also plan for clean runs around each side.
Tip: Avoid placing the strip directly where you’ll plug in any cables or mounting brackets, unless the kit is specifically designed for it.
Step 3: Clean the TV Surface
This is a crucial step for good adhesion. Use your clean cloth to wipe down the area on the back of your TV where you’ll be attaching the LED strip. Make sure it’s free of dust, grease, and any residue. Alcohol wipes can be very effective here.
Step 4: Measure and Cut (If Necessary)
Carefully measure the length needed for each side of your TV’s back. If you need to cut the strip, do so only at the designated cut marks (usually indicated by a pair of scissors icon). Cutting anywhere else will damage the strip.
Step 5: Apply the LED Strip
Most LED strips come with an adhesive backing. Peel this off gradually as you go, pressing the strip firmly onto the surface of your TV. Work slowly to ensure it adheres well and avoids kinks or bubbles.
For corners: If your strip has flexible connectors or is designed to bend, gently guide it around the corners. If you have separate corner pieces, follow the kit’s instructions for connecting them.
Step 6: Connect the Power and Controller
Once the strip is in place, connect the end of the strip to the controller module, and then plug in the power adapter into the controller and then into a wall outlet. Make sure all connections are secure.
Step 7: Test and Adjust
Turn on your TV and your new LED backlight. Use the remote or app to test different colors, brightness levels, and modes. Adjust them until you achieve the desired effect. For HDR bias lighting, a soft, neutral white is usually best.
For Dynamic Sync (if applicable): Follow your kit’s specific instructions for initial setup and camera placement (if it uses a camera to “read” the screen). This might involve placing a small camera in the center of your TV or on the bottom bezel.
Optimizing Your TV Backlight for the Best HDR Experience
You’ve got your LED strip installed, but how do you make sure it’s truly enhancing your HDR content? It’s all about fine-tuning.
Setting the Right White Balance
For bias lighting, you want a neutral-white light. This helps your eyes perceive the contrast on screen more accurately. The ideal color temperature is around 6500K, which mimics daylight.
- Look for RGBW or dedicated white LEDs: These provide a purer white light compared to mixing red, green, and blue.
- Adjust brightness carefully: The backlight should be visible but not distracting. It should add a subtle glow, not overpower the image. A common recommendation is that the backlight’s brightness shouldn’t exceed 10% of the overall screen brightness. This often means setting the strip’s brightness to a low to medium level.
Understanding Dynamic Sync Modes (For Advanced Kits)
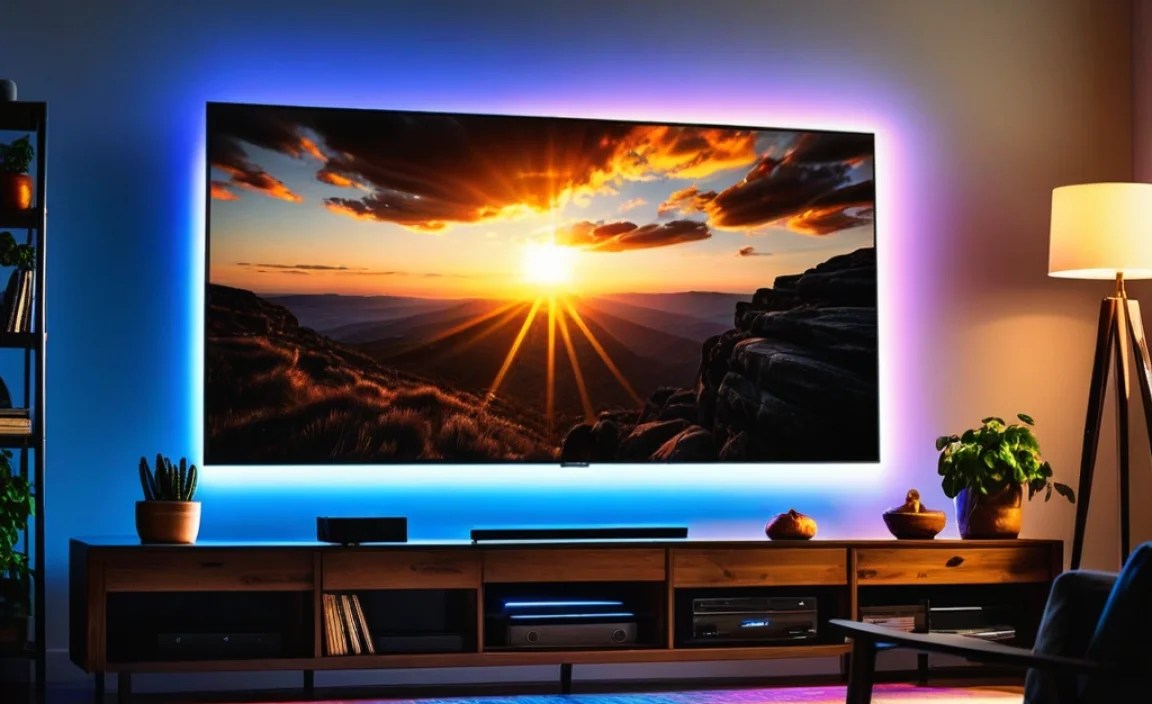
Kits with addressable LEDs and syncing capabilities can offer amazing immersion. These systems often use a camera or software to analyze the colors and action on your screen and then make the LED strip mimic them in real-time. When used with HDR content, this can genuinely elevate the viewing experience by extending the on-screen colors beyond the bezel.
Tips for Dynamic Sync:
- Camera Placement: If your system uses a camera, ensure it has a clear, unobstructed view of the screen. Mounting it on the bottom bezel or top center is common.
- Sensitivity Settings: Most apps will allow you to adjust the sensitivity of the sync. Experiment with these settings to find a balance where the light reacts quickly enough to be dynamic but not so quickly that it’s jarring.
- Color Saturation: Some systems let you adjust the “saturation” of the backlight. For HDR, you might want a slightly less saturated effect if the on-screen colors are already incredibly vibrant. This prevents the backlight from looking artificial.
- Ambient Light: These systems work best in a dimly lit room. Bright room lights can interfere with the camera’s reading of the screen and make the backlight seem less vibrant.
Static Bias Lighting vs. Dynamic Sync
It’s worth noting the difference in purpose. Static bias lighting is all about reducing eye strain and improving perceived contrast with a steady, neutral light. Dynamic sync is about immersion and extending the screen’s visual experience. Both can be great, but they serve slightly different goals.
For HDR purists looking to enhance the natural contrast and color depth, high-quality static bias lighting is king. For those seeking a more engaging, cinematic, or gaming experience, dynamic sync systems are where it’s at.
Example Setup Scenarios
Let’s look at how different needs might influence choices:
| User Goal | Recommended LED Strip Type | Key Features & Settings | Example Scenario |
|---|---|---|---|
| Enhance HDR Contrast & Reduce Eye Strain | RGBW or White-only LED strip | High CRI (90+), adjustable brightness, 6500K white color temperature. Set brightness to low/medium. | Watching late-night movies in a dim room; focusing on the deep blacks and rich colors of an HDR film. |
| Immersive Gaming / Movie Experience | Addressable (DRGB/aRGB) LED strip with sync capabilities | Individual LED control, camera or software sync, customizable patterns, app control. | Playing a fast-paced action game or watching an action-packed HDR movie where explosions and dramatic lighting are key features. |
| General Ambient Mood Lighting | RGB or RGBW LED strip | Wide color range, app or remote control, basic dimming. | Creating a relaxed atmosphere for casual TV viewing or parties, not specifically focused on HDR enhancement. |
When to Consider Professional Installation
While most installations are DIY-friendly, if you have a very large TV, a complex mounting setup (like a full-motion wall mount), or you’re uncomfortable with the process, consider hiring a professional. Many AV installers or TV mounting services offer LED strip installation as an add-on. You can also find local electronics repair shops that might offer this service.
Troubleshooting Common Issues
Even with simple setups, occasional hiccups can occur. Here are some common problems and how to fix them:
- LED Strip Not Turning On: Double-check all connections between the strip, controller, and power adapter. Ensure the power adapter is plugged into a working outlet.
- Colors Are Incorrect or Flickering: This could be a loose connection within the strip itself or at a connector. If the strip is cut, ensure the cut was precise at the designated mark and that the connectors are making good contact. For dynamic sync systems, flickering can sometimes be due to the sync software struggling with very fast-paced scenes or interference. Try adjusting sensitivity or disabling sync for a moment to test.
- Adhesive Not Sticking: The surface might not have been clean enough, or the adhesive might be old. You can try using a stronger double-sided tape specifically designed for electronics or plastics. Ensure the surface is dry and dust-free before reapplication.
- Sync System Not Working Properly: Make sure the camera/sensor is correctly positioned and has a clear view of the screen. Re-run the setup or calibration process if available in the app. Check for firmware updates for the strip controller and the associated app.
- LEDs Burning Out: This is rare with quality strips but can happen if they are overworked or have a manufacturing defect. If it’s a specific section, it might be a faulty LED. If multiple LEDs fail quickly across the strip, it could indicate a power issue or overheating.
Resources for Further Research
For those who want to dive deeper into the science of light and display technology, these resources can be helpful:
- ISO 3664:2009 – Graphic technology — Viewing conditions This international standard relates to how we perceive color, which is fundamental to understanding high-quality displays and lighting. You can find information about it on the International Organization for Standardization (ISO) website.
- Understanding HDR Technology: Many display technology websites and manufacturers offer detailed explanations of HDR. Reputable tech review sites often have articles explaining the technical aspects in an accessible way.
Frequently Asked Questions (FAQ)
Q1: What is HDR, and why does it matter for TV backlights?
HDR (High Dynamic Range) on TVs means a wider range of bright and dark colors, making images more realistic. A good backlight enhances HDR by complementing these extreme contrasts and vibrant colors, making your viewing experience more immersive and reducing eye strain.
Q2: Do I need a special TV for HDR LED backlights?
No, your TV doesn’t need to be HDR-certified for you to use an LED backlight. However, the backlight will truly shine and enhance the effect of HDR content if your TV is HDR-capable. For standard content, it still provides great ambient lighting and bias lighting benefits.
Q3: Can I cut the LED strip to fit my TV?
Yes, most TV LED strips are designed to be cut. Look for specific cut marks on the strip (usually indicated with scissors or a line). Only cut at these points to avoid damaging the circuitry.
Q4: How bright should my TV backlight be for HDR?
For HDR bias lighting, the backlight should be subtle. It should provide a soft, neutral glow that reduces eye strain and enhances perceived contrast, but not be so bright that it distracts from the image. A low to medium brightness setting on a neutral white is usually ideal.
Q5: What’s the difference between RGB and RGBW LED strips?
RGB strips mix red, green, and blue LEDs to create colors. RGBW strips add a dedicated white LED. This means RGBW strips can produce a purer white light and generally offer better color accuracy and mixing than RGB alone, making them preferable for bias lighting.
Q6: What are addressable LED strips?
Addressable LED strips allow you to control each individual LED on the strip independently. This capability is what enables dynamic lighting effects that can react to on-screen content, making them ideal for immersive gaming and movie experiences when paired with sync technology.
Q7: Will a TV backlight void my TV’s warranty?
Generally, no. Attaching an LED strip with adhesive or using simple plug-in components typically does not void your TV’s warranty, as it doesn’t involve modifying the TV’s internal hardware. However, it’s always wise to check your specific TV manufacturer’s warranty policy if you have concerns.
Conclusion
Adding a TV backlight LED strip, especially one designed to complement HDR, is one of the most impactful and affordable upgrades you can make to your home entertainment setup. It’s not just about pretty colors; it’s about enhancing the visual fidelity of your content, reducing eye strain, and pulling you deeper into the worlds on your screen. From choosing the right type of strip that balances color accuracy and brightness to carefully installing it for optimal diffusion and setting it up to work harmoniously with your HDR content, every step brings you closer to that cinema-like experience.
Whether you opt for a simple, static bias light to boost your HDR’s contrast and make late-night viewing comfortable, or a dynamic, addressable system that truly synchs.