
Setting up your smart TV is much easier than you think! Follow our essential tips for a smooth process, from unboxing to streaming your favorite shows.
Hey there! Bob here from Aimguider, ready to help you get that shiny new smart TV up and running. We all love the idea of a big, beautiful screen, but sometimes getting it all set up can feel a little daunting, right? Don’t worry, it’s a common feeling, and I’m here to break it down for you. This guide will walk you through each step, making sure you’re enjoying your favorite movies and shows in no time. Let’s get this done without any tech headaches!
Your Smart TV Setup Guide: Essential Tips for a Seamless Experience
Getting a new smart TV is exciting! The picture quality, the apps, the endless entertainment at your fingertips – it’s a game-changer. But before you can binge-watch that new series or host a movie night, there’s the setup process. Fear not, fellow home entertainment enthusiasts! This guide is designed to make your smart TV setup as smooth and simple as possible. We’ll cover everything from the moment you unbox it to connecting it to your network and getting those apps ready to go.
Step 1: Unboxing and Placement – Setting the Stage
The adventure begins with the box! Taking your new smart TV out for the first time is always a bit special.
Unboxing Carefully:
Place the box on a flat, stable surface, ideally near its final location.
Open the box from the top. Most boxes have tabs or seals you’ll need to break.
Gently remove the accessories and manuals first.
Carefully lift the TV itself. It’s often best with two people to avoid dropping or scratching the screen. Always hold it by the frame, never by the screen itself.
Remove all protective films from the TV screen and frame.
Choosing the Perfect Spot:
Viewing Angle: Consider where most people will be sitting. The TV should be directly in front of the primary viewing area for the best experience.
Light: Avoid placing your TV directly opposite a window or in a spot with a lot of glare. This can wash out the picture and cause reflections. Ambient light in a room is good, but direct sunlight is the enemy of a great picture.
Distance: The ideal viewing distance depends on the TV’s size and resolution. A good rule of thumb for 4K TVs is about 1 to 1.5 times the screen’s diagonal measurement. For example, for a 55-inch TV, aim for about 55 to 82 inches (4.5 to 6.8 feet) away.
Electrical Outlet: Make sure there’s a power outlet within reach of the TV’s power cord. Consider surge protectors to keep your new device safe from power spikes.
Step 2: Assembling the Stand or Wall Mount
You have two main options for displaying your smart TV: using the included stand or mounting it on the wall.
Attaching the Stand:
Most TVs come with two feet or a central stand. Locate the screws and the correct holes on the bottom of the TV frame.
Follow the diagram in your user manual precisely. It will show you which screws go where and in what order.
Tighten all screws securely, but don’t overtighten, as this can damage the TV or stand.
Once attached, carefully place the TV upright on its stand on a stable surface.
Mounting on the Wall (If Preferred):
Choose the Right Mount: Ensure the mount is compatible with your TV’s size and VESA (Video Electronics Standards Association) mounting pattern. You can find your TV’s VESA pattern in the manual or by measuring the distance between the mounting holes on the back of the TV. A guide to VESA patterns can be found on resources like DisplayWars.
Locate Wall Studs: For safety and sturdiness, wall mounts must be secured into wall studs. Use a stud finder to locate them.
Follow Mount Instructions: Wall mounts come with their own detailed instructions. Read them carefully and ensure you have the correct tools (drill, level, screwdriver, etc.). If you’re unsure, hiring a professional installer is a wise choice.
Step 3: Connecting Your Devices – The Entertainment Hub
Now for the fun part: hooking everything up! Your smart TV is a hub for all your entertainment.
Powering On:
Plug the TV’s power cord into a surge protector or directly into the wall outlet.
Press the power button on the TV itself or on the remote to turn it on.
Connecting Essential Cables:
HDMI Cables: These are your primary connection for devices like Blu-ray players, gaming consoles (like PlayStation or Xbox), streaming sticks (Apple TV, Roku), and cable/satellite boxes. Your TV will have multiple HDMI ports on the back or side. Connect one end of the HDMI cable to your device and the other to an HDMI port on the TV. Make a note of which port you use for which device!
Antenna/Coaxial Cable: If you plan to watch over-the-air broadcast channels with a digital antenna, connect the coaxial cable from your antenna to the “ANT IN” or “RF IN” port on your TV.
Audio Cables (Optional): For enhanced sound, you might connect a soundbar or AV receiver. These often use HDMI ARC (Audio Return Channel) ports or optical audio cables.
Understanding Ports:
Your smart TV will have various ports. Here’s a quick rundown:
| Port Type | Purpose | Common Devices |
|---|---|---|
| HDMI | High-definition digital audio/video signal | Blu-ray players, gaming consoles, streaming devices, laptops, cable boxes |
| USB | Connecting external storage, firmware updates, powering devices | USB drives, external hard drives, some streaming devices |
| Ethernet (LAN) | Wired internet connection | Connecting TV directly to router for stable internet |
| Optical Audio | Digital audio signal for surround sound | Soundbars, AV receivers |
| ANT IN / RF IN | Connects to antenna or cable outlet | Over-the-air antennas, cable TV |
Step 4: Initial Setup and Wi-Fi Connection
Once powered on, your TV will guide you through its initial setup. This is crucial for making it a “smart” TV.
Language and Region: Select your preferred language and region. This affects broadcast channels and app availability.
Network Connection: This is where you connect your TV to the internet.
Wi-Fi: Select your home Wi-Fi network from the list and enter your password. Ensure you have your Wi-Fi password handy. For optimal performance, place your router relatively close to the TV or consider a Wi-Fi extender if the signal is weak.
Wired (Ethernet): If you prefer a more stable connection or have poor Wi-Fi, plug an Ethernet cable from your router directly into the TV’s Ethernet port. This usually offers the fastest and most reliable internet speed, which is great for streaming. The Federal Communications Commission (FCC) offers great guidance on home internet best practices.
Account Login/Creation: Most smart TVs require you to log into or create an account with the manufacturer (e.g., Samsung Account, Google Account for Android TV/Google TV, LG Account). This account manages your apps, settings, and sometimes offers exclusive features.
Terms and Conditions: You’ll need to agree to the manufacturer’s terms of service and privacy policies.
Step 5: Channel Tuning and Software Updates
Getting all your channels and ensuring your TV is up-to-date is next.
Channel Scan: If you connected an antenna or cable, now is the time to scan for channels. Navigate through the TV’s settings menu to find the “Auto Tune,” “Channel Scan,” or “Broadcast” options. The TV will search for all available channels.
Software Updates: Your smart TV’s operating system and apps will need updates. The TV will likely prompt you to check for or install updates automatically. It’s crucial to keep your TV updated for security, performance, and new features. Don’t skip this! This can often be found under the “Support,” “System,” or “About” section of your TV’s settings.
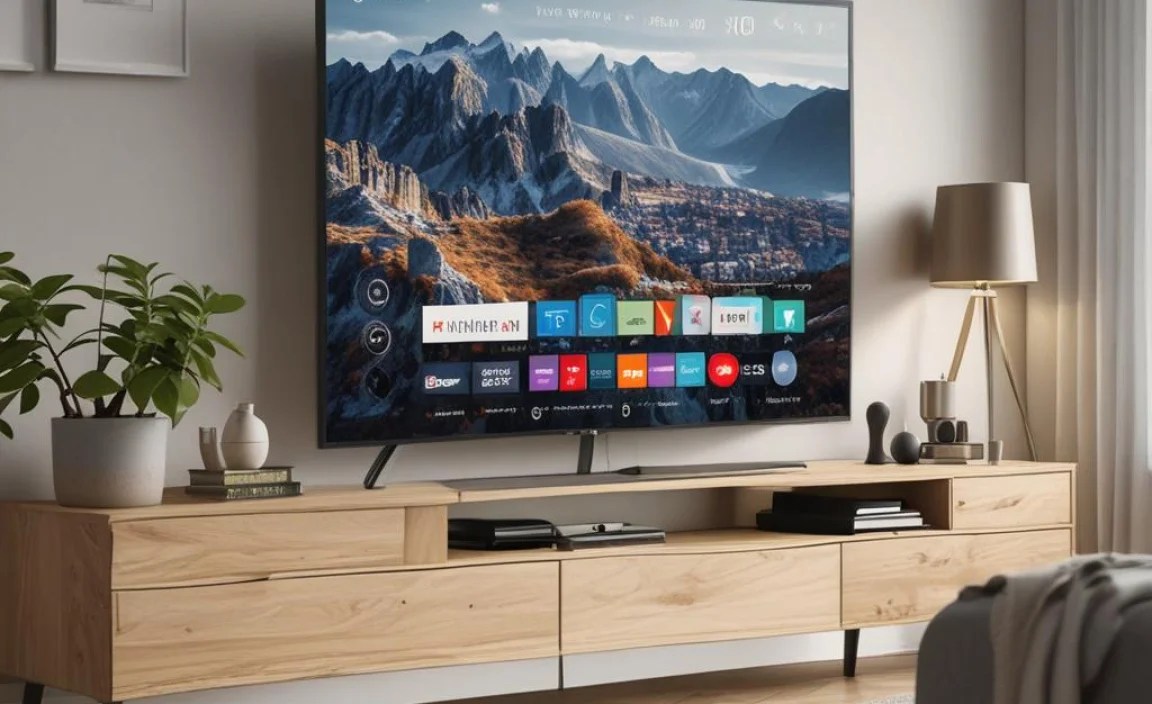
Step 6: Downloading Apps and Customizing Your Experience
This is where your TV truly becomes “smart”!
Accessing the App Store: Your TV has an app store (like Google Play Store, LG Content Store, Samsung Smart Hub, Roku Channel Store). Use your remote to navigate to it.
Finding Your Favorites: Browse or search for your must-have streaming apps. Popular choices include Netflix, Hulu, Disney+, Amazon Prime Video, YouTube, HBO Max, and Peacock.
Logging In: Once an app is downloaded, open it and log in with your existing account credentials for that service. If you don’t have an account, you’ll usually be prompted to create one.
Organizing Your Home Screen: Most smart TVs allow you to customize your home screen, pinning your favorite apps for easy access. Arrange them in an order that makes sense to you.
Picture and Sound Settings:
Picture: Explore the picture settings. Most TVs offer presets like “Standard,” “Movie,” “Sports,” and “Game.” “Movie” or “Cinema” modes are often the most accurate for watching films. You can also adjust brightness, contrast, color, and sharpness to your liking. For more advanced users, understanding HDR (High Dynamic Range) settings can significantly improve picture quality on compatible content. I personally find calibrating my picture to a neutral mode is the best starting point.
Sound: Similarly, experiment with sound modes (“Standard,” “Clear Voice,” “Music,” “Cinema”). If you have a soundbar or home theater system, ensure your TV is set to output audio correctly (often via HDMI ARC or Bitstream/Passthrough for surround sound).
Step 7: Connecting Other Smart Devices (Optional but Recommended)
Your smart TV can be part of a larger smart home ecosystem.
Voice Assistants: Many smart TVs integrate with voice assistants like Google Assistant, Amazon Alexa, or Apple’s Siri (via Apple TV or AirPlay). Follow the on-screen prompts to link your TV to your preferred assistant. This allows you to control your TV with voice commands, search for content, and even control other smart home devices.
Smartphone Integration: Many manufacturers offer mobile apps that let you control your TV, cast content from your phone, or use your phone as a remote. Check the app store for your TV brand’s companion app. Features like Apple AirPlay allow easy streaming from Apple devices.
Troubleshooting Common Setup Issues
Even with the best guides, sometimes things get tricky. Here are a few common snags and how to fix them:
No Picture or Sound:
Check all cable connections are secure.
Ensure you’ve selected the correct input source on your TV remote (e.g., HDMI 1, HDMI 2).
Try a different HDMI cable or port.
Restart your TV and the connected device.
Internet Connectivity Problems:
Restart your router and modem.
Ensure you entered the Wi-Fi password correctly.
Move the router closer to the TV or consider a Wi-Fi extender or Ethernet connection.
Check your internet service provider’s status.
Remote Not Working:
Replace the batteries.
Ensure there are no obstructions between the remote and the TV’s sensor.
Some remotes are Bluetooth-enabled and may need to be re-paired (check your TV’s settings).
Apps Not Loading or Crashing:
Ensure your TV’s software is up-to-date.
Try uninstalling and then reinstalling the app.
Restart your TV.
Frequently Asked Questions about Smart TV Setup
Q1: Do I need to connect my smart TV to the internet?
A1: Yes, to access smart features like apps, streaming services, web browsing, and software updates, you absolutely need an internet connection. You can connect via Wi-Fi or a wired Ethernet cable.
Q2: How do I find my Wi-Fi password?
A2: Your Wi-Fi password is typically found on a sticker on your internet router. If you’ve changed it, you’ll need to recall your custom password. If you can’t find it, you may need to contact your internet service provider.
Q3: What’s the difference between HDMI ARC and a regular HDMI port?
A3: HDMI ARC (Audio Return Channel) allows audio to travel from the TV back to a soundbar or AV receiver, using only one HDMI cable for both video and audio. A regular HDMI port primarily sends audio and video to the TV.
Q4: My TV is slow. How can I make it faster?
A4: Ensure your TV software is updated, as updates often include performance improvements. A strong, stable internet connection (wired is best!) also helps. Closing unused apps and restarting your TV can also clear up temporary glitches.
Q5: Can I use my old remotes for my new smart TV?
A5: Generally, no. Smart TVs come with their own specific remote controls designed to navigate their operating systems and app stores. Some universal remotes can be programmed to control multiple devices, but the one that comes with your TV is usually best for initial setup and full functionality.
Q6: How often should I update my smart TV’s software?
A6: It’s best to allow your TV to update whenever it prompts you. Manufacturers release updates to fix bugs, improve security, add new features, and enhance performance. Letting your TV update regularly ensures the best and most secure experience.
A Look at Some Common Smart TV Operating Systems

Most smart TVs run on a specific operating system (OS), which determines the interface, app availability, and features. Knowing which one you have can help you navigate and find support.
| Operating System | Common Brands | Key Features | App Store |
|---|---|---|---|
| Google TV / Android TV | Sony, TCL, Hisense, Philips (some models) | Vast app selection, Google Assistant voice control, Chromecast built-in, personalized recommendations. | Google Play Store |
| webOS | LG | Intuitive interface with a “launcher bar,” Magic Remote for pointer-style navigation, ThinQ AI for smart home integration. | LG Content Store |
| Tizen | Samsung | Clean, user-friendly interface, Bixby voice assistant, SmartThings hub for smart home control. | Samsung App Store |
| Roku TV | TCL, Hisense, Sharp (some models) | Simple, easy-to-use interface, wide range of streaming channels available, often more affordable. | Roku Channel Store |
| Fire TV | Insignia, Toshiba, Amazon Fire TV (brands) | Alexa voice control integration, Prime Video integration, recommended content. | Amazon Appstore |
Knowing your OS helps you understand where to find apps and how to use features. For instance, if you have a Google TV, you’ll likely use the Google Play Store and Google Assistant, whereas an LG TV might use the LG Content Store and LG’s ThinQ AI.
Optimizing Your Smart TV Experience

Once set up, don’t forget these final touches for the best viewing.
Picture Calibration: While presets are good, for the ultimate picture quality, consider a professional calibration or use calibration discs/apps. However, for most users, selecting the “Movie” or “Cinema” mode and making minor adjustments yourself is sufficient.
Sound Enhancement: If the built-in TV speakers aren’t cutting it, a soundbar or simple 2.1 speaker system can transform your audio experience for movies, music, and gaming for relatively little cost.
Energy Saving: Explore the energy saving settings in your TV’s menu. Options like dimming the screen slightly or turning off the TV after a period of inactivity can help reduce power consumption.
* Privacy Settings: Smart TVs collect data. Review the privacy settings in your TV’s menu to control what information is shared. This is especially important when logging into various accounts.