
Setting up your new smart TV under $1000 is straightforward. This guide covers unboxing, connecting to Wi-Fi, mounting, and configuring essential settings for a fantastic viewing experience without breaking the bank. We’ll walk you through each step to get your budget-friendly smart TV ready for enjoyment quickly and easily.
Welcome to the exciting world of smart TV ownership, especially when you’ve found a fantastic option without spending a fortune! Smart TVs are packed with features that can transform your living room into a home entertainment hub. However, getting everything set up can sometimes feel a bit daunting, especially if this is your first smart TV or if you’re working within a budget. Don’t worry, I’m here to help! This guide will take you through the essential steps to set up your new smart TV, ensuring you get the best possible experience. We’ll cover everything from unboxing to enjoying your favorite shows and apps. Stick with me, and you’ll have your new TV ready in no time!
Setting Up Your Smart TV Under $1000: A Step-by-Step Approach

Finding a great smart TV for under $1000 is definitely achievable these days. The market is brimming with excellent options that offer crisp picture quality, smart features, and plenty of connectivity. The key is to approach the setup process methodically. We’ll break down each stage, making it simple and stress-free, so you can start enjoying your new entertainment powerhouse.
1. Unboxing and Initial Inspection
The first step is always exciting – opening that new box! Take your time and be careful. Most TVs come with protective foam and plastic wrapping to prevent damage during shipping.
- Carefully open the box: Look for any tape or seals and cut them open gently.
- Remove the TV and accessories: Most TVs are designed so the screen faces you when you open the box lid. Lift the TV out carefully, or if it’s a larger screen, you might need a second person. Place it on a soft, flat surface, like a carpeted floor or over the foam packaging, to avoid scratching the screen.
- Check for all components: Inside, you should find the remote control, batteries for the remote, a power cord, a stand (if you’re not wall-mounting), and some documentation like a quick-start guide and warranty information.
- Inspect for damage: Before you do anything else, give the TV and all accessories a quick once-over for any dings, scratches, or missing parts. If you find any issues, contact the retailer or manufacturer immediately.
2. Assembling the Stand (If Applicable)
If your TV comes with a stand, you’ll need to attach it before you can place it on a furniture unit. This usually involves a few screws.
- Identify the stand parts: The stand typically comes in two pieces (left and right) that attach to the bottom of the TV, or it might be a single pedestal.
- Locate the screw holes: On the back of the TV near the bottom, you’ll see threaded holes specifically for the stand.
- Attach the stand pieces: Align the stand pieces with the holes and use the screws provided in the accessory bag. Make sure they are snug but don’t overtighten them, as this can strip the threads.
- Ensure stability: Once attached, gently lift the TV and place it on a stable, flat surface. Give it a slight wobble test to ensure the stand is secure.
3. Choosing the Perfect Location
Where your TV lives matters! Consider viewing angles, glare, and accessibility.
- Viewing distance: General recommendations suggest a viewing distance of 1.5 to 2.5 times the diagonal screen size for 1080p TVs, and 1 to 1.5 times for 4K TVs. For example, for a 55-inch 4K TV, a distance of around 5 to 6.5 feet is ideal.
- Glare: Avoid placing the TV directly opposite a window or bright light source that can cause glare and ruin your viewing experience. If placement is unavoidable, consider curtains or blinds.
- Height: Ideally, the center of the screen should be at or slightly below eye level when you’re seated. This promotes comfortable viewing for extended periods.
- Ventilation: TVs generate heat. Ensure there’s enough space around the TV for air to circulate, especially behind it and on the sides. Check your TV’s manual for specific clearance requirements.
4. Connecting to Power and Peripherals
Now it’s time to power up and hook up your devices!
- Connect the power cord: Plug the power cord firmly into the back of the TV and then into a surge protector or wall outlet. Using a surge protector is highly recommended to safeguard your new electronics from power spikes. For more information on protecting your electronics, you can check out resources like the Consumer Product Safety Commission (CPSC) guidelines on electrical safety.
- Connect external devices: Use HDMI cables to connect your cable box, game consoles, Blu-ray players, soundbars, or streaming sticks. Most modern TVs have multiple HDMI ports, often labeled for clarity (e.g., HDMI 1, HDMI 2, HDMI ARC for audio return channel).
- Connect an antenna (optional): If you plan to watch over-the-air broadcasts, connect an outdoor or indoor antenna to the antenna input port.
- Connect audio devices (optional): If you have a soundbar or audio receiver, connect it via HDMI ARC or an optical cable.
5. Initial TV Setup and Wi-Fi Connection
Once everything is plugged in, it’s time to turn on the TV and go through the on-screen setup. This is usually guided and quite easy.
- Power on the TV: Press the power button on the remote or the TV itself.
- Language and Region Selection: The TV will prompt you to select your preferred language and country/region.
- Connect to Network: This is where your smart TV becomes truly smart! You’ll be prompted to connect to your home Wi-Fi network.
- Select your Wi-Fi network name (SSID) from the list.
- Enter your Wi-Fi password carefully. Passwords are case-sensitive.
- If you have a wired Ethernet connection, you can plug in an Ethernet cable directly into the TV for a potentially more stable connection.
- Account Sign-in/Creation: Most smart TVs require you to sign in to or create an account for the TV’s specific operating system (e.g., Google TV, Roku TV, webOS, Tizen). This account is used for app downloads, updates, and personalized recommendations. Follow the on-screen prompts.
- Software Updates: The TV will likely check for and install any available software updates. This is crucial for security, performance, and accessing the latest features. Let this process complete, which might take a few minutes.
- Terms and Conditions: You’ll need to agree to the terms of service and privacy policies.
6. Picture and Sound Settings Optimization
Out of the box, picture and sound might not be perfect. A few tweaks can make a big difference.
Picture Settings
Most TVs offer various picture modes (e.g., Standard, Movie, Sports, Game). For the most accurate and cinematic look, “Movie” or “Filmmaker Mode” is often recommended as it aims to reproduce the content as the director intended, with minimal artificial processing. However, experiment to see what you like best!
- Picture Mode: Start with “Movie” or “Filmmaker Mode.”
- Brightness/OLED Light: Adjust this based on your room’s lighting. Lower for dark rooms, higher for bright rooms.
- Contrast: Controls the difference between the brightest whites and darkest blacks.
- Color: Adjusts the intensity of colors.
- Sharpness: Be cautious with this. Too much sharpness can create artificial-looking halos around objects. Often, setting it to 0 or a very low number is best.
- Motion Smoothing/Interpolation: This feature (often called Motionflow, TruMotion, Auto Motion Plus) can make films look like soap operas (“the soap opera effect”). Many enthusiasts turn this off for movies and TV shows, but it can be good for fast-paced sports.
Sound Settings
Built-in TV speakers can be adequate, but they often lack depth. However, you can still optimize them.
- Sound Mode: Similar to picture modes, try “Standard,” “Movie,” “Music,” or “Clear Voice.”
- Equalizer (EQ): If your TV has an EQ, you can manually adjust bass and treble.
- Surround Sound: Toggle this on or off to see if it enhances your listening experience. If you have a soundbar or home theater system, you’ll typically disable the TV’s virtual surround sound.
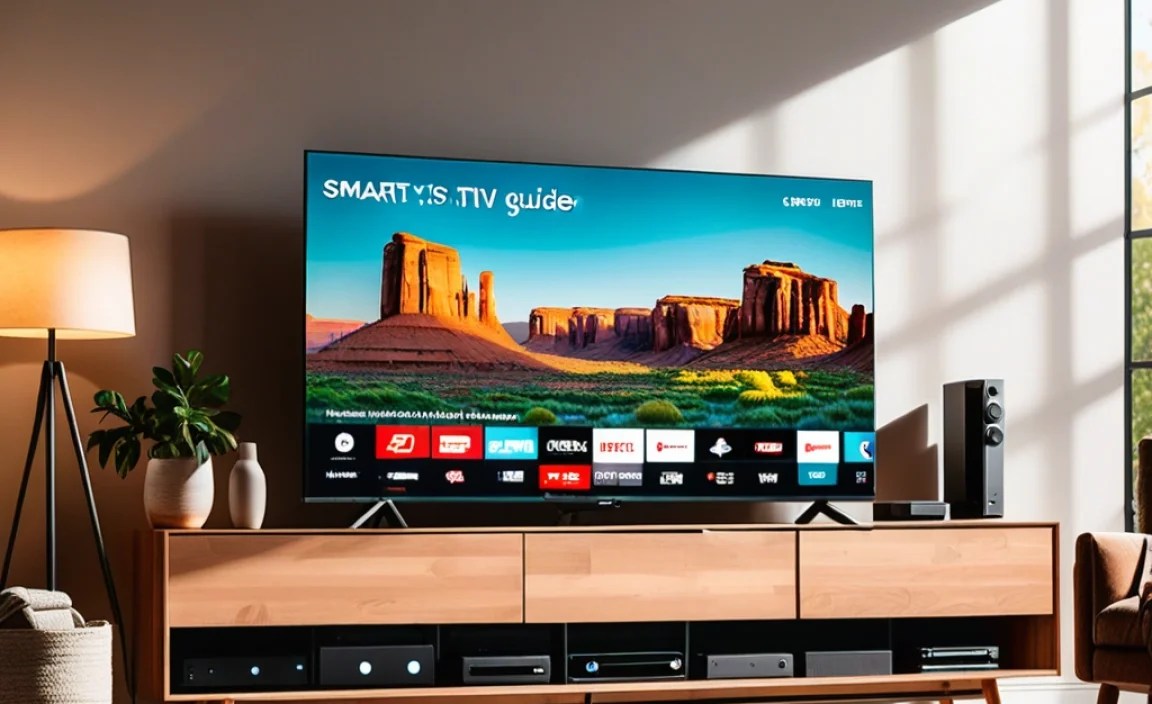
7. Connecting Your Streaming and Entertainment Apps
With your network connected and settings adjusted, it’s time to load up your favorite entertainment.
- Navigate to the App Store: Most smart TV platforms have an app store where you can download streaming services, games, and other applications.
- Search and Install: Look for popular apps like Netflix, Hulu, Disney+, Amazon Prime Video, YouTube, HBO Max, etc. Select the app and choose “Install” or “Get.”
- Log In: Once installed, open the app and log in with your existing account credentials. If you don’t have an account, you’ll usually need to sign up via a web browser.
- Organize Your Apps: Most platforms allow you to rearrange your apps on the home screen for quick access. Place your most-used apps front and center.
8. Wall Mounting Your Smart TV (Optional)
Wall mounting can save space and create a sleek look. Ensure you have the right mount and follow instructions carefully.
Important Safety Note: If you are not comfortable with DIY tasks or are unsure about wall mounting, it is safest to hire a professional installer. Improper mounting can lead to serious injury or property damage.
- Choose the Right Mount: Ensure the mount is compatible with your TV’s VESA mounting pattern (the standard spacing of the screw holes on the back of the TV) and can support its weight. You can typically find VESA dimensions in your TV’s manual or specifications.
- Locate Wall Studs: For a secure installation into drywall, you must attach the mount to wall studs. Use a stud finder to locate them. Mounting directly into drywall without hitting studs is dangerous. For concrete or brick walls, you’ll need appropriate anchors. Resources like This Old House offer guides on finding wall studs.
- Attach Brackets to TV: Screw the TV brackets from the mount onto the VESA holes on the back of your TV.
- Attach Mount to Wall: Secure the wall plate of the mount to the wall studs or anchor points.
- Hang the TV: With potentially a second person, carefully lift the TV and hook it onto the wall plate. Secure any locking mechanisms as per the mount’s instructions.
- Connect Cables: Route your cables neatly, possibly using cable management solutions.
Understanding Smart TV Platforms
The “smart” part of your TV comes from its operating system. Different brands use different platforms, each with its own interface and app selection. Here’s a quick look at some common ones:
| Platform | Commonly Found On Brands | Key Features | App Availability |
|---|---|---|---|
| Google TV / Android TV | Sony, TCL (some models), Hisense (some models), Philips | Access to Google Play Store, Google Assistant, Chromecast built-in. Highly customizable. | Vast library, most major streaming services. |
| Roku TV | TCL (many models), Hisense (many models), Sharp, Elements | Simple interface, widely praised for ease of use, huge app selection (“channels”). | Extensive; known for having almost every streaming service. |
| webOS | LG | Intuitive interface with a “launcher bar,” LG Content Store. Magic Remote functionality (on some models). | Good selection, including major services and LG-specific apps. |
| Tizen | Samsung | Clean interface, Samsung’s Smart Hub, Bixby voice assistant. | Comprehensive, with all major services. |
| Fire TV | Amazon (their own TVs) | Amazon’s ecosystem, Alexa voice control, integration with Prime Video. | Large app store, direct access to Amazon content. |
When buying a TV under $1000, you’ll often see Roku TV and Google TV/Android TV on budget-friendly models from brands like TCL and Hisense, as they offer great value and robust smart features.
Frequently Asked Questions (FAQs)
Q1: Is it safe to use a surge protector with my new smart TV?
Absolutely! Using a quality surge protector is highly recommended. It safeguards your valuable electronics from sudden power surges or spikes that could otherwise damage internal components.
Q2: How often should I update my smart TV’s software?
It’s best to aim for regular updates. Most smart TVs can be set to update automatically when connected to the internet. Check for updates at least once a month manually if automatic updates aren’t enabled. Updates often include security patches and new features.
Q3: My new smart TV seems too bright. What can I do?
This is a common issue. Most TVs come with a very bright “Standard” or “Vivid” picture mode. Switch to “Movie” or “Filmmaker Mode,” and then a djust the “Brightness” or “Backlight” setting down until it’s comfortable for your room’s lighting. Also, look for settings like “Eye Saver Mode” or “Eco Mode” which can reduce brightness.
Q4: Can I connect my old DVD player to a new smart TV?
Yes, but it depends on the ports available. Most smart TVs have HDMI ports. If your DVD player also has an HDMI output, you can use an HDMI cable. If your DVD player is older and only has composite (red, white, yellow RCA cables) or component outputs, you might need an adapter or a different player, as composite inputs are rare on new TVs.
Q5: Do I need a separate streaming device if my TV is a smart TV?
Not usually. Smart TVs come with built-in apps for streaming services. However, some people prefer external streaming devices (like a Roku Stick, Fire Stick, or Apple TV) because interfaces can be faster, apps may update more frequently, or they prefer a different platform.
Q6: What does “HDR” mean on my smart TV, and should I worry about it?
HDR stands for High Dynamic Range. It allows the TV to display a wider range of colors and contrast, meaning brighter brights and darker darks with more detail in between than standard TVs. Most TVs under $1000 will support at least HDR10. If your TV supports HDR, you’ll notice a difference in picture quality if the content you’re watching also supports HDR (e.g., from streaming services or 4K Blu-rays).
Troubleshooting Common Setup Issues
Even with the best guides, occasional hiccups can occur. Here are a few common issues and how to resolve them:
- Cannot connect to Wi-Fi: Double-check your Wi-Fi password for typos. Ensure your router is working correctly by testing another device. Try restarting your TV and your router. If the issue persists, consider a wired Ethernet connection.
- Remote not working: Ensure the batteries are inserted correctly and are fresh. Remove any obstructions between the remote and the TV’s sensor. Sometimes, unpairing and re-pairing the remote (check your TV’s manual for the specific process) can solve issues with Bluetooth remotes.
- Apps not loading or crashing: Ensure your TV’s software is up to date. Try uninstalling and reinstalling the problematic app. If multiple apps are affected, a TV software update or even a factory reset might be necessary (though try other solutions first).
- Picture or sound issues: Verify cable connections are secure. Try switching HDMI ports or using a different HDMI cable. If there’s no signal, ensure the correct input source is selected on the TV remote. For persistent display issues, a factory reset might clear corrupted settings.
For more in-depth troubleshooting, always refer to your specific TV model’s user manual or the manufacturer’s support website. These resources are invaluable goldmines of information.