
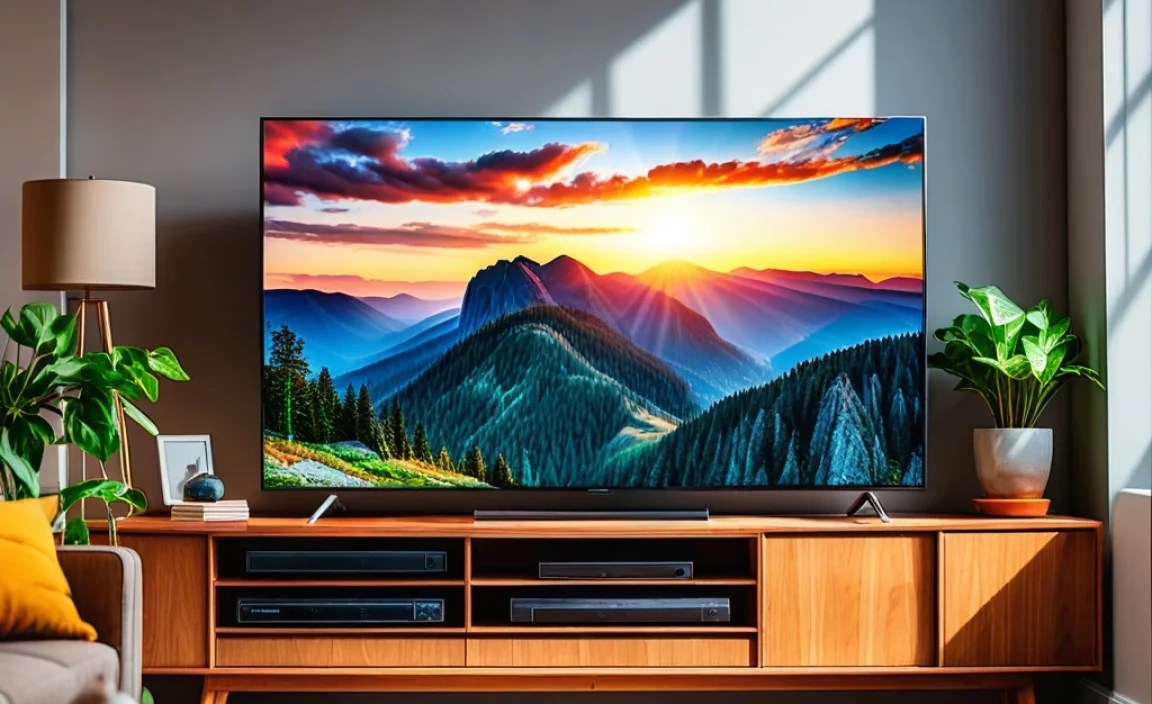
Calibrating your TV for HDR content means adjusting picture settings to unlock its full potential. This guide simplifies the process, helping you achieve stunningly vibrant colors, brilliant highlights, and deep blacks for a truly immersive viewing experience. Get ready for a picture that pops!
Hey there, digital explorers! Bob E Riley here, your guide to making your tech sing. Ever flicked on a stunning HDR movie or game, only to find the picture looks… good, but not mind-blowing? You’ve got an HDR-capable TV, but are you seeing HDR’s true magic? Often, the secret sauce isn’t the TV itself, but those little-explored picture settings. It can feel a bit daunting, I know! But don’t sweat it. We’re going to walk through this together, step-by-step, making sure your TV’s HDR performance goes from ‘wow’ to ‘WOAH!’ Get ready to unlock the vibrant world your screen is capable of showing.
Why HDR Calibration Matters (More Than You Think!)

High Dynamic Range, or HDR, is a game-changer for your TV. Unlike standard dynamic range (SDR) content, HDR offers a much wider range of brightness and color. This means brighter whites, deeper blacks, and a spectrum of colors that are far more lifelike and vibrant. Think of it like going from an old faded photograph to a crystal-clear, vibrant print.
However, simply playing HDR content doesn’t guarantee you’re seeing it perfectly. Most TVs come with default settings that are often tuned for general viewing or even for making the TV look impressive on a store shelf, not necessarily for accurate picture reproduction at home. This can lead to:
- Washed-out colors
- Crushed blacks (where you can’t see detail in dark scenes)
- Blown-out highlights (where bright areas are just pure white, losing detail)
- An overall duller image than intended
Calibrating your HDR TV settings is about fine-tuning these elements to match what the content creator intended. It’s about seeing every subtle shade, every glint of light, and every shadow with incredible detail. Especially for gamers and movie buffs, this can make a huge difference in immersion and enjoyment.
Before You Start: What You’ll Need
While professional calibration involves specialized equipment that can cost hundreds or even thousands of dollars, we can achieve significant improvements with readily available tools and resources. For this beginner-friendly guide, you won’t need a professional meter, but you will need a few things:
- Your TV Remote: Obviously! You’ll be navigating menus a lot.
- An HDR Test Pattern Source: This is crucial. You can use:
- Streaming Services: Netflix, Disney+, Amazon Prime Video, and Apple TV+ often have HDR content. Some might even have built-in test patterns or demos.
- 4K Blu-ray Discs: Many 4K UHD Blu-rays include excellent HDR demonstration material.
- YouTube Channels: Search for “HDR test patterns” or “HDR calibration videos.” Look for reputable sources that provide clear patterns. For example, you can find various test patterns on channels like the Digital Foundry or HD D-Series.
- Calibration Discs: For a more controlled environment, consider discs like Spears & Munsil UHD Benchmark or OSD Audio UHD HDR Calibration disc. These are designed specifically for calibration.
- A Bit of Patience: This isn’t a five-minute job, but it’s rewarding!
- Good Lighting Conditions: For the most accurate results, try to calibrate in the lighting conditions you’ll typically be viewing your TV in. If you watch movies in a completely dark room, calibrate in the dark. If you watch during the day with lights on, do it then.
Understanding Your TV’s HDR Picture Settings

Every TV menu is a little different, but most share common picture settings that are essential for HDR calibration. Let’s break them down:
1. Picture Mode/Scene Preset:
This is your starting point. For HDR content, you’ll want to select an HDR-specific picture mode. These are usually labeled:
- HDR Vivid / Dynamic: Usually too bright and oversaturated. Avoid this for calibration.
- HDR Standard / Cinema / Movie: This is typically the best starting point. It aims for accuracy over sheer brightness.
- HDR Bright Cinema / Bright: A good compromise if your room is very bright.
- Filmmaker Mode / ISF Mode: If your TV has these, they are often factory-calibrated for accuracy, making them excellent for HDR.
Recommendation: Start with “HDR Cinema,” “HDR Movie,” or “Filmmaker Mode.”
2. Brightness Settings:
This is where HDR calibration really shines. You’ll usually find several brightness-related controls:
- Brightness (or Black Level): This controls the black level of the image. Setting this correctly is vital to avoid crushed blacks. On some OLED TVs, this might be called “Black Level” and should typically be at 50 for most HDR content.
- Contrast: This controls the white level or peak brightness. Too high, and you’ll lose detail in bright areas. Too low, and HDR won’t “pop.”
- OLED Light / Pixel Brightness (OLED TVs): This controls the overall luminance of the panel. For HDR, you’ll want this set higher than for SDR, but not so high it causes temporary image retention or damage.
- LED Local Dimming / Black Frame Insertion (Edge-lit/Full-array TVs): This feature controls how the TV dynamically adjusts the backlight for deeper blacks and brighter whites. “High” or “Auto” is usually best for HDR, but experiment if you see haloing.
Recommendation: We’ll adjust these using test patterns.
3. Color Settings:
- Color (or Saturation): Controls the intensity of the colors.
- Tint / Hue: Adjusts the balance between green and magenta.
- Color Tone / Color Temperature: Sets the overall warmth or coolness of the image. “Warm” or “Warm 2” is usually closest to industry standards for films.
Recommendation: These are often best left alone initially, especially if your TV has good picture modes. We’ll touch on advanced settings if needed.
4. Sharpness:
This setting controls edge enhancement. Most modern TVs process images so well that adding sharpness can create artificial-looking halos and artifacts. For HDR, less is often more.
Recommendation: Set to 0 or a very low number for most content.
5. Advanced Settings:
These can vary wildly: Dynamic Contrast, Dynamic Color, HDR Effect, Noise Reduction, Motion Smoothing (Blur Reduction, TruMotion, MotionFlow etc.).
- Dynamic Contrast/Color: Often artificial and can harm HDR. Turn these OFF for calibration.
- HDR Effect: This tries to add HDR to SDR content. Turn this OFF for real HDR content.
- Noise Reduction: Useful for very low-quality sources, but should be off for high-quality HDR Blu-rays or streams.
- Motion Smoothing: This is a personal preference. For movies, it’s generally recommended to turn it OFF to avoid the “soap opera effect.” For sports or games, some prefer it on. Keep it OFF during calibration to see the image as intended.
Recommendation: Turn OFF most of these “enhancements” for calibration.
Step-by-Step HDR TV Calibration Guide
Let’s get hands-on! We’ll use a common HDR test pattern scenario to guide you. Imagine you’re using a YouTube video with multiple test patterns.
Step 1: Select Your HDR Picture Mode and Source
Turn on your TV and load your chosen HDR content source (e.g., a Netflix HDR title, a calibration disc, or a YouTube HDR test pattern video). Navigate to your TV’s Picture Settings menu and select the most accurate HDR mode (e.g., HDR Cinema, Filmmaker Mode).
Ensure your TV is receiving an HDR signal. Most TVs will indicate this, either in the input information or with a pop-up notification when an HDR signal starts. If you’re unsure, check your TV’s input settings or signal information menu.
Step 2: Adjust Black Level (Brightness)
Goal: Ensure you can see detail in the darkest parts of the image without the image looking murky or gray.
Find an HDR test pattern that features a gradient of black or dark grays, often with a few small black bars or squares. You might look for a chart that goes from perfect black (0%) up to around 15% gray.
Action:
- Locate the “Brightness” or “Black Level” setting in your TV’s picture menu.
- If your “Brightness” is set too low, the dark grays will disappear into the black bars, and you’ll lose detail in shadows.
- If your “Brightness” is set too high, the black bars will appear gray, and blacks won’t look truly black. “Crushed blacks” occur when you can’t distinguish near-black shades.
- Adjust the “Brightness” setting until you can just barely distinguish the darkest grays from the black bars. You want to see some detail in the dark areas, but the blacks should still appear deep and inky.
On OLED TVs: The “Brightness” setting is often irrelevant for HDR content, and you should focus on ensuring “Black Level” is set correctly (usually 50). If you have an OLED and are seeing black bars that appear gray, this can sometimes be related to “Peak Brightness” or “Dynamic Contrast” settings working overtime. Turn those off if possible.
Step 3: Adjust White Level (Contrast)
Goal: Maximize the brightness of the image so highlights are brilliant, without losing detail in the brightest parts.
Find an HDR test pattern that shows a gradient of bright whites, usually from 90% white up to 100% white (or specular highlights). You’re looking for the subtle details within the white area.
Action:
- Locate the “Contrast” setting.
- If the “Contrast” is too low, highlights won’t appear bright enough, and the image might look flat.
- If the “Contrast” is too high, fine details in bright scenes (like the sun, bright lights, or white fabric) will be washed out and appear as a solid white blob. This is called “clipping.”
- Adjust “Contrast” upwards until the brightest parts of the image look impactful and have a sense of glow, but ensure you can still see the subtle shades and textures within the brightest elements. You might need to slightly lower Contrast from its maximum if you see clipping.
For OLED TVs: On OLEDs, this is particularly important. You have an “OLED Light” or “Pixel Brightness” setting that controls the panel’s maximum output. For HDR, you’ll want this set relatively high, but not to its absolute maximum if it causes discomfort or potential degradation over time. A good starting point is often between 70-90%, adjusted by eye for comfortable brightness in your room.
Step 4: Adjust Color Settings (If Necessary)
Goal: Ensure colors look natural and vibrant, not oversaturated or dull.
If your TV has a good “Color” or “Saturation” setting in its HDR mode, and a “Color Temperature” setting like “Warm2” or “Cinema,” these are usually quite accurate out of the box. However, you can fine-tune them.
Action:
- Color/Saturation: Find a test pattern with various colored squares or gradients. Adjust the “Color” setting so that colors are rich and lifelike, but not garish or artificial. If colors look washed out, increase it slightly. If they look like neon signs, decrease it.
- Color Temperature/Tint: Most movie content is mastered with a D65 white point, which looks slightly warm/reddish on screen. If your TV’s “Warm” setting looks too yellow or too blue, you might need to adjust “Tint” (if available) or experiment with different color temperature presets (“Warm1,” “Warm2,” “Standard”). For most users, selecting the warmest preset available is the best bet.
External color bars or gradients that show primary and secondary colors (red, green, blue, yellow, cyan, magenta) can be very helpful here if you have access to them.
Step 5: Fine-tune Sharpness and Motion
Goal: Eliminate artificial artifacts and achieve a clean, natural image.
Action:
- Sharpness: Set your “Sharpness” to 0 or the lowest possible setting. In most cases, this will provide the cleanest image. Only increase slightly if edges appear too soft, but beware of introducing halos.
- Motion Smoothing: For cinematic playback, turn OFF any motion interpolation or smoothing features (e.g., TruMotion, MotionFlow, Clear Motion, Auto Motion Plus). These can introduce artifacts and the “soapbox opera effect.” If you prefer smoother motion for sports or games, you can re-enable them after calibration, but view the picture as intended first.
Step 6: Test with Actual Content
Goal: See how your new settings perform with your favorite HDR shows and movies.
Now, switch to your typical viewing content. Watch scenes that you know well, especially those with challenging brightness and color.
What to look for:
- Do dark scenes have detail, or are they completely black?
- Are bright scenes too washed out, losing detail?
- Do skin tones look natural? Are explosions and bright lights realistic?
- Do colors pop without looking artificial?
If something seems off, go back to the relevant step and make minor adjustments. Remember, this is about finding a balance that looks great in your specific viewing environment.
Tips for Different TV Technologies (OLED vs. LED/QLED)
While the core principles of HDR calibration are the same, the implementation and specific settings can differ slightly between OLED and LED/QLED TVs.
| Setting | OLED TV Focus | LED/QLED TV Focus |
|---|---|---|
| Black Level (Brightness) | Usually fixed or less impactful for HDR. Focus on “Peak Brightness” or “OLED Light”. Ensure blacks are deep without crushing. | Crucial for detail in shadows. Adjust to reveal near-black detail without making blacks appear gray. |
| Contrast (Peak Brightness) | “OLED Light” or “Pixel Brightness” is your main control for overall HDR brightness. Be mindful of panel longevity. | “Contrast” directly controls peak highlights. Adjust to make brights pop without clipping details. |
| Local Dimming | Not applicable. OLEDs have per-pixel control. | Very important. Set to “High” or “Auto” for best black levels and contrast. Monitor for blooming/haloing artifacts and adjust if severe. |
| Color/Brightness Settings | Similar to LED/QLED, but be aware of potential for temporary “image retention” if “OLED Light” is consistently maxed out on static images. | Standard adjustments, experiment within reason for vibrant, natural colors. |
OLED Specifics:
OLEDs offer perfect blacks and near-instantaneous pixel response. This means you generally don’t need to worry about “black crush” in the same way as LED TVs. The main considerations are managing the panel’s peak brightness (“OLED Light”) for longevity and avoiding image retention with static content. For HDR, you’ll typically want this setting higher than for SDR.
LED/QLED Specifics:
These TVs rely on a backlight (either edge-lit or full-array with local dimming zones) to create brightness. The effectiveness of local dimming is key to good HDR performance. Too few zones or poor control can lead to “blooming” (light halos around bright objects on dark backgrounds). This is where calibrating “Contrast” and fiddling with “Local Dimming” settings becomes paramount.