Quick Summary:
A Bluetooth microphone for your DSLR camera offers wireless freedom and better audio quality for videos. This guide simplifies choosing and using one, ensuring clear sound without trailing cables, perfect for creators of all levels.
Unlock Clear Audio: Your Beginner’s Guide to Bluetooth Microphones for DSLR Cameras

Tired of bulky microphone cables getting in the way of your shots, or picking up unwanted noise? You’re not alone! Getting great audio for your DSLR videos can feel tricky, especially when you’re starting out. But what if there was a way to get crisp, clear sound wirelessly? That’s where a Bluetooth microphone for your DSLR camera comes in. It’s a fantastic tool that can make a huge difference, letting you move freely and focus on capturing that perfect moment. We’ll walk you through everything you need to know, making it super simple to get your wireless audio setup working like a charm. Let’s explore how to get fantastic sound for your videos without the hassle!
Why Go Wireless? The Benefits of a Bluetooth Microphone for DSLR

When you’re filming with your DSLR, sound is just as important as the picture. A built-in camera microphone often picks up room noise or the camera’s own whirring sounds. This is where a dedicated microphone shines, and a wireless one adds a whole new level of convenience.
Imagine interviewing someone across a room, or capturing a scenic shot from a distance – all while your microphone is picking up crystal-clear dialogue or ambient sound. That’s the magic of wireless audio. A Bluetooth microphone specifically designed for DSLR cameras takes this convenience a step further by ditching the physical connection altogether.
Here are some key advantages:
- Freedom of Movement: No more tripping over cables or being tethered to your camera. This is crucial for dynamic shots and when you’re the talent and the camera operator.
- Improved Audio Quality: Bluetooth microphones are designed to capture better sound than your camera’s internal mic. You’ll get clearer dialogue, less background noise, and richer audio.
- Ease of Setup: Many Bluetooth systems are plug-and-play, making them very beginner-friendly.
- Reduced Cable Noise: Cables can sometimes pick up rustling sounds as you move. Wireless eliminates this.
- Versatility: Some systems can connect to multiple devices, not just your camera.
Understanding the Basics: How Bluetooth Microphones Work with DSLRs

So, how does this wireless magic happen? It’s simpler than you might think.
A typical Bluetooth microphone setup for a DSLR involves two main parts: the microphone itself (which might be a lavalier, a clip-on, or a handheld unit) and a receiver. The microphone captures your audio and transmits it wirelessly via Bluetooth to the receiver. This receiver then plugs into your DSLR camera, usually into the microphone input jack.
The key difference between standard Bluetooth and the systems used for cameras is often the protocol and latency. For video, you need audio that is perfectly synced with the video. While standard Bluetooth can sometimes have a noticeable delay (latency), professional wireless microphone systems use optimized Bluetooth codecs or proprietary wireless technology to minimize this delay, ensuring your audio and video are in perfect sync. Brands often highlight “low latency” as a major feature.
It’s important to note that not all cameras have built-in Bluetooth receivers capable of taking an audio input stream directly from a Bluetooth microphone. In most cases, you’ll be using a Bluetooth transmitter/receiver system that is external to both the camera and the microphone. The microphone talks to the transmitter, and the transmitter either sends the signal wirelessly to a receiver that plugs into your camera, or sometimes, the transmitter itself becomes the receiver and plugs into your camera.
For a deeper dive into the technicalities of audio transmission, you might find resources on digital audio transmission and latency management helpful. Understanding these concepts can further clarify why specific wireless systems perform better for video production.
Choosing the Right Bluetooth Microphone for Your DSLR: Key Features to Look For

With so many options out there, picking the right Bluetooth microphone can seem daunting. But when you know what to look for, it becomes much easier. Think of it like choosing the right tool for a job – the better the tool, the better the outcome.
Types of Wireless Microphones
Wireless microphone systems come in a few main forms, and understanding them helps you choose what’s best for your shooting style:
- Lavalier (or Lapel) Microphones: These are tiny microphones that clip onto your clothing, usually near the collar. They are excellent for capturing clear dialogue from a single person, as they are close to the sound source.
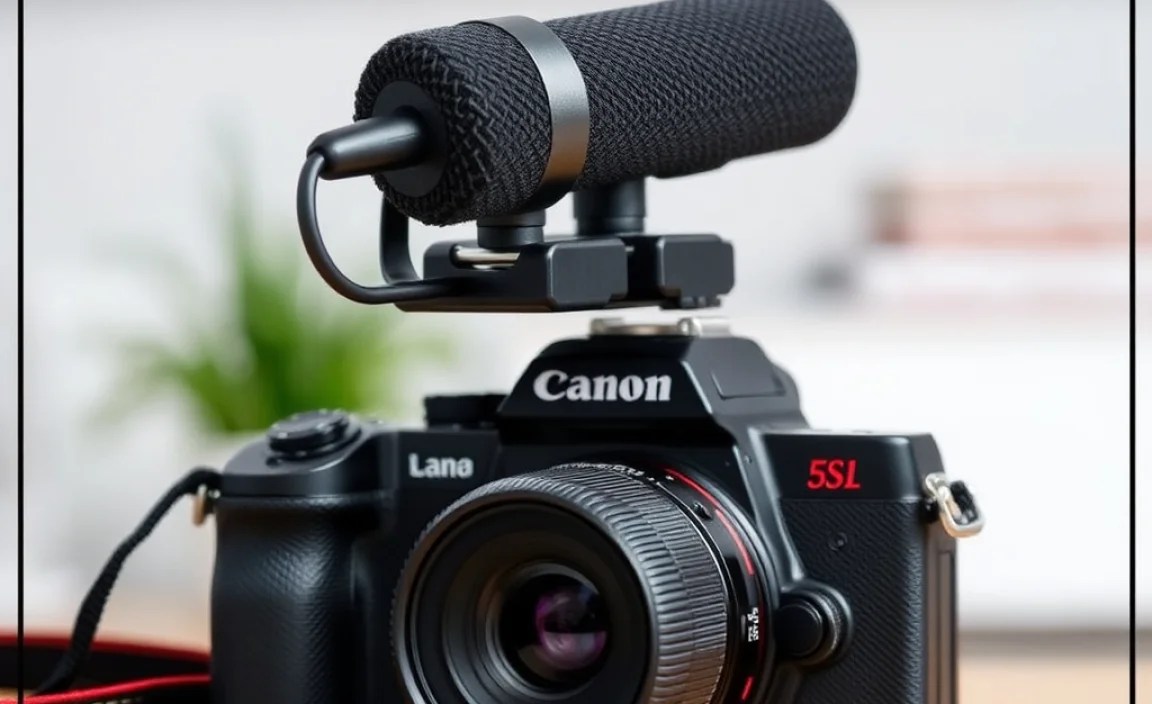
- Shotgun Microphones: These are directional and designed to pick up sound from a specific direction while rejecting sound from the sides and rear. When mounted on a camera or boom pole, they can capture focused audio. Wireless versions still use a transmitter/receiver setup.
- Handheld Microphones: Less common for DSLR rigs unless you’re doing specific interview styles where the subject holds the mic, or for on-camera hosts.
- All-in-One Systems: Some systems offer a combination or are designed for simplicity, often with a small transmitter that clips onto clothing and a built-in microphone.
Essential Features to Consider
Beyond the type of microphone, several features will impact your experience:
- Range: How far can the microphone transmit before the signal weakens? For most indoor use or close-range outdoor shooting, 50-100 feet is often sufficient. For larger spaces or more freedom, look for longer ranges.
- Battery Life: How long does the microphone and receiver unit last on a single charge? You don’t want your audio cutting out mid-shoot. Look for systems that offer several hours of continuous use, and consider if they can be charged or powered via USB while in use.
- Connectivity: How does the receiver connect to your camera? Most will use a standard 3.5mm audio jack. Ensure your camera has this input, or be prepared to use an adapter. Some higher-end systems might offer digital connections.
- Latency: As mentioned, this is the delay between sound being captured and it reaching your camera. For video, low latency is crucial. Look for specs that mention “low latency” or specific figures (e.g., under 20ms).
- Durability and Build Quality: Your gear will be on set, so it needs to withstand regular use. Check reviews for comments on how well the units are built.
- Ease of Use: For beginners, a system that’s simple to pair and operate is key. Does it auto-pair? Are the controls intuitive?
- Number of Channels/Microphones: Do you need to record one person or two simultaneously? Some systems allow for multiple transmitters to connect to a single receiver.
- Microphone Quality: Even with wireless, the microphone itself matters for sound fidelity. Look for specs that mention frequency response and signal-to-noise ratio if available, though reviews are often a better guide for beginners.
Setting Up Your Bluetooth Microphone for DSLR: A Step-by-Step Guide
Getting your wireless microphone system connected to your DSLR is usually straightforward. Here’s a general process you can follow:
Step 1: Unboxing and Charging
First, carefully unbox your new wireless microphone system. Typically, you’ll have a microphone unit (transmitter), a receiver unit, and charging cables. Before you do anything else, ensure both the transmitter and receiver units are fully charged. Most systems use USB-C or micro-USB for charging.
Step 2: Pairing the Transmitter and Receiver
This is the crucial step to establish the wireless connection. The process varies by brand, so always refer to your specific manual. However, it generally involves:
- Turning on both the transmitter and receiver.
- Pressing and holding a pairing button on each unit, or following an on-screen prompt if your units have displays.
- Wait for an indicator light (often on both devices) to show a solid connection, usually changing color or becoming steady.
Some advanced systems might offer automatic pairing, which simplifies this even further.
Step 3: Connecting the Receiver to Your DSLR
The receiver unit needs to send the audio signal to your camera. This is usually done via a 3.5mm audio cable:
- Locate the audio-out port on your receiver unit.
- Locate the microphone input jack on your DSLR camera. This is often labeled with a microphone icon and is usually a 3.5mm jack.
- Connect one end of the audio cable to the receiver’s audio-out port and the other end to your camera’s microphone input.
Important Note: If your DSLR doesn’t have a microphone input jack, you might need an adapter or a different type of wireless system that connects via USB or a hot shoe adapter with audio input capabilities. Always check your camera’s specifications.
Step 4: Mounting and Placement
Position your microphone (transmitter) correctly.
- Lavalier: Clip it securely onto the subject’s clothing, about 4-6 inches below their chin. Avoid clipping it over rustling fabric or too close to the mouth, which can cause plosive sounds (harsh ‘p’ and ‘b’ sounds).
- Shotgun: If you’re using a wireless shotgun, mount it on your camera’s hot shoe or a boom pole, pointing directly at your sound source.
Place the receiver unit where it’s secure but won’t interfere with your shooting. Some systems can attach to your camera’s hot shoe.
Step 5: Camera Settings
Now, you need to tell your DSLR to use the external microphone:
- Turn on your camera.
- Navigate to your camera’s audio settings menu. Look for options like “Microphone Input,” “External Mic,” or “Audio Settings.”
- Select “External Microphone” as your audio input source. If your camera has adjustable input levels, you might need to set this to a suitable level (often manual is preferred for control).
- Test your audio! Start recording a short clip and play it back to ensure you’re getting a clean signal and that the audio levels are appropriate. Adjust the volume on your transmitter or within your camera settings if necessary.
Troubleshooting Common Issues
Even with the best gear, you might encounter a hiccup now and then. Here are some common problems and how to fix them:
- No Sound:
- Check battery levels on both units.
- Ensure the transmitter and receiver are properly paired and the indicator lights show a connection.
- Verify the audio cable is securely plugged into both the receiver and the camera.
- Make sure your camera is set to use an external microphone.
- Check if the volume is turned up on the transmitter (if applicable) and not muted.
- Poor Sound Quality (Hiss, Static, or Dropouts):
- Move closer to your subject to improve signal strength.
- Ensure there are no major obstructions between the transmitter and receiver.
- Check for potential sources of interference (e.g., Wi-Fi routers, other wireless devices) and try to move away from them.
- Some systems have adjustable audio gain. Try reducing the gain on the transmitter if it sounds distorted (clipping), or increasing it if it’s too quiet.
- Audio and Video Not Synced:
- This indicates high latency. Unfortunately, if your system has high latency, there might not be much you can do in-camera. Look for systems advertised with “ultra-low latency.”
- Some video editing software allows you to manually sync audio and video in post-production by nudging the audio track.
- Receiver Not Plugging In Correctly:
- Ensure you are using the correct cable and that it’s fully inserted.
- Confirm your DSLR has a standard 3.5mm mic input. Older or very basic DSLRs might not, or they might have a different jack size.
Remember, consulting your product’s user manual is always the first step when troubleshooting specific issues.
Top Bluetooth Microphone Systems for DSLRs (Examples)
While I can’t recommend specific models that might become outdated, I can highlight types of popular systems and brands known for reliable wireless audio for DSLRs.
When looking, you’ll often find options from brands like RODE, Sennheiser, DJI, and smaller brands focused on creator gear. These often come in various configurations:
Entry-Level Options (Great Starters)
These are typically simpler systems, often with a clip-on transmitter that has a built-in mic, and a receiver that plugs directly into your camera. They focus on ease of use and affordability.
- Features to expect: Decent range (30-50m), good battery life (3-5 hours), plug-and-play simplicity, low latency for stable sync.
- Ideal for: Vlogging, interviews, basic content creation.
Mid-Range Systems (Improved Performance)
These often offer better build quality, longer range, and sometimes the option to connect an external lavalier mic to the transmitter for even better sound. They might also have advanced features like multi-channel support.
- Features to expect: Extended range (50-100m+), longer battery life (6+ hours), better audio fidelity, more robust build, potentially dual-channel support (two mics at once).
- Ideal for: More serious YouTubers, small production teams, filmmakers.
Professional Wireless Systems (Premium)
These systems are built for demanding use and offer the highest audio quality, longest range, and most advanced features. They might use different transmission technologies beyond basic Bluetooth for optimal performance and reliability.
- Features to expect: Very long range (100m+), exceptional audio quality, robust construction, advanced settings, sophisticated interference management.
- Ideal for: Professional videographers, broadcast journalism, filmmakers.
Wireless Microphone Receiver Buying Guide Table
To help you compare, here’s a look at what to consider when comparing different types of wireless microphone receivers:
| Feature | Beginner Focus | Intermediate Needs | Professional Requirements |
|---|---|---|---|
| Ease of Use | Plug-and-play, auto-pairing, minimal setup. | Clear instructions, easy menus, some customization. | Comprehensive controls, advanced settings, detailed manuals. |
| Range | 20-50 meters (65-165 feet) | 50-100 meters (165-330 feet) or more. | 100+ meters (330+ feet), reliable in complex environments. |
| Battery Life | 3-5 hours, USB charging. | 6+ hours, potentially swappable batteries. | 8+ hours, robust battery management, quick charging. |
| Audio Quality | Clear dialogue, improved over camera mic. | Higher signal-to-noise ratio, wider frequency response. | Broadcast quality, minimal distortion, superior clarity. |
| Latency | Acceptable for most video needs. | Very low, minimal sync issues. | Ultra-low latency, virtually imperceptible sync delay. |
| Durability | Adequate for casual use. | Robust construction for frequent use. | Heavy-duty, weather-resistant, built for tough conditions. |
| Connectivity Options | 3.5mm TRS/TRRS output. | 3.5mm, XLR adapter options, digital output. | Multiple options, advanced digital interfaces. |
Tips for Best Performance with Your Wireless Mic
Once you’ve got your system set up, here are some extra tips to ensure you’re getting the best possible audio:
- Test Before You Shoot: Always do a quick audio test before your main recording session. Record a few seconds of dialogue and listen back carefully.
- Monitor Your Audio: If your system allows (or if you have a headphone jack on your camera or receiver), use headphones to monitor the audio while you’re recording. This helps you catch any issues immediately.
- Manage Interference: Whenever possible, try to run your wireless microphone system on a different frequency band than other wireless devices (like Wi-Fi routers, wireless headphones, or other microphones) that might be in use in the same area. Some systems have frequency scanning features to help you find a clear channel.
- Line of Sight is Best: While wireless systems
Related Posts
- Ultimate 2025 Speaker Buying Guide & Setup Tips
- Top Gaming Microphones Under $100 For Ultimate Sound!
- Ultimate Tv Buying Guide For Beginners: Get Started Now!
- Ultimate Wireless Microphone Guide: Find Your Perfect Fit
- How To Choose Screen Size Vs. Performance: Expert Tips
- Best Microphone For Mac For Recording Studio Success

Microphone For Android Review: Boost Your Sound Quality!
Are Monoprice Cables Good For Digital Electronic Devices?