Quick Summary:
Setting up your soundbar with your TV is straightforward! This guide provides essential steps for a smooth “soundbar setup with TV review” experience, ensuring you get better audio without the hassle. We’ll cover connections, settings, and tips for the best sound.
You know that feeling. You’ve got a big game, a thrilling movie, or your favorite show coming on, and the TV speakers just don’t cut it. The dialogue is muffled, the explosions are weak, and you’re missing out on the full experience. Upgrading your TV’s sound is one of the best ways to boost your home entertainment, and a soundbar is a popular, easy solution. But how do you actually set one up? It can seem a little daunting, but don’t worry. I’m Bob E Riley, and I’m here to walk you through every step of your soundbar setup with TV, making sure you get that cinematic sound without any tech headaches.
Why a Soundbar? The Simple Upgrade
TVs have gotten incredibly thin, which looks sleek, but it leaves very little room for decent speakers. That’s where soundbars come in. They’re long, slim speakers designed to sit neatly in front of your TV or be mounted on the wall. They pack a much bigger audio punch than your TV’s built-in speakers, offering clearer dialogue, deeper bass, and a more immersive soundstage. Think of it as giving your TV an instant audio facelift.
A good soundbar can transform watching movies, playing games, or listening to music. You’ll hear every whisper, feel every explosion, and get a richer, more detailed sound. This guide will make your soundbar setup with TV as easy as turning on your TV itself.
Getting Started: What You’ll Need
Before we dive into the setup process, let’s make sure you have everything ready. Most soundbars come with the necessary cables, but it’s always good to double-check. Here’s a common checklist:
- Your Soundbar: Of course!
- The Power Adapter: Every soundbar needs power.
- Remote Control: For adjusting volume and settings.
- Connection Cables: Usually includes an HDMI cable and/or an optical audio cable.
- Your TV Remote: You’ll need this to change TV settings.
- Optional: Wall Mount Kit: If you plan to mount your soundbar.
- Optional: Subwoofer: Many soundbars come with a separate subwoofer for extra bass.
Connecting Your Soundbar to Your TV: The Core Steps
This is the most crucial part of your soundbar setup with TV. There are a few common ways to connect your soundbar, and the best method depends on the ports available on both your TV and your soundbar. We’ll cover the most popular and recommended methods.
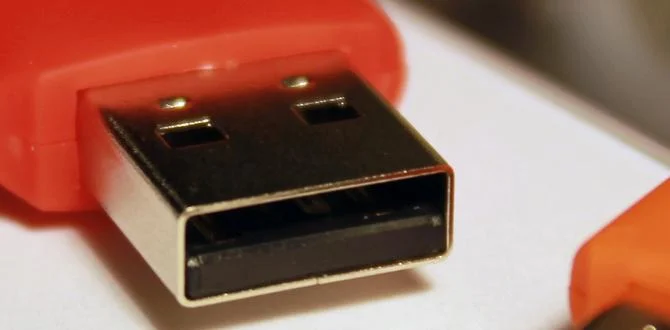
Method 1: HDMI ARC (Audio Return Channel) – The Best Option
HDMI ARC is the most modern and recommended way to connect your soundbar. It uses a single HDMI cable for both sending audio from your TV to the soundbar and receiving video signals. Plus, it allows your TV remote to control the soundbar’s volume, which is super convenient!
What you need:
- An HDMI cable.
- A compatible HDMI ARC port on both your TV and your soundbar. Look for a port labeled “HDMI ARC” or simply “ARC”.
Steps:
- Locate the HDMI ARC Ports: Find the HDMI port labeled “ARC” on the back of your TV. Do the same for your soundbar.
- Connect the Cable: Plug one end of the HDMI cable into the TV’s ARC port and the other end into the soundbar’s ARC port.
- Power On: Plug in your soundbar and TV and turn them on.
- Enable ARC on Your TV: This is important! You’ll need to go into your TV’s settings menu. Look for options like “HDMI-CEC,” “Anynet+,” “Simplink,” “Bravia Sync,” or “Viera Link” (the name varies by TV manufacturer). Turn this feature on. Then, find the “Audio Output” or “Sound” settings and select “HDMI ARC” or “Audio Receiver.” Some TVs might automatically detect the soundbar when ARC is enabled; others require manual selection.
- Enable ARC on Your Soundbar: Some soundbars automatically detect the ARC connection. Others might have a setting in their own menu or require you to select “HDMI ARC” as the input source using the soundbar’s remote. Consult your soundbar’s manual if unsure.
- Test the Connection: Play some content on your TV. You should hear sound coming from the soundbar. Try adjusting the volume with your TV remote. If it works, you’ve successfully set up HDMI ARC!
External Link: Learn more about HDMI ARC and CEC from the experts at Rtings.com, a reputable source for TV and audio reviews and information.
Method 2: Optical Audio Cable – A Reliable Alternative
If your TV or soundbar lacks HDMI ARC support, an optical audio cable is the next best option. This is a very common and reliable connection method that is universally supported.
What you need:
- An optical audio cable (often called a Toslink cable). These have small, square-ish connectors, often with a plastic cap that needs to be removed before plugging in.
- An “Optical Out” port on your TV and an “Optical In” port on your soundbar.
Steps:
- Locate Optical Ports: Find the “Optical Out” port on your TV and the “Optical In” port on your soundbar.
- Prepare the Cable: Remove the protective plastic caps from both ends of the optical cable. Be careful not to touch the cable’s end.
- Connect the Cable: Plug one end into the TV’s “Optical Out” and the other into the soundbar’s “Optical In.” The connector is directional, so it should only fit one way.
- Power On: Turn on your TV and soundbar.
- Select Input on Soundbar: Using your soundbar’s remote, select “Optical” or “TOSLINK” as the audio input source.
- Configure TV Audio Output: Go into your TV’s sound settings menu. Select “Audio Output” and choose “Optical” or “External Speakers (Optical).” You might also need to turn off your TV’s internal speakers.
- Test the Connection: Play content on your TV. You should hear sound from the soundbar. Note that with an optical connection, your TV remote usually cannot control the soundbar’s volume; you’ll need to use the soundbar’s remote for that.
Method 3: Analog Audio Cables (3.5mm or RCA) – For Older Devices
If your TV and soundbar are older and don’t have HDMI ARC or optical ports, you might be limited to analog connections. These are less common for modern soundbars but still exist.
What you need:
- For 3.5mm: A 3.5mm audio cable (like a headphone cable).
- For RCA: An RCA stereo cable (usually red and white connectors).
- The corresponding “Audio Out” ports on your TV (e.g., headphone jack or red/white RCA ports) and “Audio In” ports on your soundbar.
Steps (3.5mm Example):
- Locate Ports: Find the headphone jack on your TV and the “Aux In” or “3.5mm In” port on your soundbar.
- Connect the Cable: Plug one end into the TV’s headphone jack and the other into the soundbar’s Aux In port.
- Power On: Turn on your TV and soundbar.
- Select Input on Soundbar: Use the soundbar’s remote to select “AUX” or “3.5mm” as the input.
- Configure TV Audio Output: In your TV’s sound settings, you might need to select “Audio Output” as “Headphone” or “External Speakers.” You may also need to adjust the TV’s volume to be fixed or disable its internal speakers.
- Test the Connection: Play content. You’ll likely need to use the soundbar remote for volume control and potentially experience slightly lower audio quality compared to digital methods.
Optimizing Your Soundbar Setup: Placement and Settings
Once your soundbar is connected, a few tweaks can make a big difference in sound quality. It’s not just about plugging it in; it’s about placing it right and adjusting settings.
Placement is Key
Where you put your soundbar affects how you hear it.
- In Front of the TV: The most common spot. Ensure it’s not blocking the TV’s sensors (like the remote sensor) or the screen itself. If it’s too tall, consider tilting it slightly upwards or repositioning it.
- Below the TV: Ideal for shelves or entertainment centers. Make sure it has some breathing room; don’t push it too far back.
- Wall-Mounted: Many soundbars come with wall-mounting brackets. This can be a clean look and might improve sound projection, especially if you have thin front speakers on your TV. Check the manual for correct mounting procedures.
- Subwoofer Placement: If your soundbar has a separate subwoofer, its placement is also important for bass response. Often, placing it in a corner can enhance bass, but it can also make it sound boomy. Experiment with positions along the front wall. A good trick is to place the subwoofer where you’ll be sitting, play some bass-heavy music, and then crawl around the room to find where it sounds best – that’s likely the ideal spot for your subwoofer!
Soundbar Settings and TV Audio Modes
Your soundbar likely has various sound modes and EQ settings. Your TV also has audio options that work in conjunction.
- Sound Modes: Most soundbars offer modes like “Standard,” “Movie,” “Music,” “Game,” or “Clear Voice.”
- Standard: A balanced setting for everyday listening.
- Movie: Often enhances surround effects and bass for a cinematic feel.
- Music: Aims for a more natural, detailed sound reproduction.
- Clear Voice/Dialogue Enhancement: Boosts vocal frequencies to make dialogue easier to understand, especially in noisy scenes or for those with hearing difficulties. This is a lifesaver for many!
- Game: May offer specific audio cues or immersive effects tailored for gaming.
- Surround Sound Settings: If your soundbar supports virtual surround sound, playing with this setting can enhance the feeling of spaciousness. Some soundbars have physical up-firing speakers for Dolby Atmos or DTS:X, creating a true three-dimensional sound bubble.
- Bass and Treble Controls: Adjust these to your preference. Lowering bass can prevent muddiness, while increasing treble can add clarity.
- TV Audio Settings:
- Digital Audio Output Format: If using HDMI ARC or Optical, you might find options like “Auto,” “PCM,” “Dolby Digital,” or “DTS.”
- PCM: Uncompressed stereo sound. Good if your soundbar is basic, but lacks surround sound.
- Dolby Digital/DTS: Compressed surround sound formats. Your soundbar will decode these. This is generally the best option for surround sound.
- Auto: Lets the TV try to send the best format it can.
- CEC (Consumer Electronics Control): This is crucial for HDMI ARC to work. Ensure it’s enabled on your TV (names like Anynet+, Simplink, etc.).
- Turn Off TV Speakers: To avoid echo or having audio from both sources, make sure your TV’s internal speakers are disabled in the audio settings.
A Quick Review of Soundbar Connection Types
To help visualize, here’s a quick look at the primary connection methods:
| Connection Type | Pros | Cons | Best For |
|---|---|---|---|
| HDMI ARC | Single cable for audio/control, best audio quality, remote control of volume. | Requires compatible ARC ports on both devices. | Modern TVs and soundbars; ease of use. |
| Optical (Toslink) | Widespread compatibility, good digital audio quality, reliable. | No remote volume control via TV remote, only supports compressed surround sound (usually). | When HDMI ARC isn’t available; older compatible devices. |
| Analog (3.5mm/RCA) | Works with very old devices. | Lowest audio quality, potential for interference, no smart features. | Very old TVs and soundbars only. |
Troubleshooting Common Soundbar Setup Issues
Even with the best guides, sometimes things don’t work right away. Don’t panic! Here are common hiccups and how to fix them.
- No Sound:
- Check Cables: Ensure they are securely plugged in at both ends.
- Verify Input Source: Is the soundbar set to the correct input (HDMI ARC, Optical, AUX)?
- TV Audio Settings: Confirm your TV’s audio output is set to external speakers/HDMI ARC/Optical and that internal speakers are off.
- Volume: Is the volume up on both the TV and the soundbar?
- Restart Devices: Sometimes a simple power cycle (unplugging both TV and soundbar for a minute, then plugging back in) can resolve glitches.
- Test Cables: If possible, test the connection cables with other devices.
- Soundbar Volume Not Controlled by TV Remote (HDMI ARC):
- Enable CEC: Double-check that HDMI-CEC is enabled on your TV (Anynet+, Simplink, etc.) and that the soundbar supports it.
- Correct HDMI Port: Ensure you are using the HDMI port specifically labeled “ARC” on both devices.
- Device Order: Sometimes, power cycling in a specific order helps. Turn off both, plug in, then turn on the TV first, then the soundbar.
- Echo or Delayed Sound:
- Audio Sync Settings: Many soundbars and TVs have an “Audio Delay” or “Lip Sync” setting. Adjust this to match the audio to the video.
- Connection Type: Analog connections are more prone to delay. If using ARC or Optical, troubleshoot other settings first.
- Surround Sound Not Working:
- Source Material: Ensure the content you’re watching has a surround sound track (Dolby Digital, DTS). Streaming services often have this option marked.
- TV/Source Device Settings: Check the audio output settings on your TV, streaming device (like a Roku or Apple TV), or Blu-ray player to ensure it’s set to output surround sound.
- Soundbar Settings: Make sure your soundbar’s surround mode is enabled and compatible with the incoming format.
Frequently Asked Questions About Soundbar Setup
Q1: Do I need a soundbar if my TV has good speakers?
A1: While some TVs have decent speakers, soundbars almost always offer a significant upgrade in clarity, depth, and immersion. They are especially helpful for dialogue clarity and deeper bass, making a noticeable difference in movies and shows.
Q2: Can I use my TV speakers and soundbar at the same time?
A2: While technically possible on some very old setups, it’s generally not recommended. Having both active can cause echo, phasing issues, and a generally muddy sound. It’s best to disable your TV’s internal speakers in the settings once your soundbar is connected and working.
Q3: My soundbar has multiple HDMI ports. Which one should I use?
A3: Look for a port specifically labeled “HDMI ARC” or “ARC” on the soundbar. If there are other HDMI inputs, they are typically for connecting devices like gaming consoles or Blu-ray players to the soundbar, which then passes the video signal to the TV. For connecting the soundbar to the TV, the ARC port is usually the