A professional microphone for karaoke can dramatically elevate your singing experience, making you sound clearer and more powerful. It’s the secret weapon for home karaoke stars wanting studio-quality sound for their performances.
Love to sing your heart out at home? Imagine hitting those high notes with clarity and power, without that tinny or muffled sound. Many home karaoke setups use basic mics that just don’t do your voice justice. It can be frustrating when your performance doesn’t match the sound in your head!
But don’t worry, finding the right professional microphone for karaoke is easier than you think. This guide is here to help you understand what makes a great karaoke mic and how to pick the perfect one for your voice and setup. Get ready to sound like a superstar!
Why Upgrade from a Basic Karaoke Mic?
You might be wondering, “Why do I need a ‘professional’ microphone for karaoke?” The answer is simple: sound quality and performance. Those little handheld mics that often come with basic karaoke machines are typically designed for casual use and have limitations. They might be:
- Less sensitive, requiring you to shout to be heard.
- Prone to feedback (that annoying screeching sound).
- Not great at capturing the full range of your voice, making it sound flatter.
- Built with cheaper materials that might not last.
A professional microphone for karaoke, on the other hand, is engineered for better sound reproduction, durability, and a more enjoyable singing experience. It’s like going from a basic smartphone camera to a dedicated DSLR – the results are just night and day.
Understanding Microphone Types: Dynamic vs. Condenser
When you start looking at microphones, you’ll quickly encounter two main types: dynamic and condenser. For karaoke, dynamic microphones are usually the go-to choice for most home users. Let’s break down why:
Dynamic Microphones
Dynamic mics are robust and handle loud sounds well. They don’t require external power (phantom power) and are less sensitive to background noise, which is perfect for lively home environments. They are built tough, able to withstand the occasional bump or drop.
Pros:
- Durable and reliable
- Great at handling loud vocals
- No external power needed
- Less sensitive to background noise
- Generally more affordable
Cons:
- Might not capture subtle vocal nuances as well as condensers
Condenser Microphones
Condenser mics are more sensitive and capture a wider range of frequencies, offering a more detailed and nuanced sound. However, they require phantom power (usually supplied by your mixer or audio interface) and are more sensitive to background noise and handling noise. While fantastic for studio recording, they can sometimes be overkill or tricky to manage for a loud karaoke party.
Pros:
- Exceptional detail and clarity
- Captures a wide frequency range
- Ideal for studio environments
Cons:
- Require phantom power
- More sensitive to background noise
- Less durable than dynamic mics
- Can be more expensive
For most karaoke enthusiasts, a good dynamic microphone offers the best balance of performance, durability, and ease of use.
Key Features to Look For in a Professional Karaoke Microphone
So, what exactly makes a microphone “professional” and “good for karaoke”? Here are the essential features to consider:
1. Polar Pattern
This describes the directionality of the microphone – how it picks up sound. For karaoke, you’ll usually want a cardioid pattern.
- Cardioid: Picks up sound primarily from the front, rejecting sound from the sides and rear. This is crucial for karaoke to minimize sound bleed from speakers and reduce feedback.
- Supercardioid/Hypercardioid: Even more focused than cardioid, but with a small rear pickup lobe.
- Omnidirectional: Picks up sound from all directions. Not ideal for karaoke due to high feedback risk.
Recommendation: Stick with cardioid polar patterns for singing.
2. Frequency Response
This refers to how well a microphone captures different sound frequencies (bass, mids, treble). A “flat” frequency response means it captures all sounds equally. For vocals, you often want a microphone that slightly emphasizes certain frequencies to make the voice cut through a mix or sound warmer. Many professional vocal microphones have a slight “presence boost” in the upper-mid frequencies that helps vocals sound clearer and more forward.
3. Sensitivity
This indicates how much electrical output a microphone produces for a given sound pressure level. Higher sensitivity means the mic picks up quieter sounds more easily. For karaoke, you generally want a mic that’s sensitive enough to pick up your voice clearly without you having to strain.
4. Durability and Build Quality
Karaoke can get energetic! A professional microphone is built to last. Look for solid metal construction and a sturdy grille. This is where dynamic mics often shine.
5. Connectivity
Most professional microphones use an XLR connector, which is a three-pin professional audio standard. This provides a balanced signal, reducing noise over longer cable runs. You’ll need a compatible mixer, amplifier, or audio interface with XLR inputs to use these. Some mics come with USB options, which can plug directly into a computer, but XLR is the standard for robust audio setups.
6. Wired vs. Wireless
Wired: Generally more affordable, reliable, and offer excellent sound quality. No battery worries! You’ll need an XLR cable and a compatible audio system.
Wireless: Offers freedom of movement, which is great for energetic performers. However, they are significantly more expensive, require batteries, and can sometimes experience interference. For home karaoke, a good wired mic is often the best value.
Top Professional Microphones for Karaoke (and Why)
Let’s talk about some specific, well-regarded microphones that are excellent choices for karaoke. These are industry standards for a reason!
1. Shure SM58
This is the workhorse of the live performance world, and for good reason. It’s iconic, virtually indestructible, and sounds fantastic for vocals.
- Type: Dynamic
- Polar Pattern: Cardioid
- Why it’s great for karaoke: Its sound profile is designed to make vocals cut through the mix, it handles high volumes without distortion, and it’s incredibly durable. It’s also very forgiving with vocals that might not be perfectly in tune, helping them sound present.
- Connectivity: XLR
You’ll see the Shure SM58 on stages worldwide, from dive bars to massive arenas. It’s a reliable, no-nonsense choice for anyone wanting solid vocal performance.
2. Sennheiser e835 / e845
Sennheiser offers fantastic alternatives that compete directly with Shure. The e835 (cardioid) and e945 (supercardioid) are popular choices known for their clarity and presence.
- Type: Dynamic
- Polar Pattern: e835 (Cardioid), e945 (Supercardioid)
- Why it’s great for karaoke: They offer a slightly brighter and more detailed sound than the SM58, which can be great for bringing out nuances in a voice. They also handle feedback rejection very well.
- Connectivity: XLR
If you’re looking for a slightly different tonal character that still offers excellent performance and durability, the Sennheiser line is worth exploring.
3. Audio-Technica AT2020 (Condenser Option for Enthusiasts)
While dynamic mics are king for most, if you have a quieter setup and crave more detail, a condenser might be an option. The AT2020 is a popular entry-level condenser that’s fantastic for vocals in a controlled environment.
- Type: Condenser
- Polar Pattern: Cardioid
- Why it’s great for karaoke: It captures more detail and nuance than dynamic mics. However, it requires phantom power and is more sensitive to background noise and room acoustics.
- Connectivity: XLR
Note: This is best suited if you have a quiet room, an audio interface with phantom power, and are aiming for a more studio-like vocal recording experience at home.
4. Shure PGA58
A more budget-friendly option from Shure, the PGA58 offers many of the benefits of the SM58 at a lower price point. It’s a great starting point for those who might not want to invest heavily upfront.
- Type: Dynamic
- Polar Pattern: Cardioid
- Why it’s great for karaoke: It’s a solid performer that’s durable and designed for vocals. While it might not have the absolute polish of the SM58, it’s a significant upgrade from basic mics and very affordable.
- Connectivity: XLR
Setting Up Your Professional Karaoke Microphone
Once you’ve got your microphone, setting it up correctly is key to getting that amazing sound. Here’s a simple rundown:
Step-by-Step Setup:
- Connect the Microphone: Plug your microphone’s XLR cable into the microphone itself. Then, plug the other end of the XLR cable into the microphone input on your mixer, amplifier, or audio interface.
- Power On: If you’re using a condenser microphone, ensure your mixer or interface is providing phantom power (+48V). Most devices have a dedicated button for this. Dynamic mics do not need phantom power.
- Connect to Speakers/Amplifier: Follow the instructions for your specific audio system to connect your mixer or interface to your speakers or amplifier.
- Adjust Gain (Preamp Level): This is crucial! On your mixer or interface, there’s a gain knob for each input. Sing into the microphone at your normal singing volume. Slowly turn up the gain until the signal meter is peaking in the “green” or “yellow” range, but NEVER into the “red” (which indicates clipping or distortion). You want a healthy signal without it being too quiet or too loud.
- Adjust Volume (Fader/Level): Once the gain is set, use the channel fader or volume knob on your mixer/interface to control the overall loudness of the microphone.
- EQ (Optional but Recommended): Most mixers have EQ controls (Bass, Mid, Treble). Experiment with these to shape your vocal sound. A slight boost in the treble can add clarity, while a small cut in the mids can sometimes reduce muddiness.
- Monitor Sound: Listen to yourself through your speakers or headphones. Make small adjustments to gain, EQ, and volume until you’re happy with the sound.
Essential Accessories for Your Setup
To get the most out of your professional karaoke microphone, a few accessories can make a big difference:
- XLR Cable: A good quality, shielded XLR cable is essential for connecting your mic to your audio gear.
- Microphone Stand: Holding a mic for an entire karaoke session can be tiring. A stand keeps your hands free and your microphone positioned optimally.
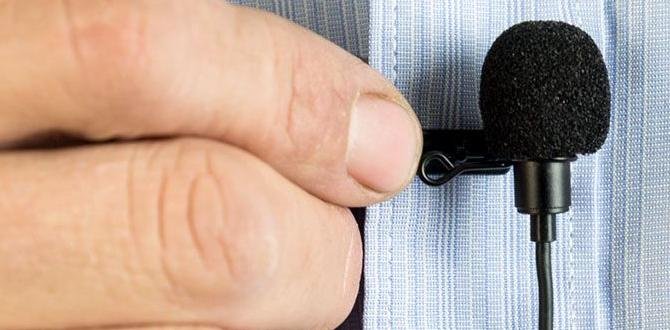
- Pop Filter/Windscreen: While not always necessary for home karaoke, a pop filter (for studio mics) or windscreen (for dynamic mics) can help reduce “plosives” (harsh ‘p’ and ‘b’ sounds) and breath noise.
- Audio Interface or Mixer: This is how you’ll connect your microphone to your speakers. An audio interface is ideal for connecting to a computer for recording or playback, while a mixer provides hands-on control over sound levels, EQ, and multiple inputs.
Karaoke Microphone Setup Scenarios
Your ideal professional microphone setup might vary depending on your existing gear. Here are a couple of common scenarios:
Scenario 1: Connecting to a Home Stereo/PA System
If you have a home stereo receiver or a powered PA speaker, you’ll likely need a small mixer or an XLR-to-1/4-inch adapter (though a mixer is highly recommended).
Setup:
- Microphone (XLR) -> Mixer (XLR Input)
- Mixer (Main Out – 1/4″ or RCA) -> Amplifier/Powered Speaker
A basic 2-channel mixer is perfect for a karaoke setup, allowing you to control mic levels and mix in music from another source (like your phone or laptop).
Scenario 2: Connecting to a Computer (for Software Karaoke/Recording)
If you use karaoke software on your computer or want to record yourself, an audio interface is the best route.
Setup:
- Microphone (XLR) -> Audio Interface (XLR Input & Phantom Power if needed)
- Audio Interface (USB) -> Computer
- Computer -> Speakers/Headphones
This setup gives you high-quality audio input and output for your computer, enabling you to use karaoke apps or even record your performances.
Troubleshooting Common Karaoke Microphone Issues
Even with a great mic, you might run into a hiccup. Here are solutions to common problems:
- Feedback/Howling: This is usually caused by the microphone picking up sound from the speakers and re-amplifying it.
- Solution: Turn down the volume slightly. Reposition speakers away from the microphone. Use a mic with a tighter polar pattern (like cardioid) and ensure you’re not pointing the mic directly at a speaker. Adjust EQ to cut frequencies causing the feedback.
- No Sound:
- Solution: Check all cable connections. Ensure the microphone is turned on (if it has a switch). Verify phantom power is engaged for condenser mics. Check the gain and volume levels on your mixer/interface. Test the microphone with a different cable or on a different input.
- Sound is Distorted or “Crackly”:
- Solution: The gain is likely set too high, causing the signal to “clip.” Turn down the mic’s gain setting on your mixer/interface. If the problem persists, the microphone or cable might be damaged.
- Sound is Too Quiet:
- Solution: Increase the gain on your mixer/interface, ensuring it doesn’t reach the red zone. Make sure you’re speaking directly into the most sensitive part of the microphone (usually the grille).
For more in-depth audio troubleshooting, resources like the Shure support site offer excellent guides on common audio issues.
Making Your Karaoke Sound Even Better: Tips and Tricks
Ready to take your home karaoke game to the next level? Here are some professional tips:
- Mic Technique: Don’t hold the microphone too far away! For most dynamic mics, singing about 1-3 inches from the grille is optimal. Slightly angle the mic away from your mouth to reduce “plosives” and breath noise.
- Room Acoustics Matter: Hard, reflective surfaces (like bare walls and glass) can cause echoes. Soft furnishings like carpets, curtains, and upholstered furniture can absorb sound and make vocals sound clearer.
- Experiment with EQ: As mentioned, EQ can sculpt your voice. A little goes a long way! Don’t overdo it, as it can make vocals sound unnatural. Search online for “vocal EQ settings for karaoke” to find starting points.
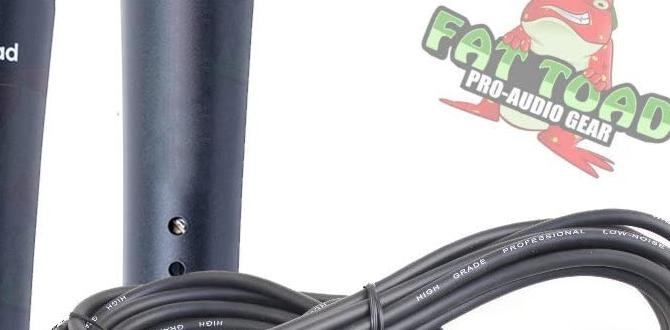
- Use a Good Quality Cable: It might sound like a small thing, but a well-shielded, durable XLR cable can prevent unwanted noise and give you consistent performance.
- Listen Critically: Record yourself singing! It’s the best way to hear what your audience hears and identify areas for improvement in your mic technique or EQ.
Frequently Asked Questions (FAQ)
Q1: What is the best type of microphone for home karaoke?
For most home karaoke users, a dynamic cardioid microphone is the best choice. They are durable, handle loud vocals well, are less prone to feedback, and don’t require extra power.
Q2: Do I need a special mixer or amplifier for a professional karaoke microphone?
Yes, professional microphones typically use an XLR connector. You’ll need a mixer, audio interface, or amplifier with XLR microphone inputs to connect and use them. These devices also let you control volume and EQ.
Q3: How far should I hold the microphone when singing karaoke?
For dynamic mics like the Shure SM58, try holding it about