Quick Summary:
Choosing the right microphone for YouTube karaoke is simple! Start with a USB condenser mic for clear vocals and easy setup. Look for cardioid patterns to reduce background noise. Test different mic placements to find your sweet spot. Good audio makes your karaoke go from amateur to amazing.
Hey everyone, Bob E Riley here! Ever dreamt of belting out your favorite tunes on YouTube for karaoke nights but felt your voice sounded a bit… fuzzy? You’re not alone! Getting clear, crisp audio for your karaoke videos can feel like a mystery. But don’t worry, it’s totally achievable, even if you’re new to audio gear. We’re going to walk through how to pick the perfect microphone that makes your singing sound fantastic for your YouTube audience. Let’s make your voice shine!
Why the Right Microphone Matters for YouTube Karaoke
Your voice is the star of the show when it comes to karaoke, and that’s exactly what your microphone is there to capture. A bad microphone can make even the most talented singer sound tinny, distant, or drowned out by background noise. For YouTube, this means viewers might click away because the audio just isn’t pleasant. When you use a microphone designed to pick up vocals clearly, you’re setting yourself up for success. It ensures your audience hears every note, every lyric, and all the passion you put into your performance. Think of it as giving your voice the spotlight it deserves!
Understanding Microphone Types for Karaoke
When you start looking for a microphone, you’ll see a few different types. For YouTube karaoke, we generally want something that’s easy to set up and delivers great sound quality for vocals. Let’s break down the most common and relevant types.
Condenser vs. Dynamic Microphones
These are the two main categories you’ll encounter. Each has its strengths.
- Condenser Microphones: These are fantastic for capturing detail and nuance. They’re very sensitive, meaning they pick up a wide range of frequencies, which is perfect for the subtleties of singing. They usually require phantom power (often built into USB mics or audio interfaces), but many USB condenser mics handle this automatically. For clear, bright vocal reproduction, condenser mics are often a top choice.
- Dynamic Microphones: These are generally more rugged and less sensitive than condenser mics. They handle high sound pressure levels (SPL) really well, meaning they won’t distort easily if you sing very loudly up close. Think of microphones used for live stage performances – those are often dynamic. While great for loud environments, they might not capture the same level of vocal detail as a condenser for a home recording setup.
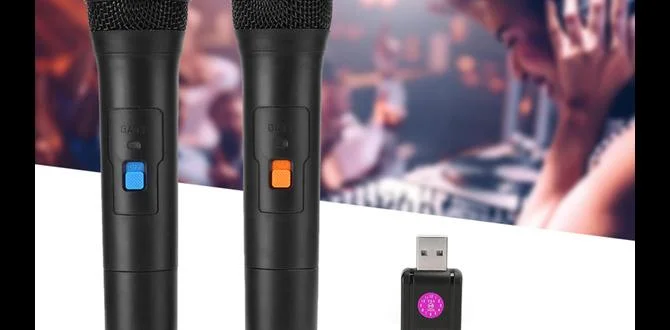
USB vs. XLR Microphones
This distinction is all about how the microphone connects to your computer or recording device.
- USB Microphones: These are the easiest for beginners. You simply plug them directly into a USB port on your computer, and they’re usually ready to go. They often have built-in preamps and analog-to-digital converters, making setup incredibly straightforward. Many excellent condenser microphones for YouTube karaoke fall into this category.
- XLR Microphones: These use a professional standard 3-pin connector. To use an XLR microphone, you’ll need an audio interface or a mixer to convert the analog signal to digital and provide phantom power if it’s a condenser mic. While they offer potentially higher sound quality and more flexibility for future upgrades, they involve more gear and a slightly steeper learning curve.
For most people starting out with YouTube karaoke, a USB condenser microphone is the sweet spot. It offers excellent sound quality for vocals and is incredibly simple to set up.
Key Features to Look for in Your Karaoke Microphone
Once you know the type of microphone you want, here are the specific features to consider to ensure it’s a great fit for your YouTube karaoke channel.
Polar Patterns: What They Are and Why They Matter
The polar pattern describes how sensitive a microphone is to sound coming from different directions. For karaoke, focusing on a microphone with a specific pattern can make a big difference in sound quality.
- Cardioid Pattern: This is the most common and beneficial pattern for solo vocalists. It picks up sound primarily from the front of the microphone and rejects sound from the sides and especially the rear. This is perfect for home setups because it will help minimize background noise like computer fans, keyboard clicks, or room echo. You’ll want to sing directly into the front of a cardioid microphone.
- Omnidirectional Pattern: This pattern picks up sound equally from all directions. While useful for capturing a room’s ambiance or multiple sources evenly, it’s not ideal for solo vocals in a typical home recording environment, as it will pick up a lot of unwanted room noise.
- Bidirectional (Figure-8) Pattern: This pattern picks up sound equally from the front and the rear, while rejecting sound from the sides. This is great for duets where two singers face each other, but less common for single karaoke performers.
Recommendation: Look for microphones with a cardioid polar pattern for the best results in a non-professional studio setting.
Frequency Response
Frequency response refers to the range of sound frequencies a microphone can pick up and how evenly it reproduces them. For vocals, you want a microphone that has a relatively flat response across the mid-range frequencies where the human voice sits. Many microphones designed for vocals will have a slight boost in the higher frequencies to add clarity and presence, and sometimes a slight dip in very low frequencies to reduce rumble. This detail is often found in the microphone’s specifications on the manufacturer’s website.
Sensitivity and Signal-to-Noise Ratio (SNR)
Sensitivity tells you how well a microphone converts acoustic sound into an electrical signal. Higher sensitivity means it can pick up quieter sounds. The Signal-to-Noise Ratio (SNR) is crucial. It indicates how much louder the desired sound (your voice) is compared to the microphone’s own self-generated noise (the hiss you sometimes hear when no sound source is present). A higher SNR means less inherent hiss, which is always better for clean recordings.
Durability and Build Quality
Even though you might not be traveling with your karaoke mic, a solid build means it’s likely to last longer and feel more reliable. Metal construction is often a good sign. For a USB mic, ensure the cable is also well-made and detachable if possible, in case it needs replacing.
Top Microphone Recommendations for YouTube Karaoke
Based on ease of use, sound quality, and typical budget for beginners, here are some popular and highly-regarded options. These are generally USB condenser microphones with cardioid patterns.
Budget-Friendly (<$100)
You can get surprisingly good quality without breaking the bank. These mics are excellent for getting started and will significantly improve your karaoke sound.
- Samson Meteor Mic: A compact, portable USB condenser mic with a built-in stand. It offers a warm, rich sound and is incredibly easy to use.
- Blue Snowball iCE: A popular choice for its affordability and decent sound quality. It’s a cardioid mic that plugs right in and is great for voice-overs and singing.
- Rode NT-USB Mini: While sometimes slightly over $100, it frequently dips into this range during sales. It’s a step up in quality with a very clear, professional sound.
Mid-Range ($100 – $250)
Stepping into this range often means better build quality, more refined sound, and sometimes additional features like headphone monitoring.
- Blue Yeti: This is perhaps the most well-known USB microphone. It’s a multi-pattern microphone, meaning you can switch between cardioid, omni, and other patterns, offering great versatility. Its plug-and-play convenience and excellent sound make it a favorite for many creators.
- Audio-Technica AT2020 USB+: A fantastic USB version of a popular studio condenser microphone. It delivers a clear, detailed sound that’s perfect for vocals and has a headphone jack for direct monitoring.
- Rode NT-USB+: An upgrade from the Mini, offering even better sound fidelity and build. It’s a favorite among content creators for its natural voice reproduction.
Prosumer/Higher-End (<$250)
If you’re looking for top-tier USB quality or want to dip your toes into XLR, these are great choices. You might need an audio interface for XLR mics.
- Shure MV7: This mic is unique because it features both USB and XLR outputs, giving you the best of both worlds. It’s designed with broadcast vocalists in mind, offering excellent noise reduction and a very polished sound with its USB connection.
- Aston Origin: (XLR – requires an audio interface) This is a high-quality condenser mic known for its smooth, natural sound. It’s often praised for making vocals sound rich and present. You would need to pair this with an interface like a Focusrite Scarlett Solo.
Setting Up Your Microphone for the Best Sound
Once you have your microphone, setting it up is the next crucial step. Don’t just plug it in and hope for the best! A little effort here goes a long way.
Placement is Key
Where you position your microphone can dramatically affect the sound quality. Here are some tips:
- Distance from Mouth: For most cardioid condenser microphones, aim for about 6-10 inches (15-25 cm) away from your mouth. Singing too close can cause “plosives” (harsh P and B sounds) and distortion. Singing too far away will pick up more room noise and make your voice sound distant.
- Angle: Don’t point the microphone directly at your mouth if plosives are an issue. Try angling it slightly off to the side or singing across the top of the microphone. This can help reduce the direct impact of air from your breath.
- Pop Filter/Windscreen: Essential for vocalists! A pop filter (a mesh screen that sits in front of the mic) or a foam windscreen will significantly reduce those harsh plosive sounds. They are inexpensive and make a huge difference. You can find effective ones on Amazon or at electronics stores.
For additional guidance on microphone placement, check out resources from reputable audio organizations like the Audio Engineering Society (AES). Their Audio Engineering Society provides extensive research and guidelines on acoustics and microphone techniques used by professionals worldwide.
Room Acoustics
Your room itself is a big factor in sound quality. Hard surfaces like bare walls, windows, and hard floors reflect sound, creating echo and “roominess.”
- Minimize Reflections: Try to set up in a room with soft furnishings like carpets, curtains, or upholstered furniture.
- DIY Solutions: If your room is echoey, you can hang blankets on the walls behind you or use a makeshift vocal booth (e.g., placing your mic between two wardrobes filled with clothes). Even a large pillow placed behind the microphone can help absorb reflections.
Monitoring Your Audio
You need to hear yourself! Most USB microphones have a headphone jack. Plug your headphones directly into the microphone. This allows you to monitor your voice in real-time without any delay (latency). This is crucial for staying in tune and on pitch. If your USB mic doesn’t have a headphone jack, you’ll need to plug your headphones into your computer, but be aware that there might be a slight delay.
Software Settings for Clear Karaoke Audio
Your computer and recording software play a role too. Here’s how to get those settings right.
Selecting Your Microphone in Your OS
First, make sure your computer is recognizing your new microphone and using it as the input device.
- Windows: Go to Settings > System > Sound. Under “Input,” select your microphone from the dropdown list. You can also click “Device properties” to adjust the input volume.
- macOS: Go to System Preferences > Sound. Click on the “Input” tab and select your microphone from the list. You’ll see a volume slider to adjust the input level.
Recording Software (DAW or Video Editor)
Whether you’re using dedicated recording software (like Audacity, GarageBand, Reaper) or your video editor (like Adobe Premiere Pro, DaVinci Resolve), you’ll need to ensure it’s set to use your chosen microphone for recording.
- Input Device Selection: In your software’s audio settings or preferences, select your USB microphone as the audio input device.
- Gain Staging (Setting Input Levels): This is super important! You want to set the input level (often called “gain”) so that your singing is loud enough but doesn’t “clip” or distort.
- Sing your loudest into the microphone.
- Watch the meters in your software. You want the loudest peaks to reach around -6 dB to -12 dB. Never let them hit 0 dB, as this is where distortion occurs.
- Most USB mics have a physical gain knob, or you’ll adjust this in your OS sound settings.
For a more in-depth look at audio settings, check out guides from sites like Sweetwater, a leading music technology retailer, which offers excellent beginner-friendly articles on audio recording and gear.
A Comparison of Popular USB Microphones for YouTube Karaoke
To help you visualize the options, let’s look at a few popular choices and what they offer. This table focuses on features important for YouTube karaoke.
| Microphone Model | Type | Polar Pattern(s) | Connection | Headphone Jack | Price Range | Best Use Case |
|---|---|---|---|---|---|---|
| Blue Yeti | Condenser | Cardioid, Bidirectional, Omnidirectional, Stereo | USB | Yes | $$$ | Versatile, adaptable to different recording situations, clear vocals. |
| Audio-Technica AT2020 USB+ | Condenser | Cardioid | USB | Yes | $$$ | Professional-sounding vocals, detailed and clear audio quality. |
| Rode NT-USB+ | Condenser | Cardioid | USB | Yes | $$$$ | Exceptional vocal clarity, natural sound reproduction, high-end USB option. |
| Samson Meteor Mic | Condenser | Cardioid | USB | No (Relies on computer output) | $ | Super portable, easy setup, great for budget-conscious users. |
| Shure MV7 | Dynamic/Condenser Hybrid | Cardioid | USB / XLR | Yes | $$$$$ | Hybrid flexibility, excellent noise rejection, broadcast-quality vocals. |
Price categories: $ = Under $100, $$ = $100-$150, $$$ = $150-$200, $$$$ = $200-$300, $$$$$ = Over $300. Prices are approximate and can vary with sales and retailers.
Tips for Improving Your YouTube Karaoke Performance
Beyond the gear, there are performance aspects that help your karaoke videos shine.
- Practice, Practice, Practice: Know the song! The better you know the melody and lyrics, the more you can focus on your vocal performance and connecting with the song.
- Sing with Emotion: Don’t just hit the notes; feel them. YouTube audiences connect with energy and passion.
- Engage with the Camera: Even though it’s audio-focused, your visual presence matters. Smile, make eye contact (with the camera!), and enjoy yourself.
- Edit Wisely: You might not need heavy editing, but make sure your recorded audio is balanced. You can often boost the vocal track slightly or lower the backing track if needed in your video editor.
- Learn Basic Audio Editing: Even simple things like applying a gentle EQ (equalizer) to add a bit more presence or air to your voice, or using a compressor gently to even out dynamics, can make a big impact. Many free tools can help with this.
Frequently Asked Questions (FAQ)
What is the easiest microphone to set up for YouTube karaoke?
A USB condenser microphone is generally the easiest. You just plug it into your computer’s USB port, and it should be recognized automatically. No extra adapters or complicated drivers are usually needed.
Do I need a pop filter for my karaoke microphone?
Yes, a pop filter or windscreen is highly recommended for any vocal recording, including karaoke. It’s essential for reducing the