Quick Summary:
Finding the top-rated microphone for streaming is about balancing fantastic sound quality with your streaming needs and budget. We’ll guide you through the best options with clear, simple advice to ensure your voice shines through, making your audience stick around.
Hey there, future streaming superstar! Are you tired of your viewers complaining about muffled or fuzzy audio? You’ve got the game, the passion, and the personality, but your sound isn’t quite hitting the mark. It’s a super common hiccup, but don’t sweat it! Getting a crystal-clear microphone for your stream doesn’t have to be complicated. We’re going to walk through everything you need to know, step-by-step, to pick a mic that makes you sound amazing. Get ready to upgrade your audio game!
Why a Great Microphone Matters for Streaming
Think of your microphone as the voice of your stream. It’s how your audience connects with you, hears your jokes, your reactions, and your commentary. If your mic sounds bad, it can really distract from the experience, no matter how exciting your content is. Viewers will often click away if the audio is poor, even if they like what they’re seeing. Investing in a good microphone isn’t just about sound quality; it’s about keeping your audience engaged and growing your community.
On the flip side, a high-quality microphone captures every nuance of your voice. This makes you sound more professional, more engaging, and more likable. Whether you’re a gamer, a musician, a podcaster, or just chatting, clear audio is king. It builds trust and makes your stream a place people want to hang out.
Understanding Microphone Types for Streaming
Before diving into specific models, it’s helpful to know the main types of microphones you’ll encounter:
- USB Microphones: These are the easiest to set up. You just plug them into your computer’s USB port, and they work! They’re perfect for beginners because they require minimal technical knowledge and often come with built-in audio interfaces.
- XLR Microphones: These offer superior sound quality and require more equipment. You’ll need an audio interface or a mixer to connect an XLR mic to your computer. They are often preferred by professionals for their flexibility and pristine audio capture.
- Condenser Microphones: These are sensitive and capture a wide range of frequencies, making them great for picking up subtle details. They are ideal for quiet environments but can also pick up background noise if your room isn’t treated.
- Dynamic Microphones: These are more rugged and less sensitive than condenser mics. They are excellent at isolating your voice and minimizing background noise, making them a good choice for louder environments or if you have a lot of ambient sound in your room.
Key Features to Look For in a Streaming Microphone
When you’re browsing for that perfect mic, keep these important features in mind:
- Polar Patterns: This refers to how the microphone picks up sound. For streaming, you’ll most likely want a Cardioid pattern. This pattern focuses on sound coming from directly in front of the mic, effectively rejecting sounds from the sides and rear. This is crucial for minimizing room echo and keyboard noise.
- Frequency Response: This tells you the range of sound frequencies the microphone can capture. A well-balanced frequency response ensures your voice sounds natural and clear, without being too boomy or too tinny.
- Sample Rate and Bit Depth: For digital audio, higher sample rates (like 48kHz or 96kHz) and bit depths (16-bit or 24-bit) contribute to clearer, more detailed sound. Most streaming applications work perfectly with 48kHz and 24-bit.
- Durability and Build Quality: A solid metal construction often means a mic will last longer and feel more premium.
- Included Accessories: Look for mics that come with essential accessories like a stand, pop filter, or shock mount. These can save you extra money and setup hassle.
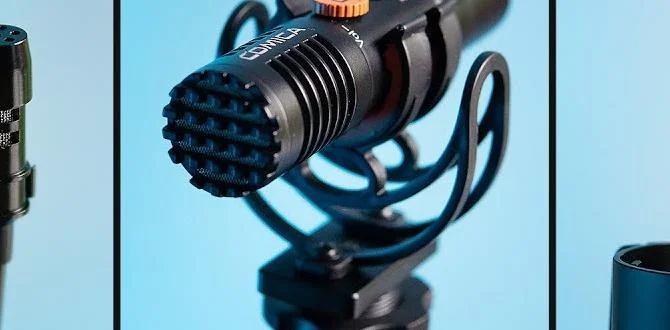
Top-Rated Microphones for Streaming (Beginner-Friendly Focus)
Based on sound quality, ease of use, and overall value, here are some of the top-rated microphones that are fantastic for streamers, especially those just starting out. These focus heavily on USB connectivity for simplicity.
1. Blue Yeti USB Microphone
The Blue Yeti is practically legendary in the streaming world, and for good reason. It’s a versatile condenser microphone that consistently delivers excellent sound quality and is incredibly simple to set up.
- Why it’s great for beginners: Plug-and-play USB connection, no extra software needed.
- Polar Patterns: Offers four patterns: Cardioid, Bidirectional, Omnidirectional, and Stereo. Cardioid is your go-to for streaming.
- On-mic controls: Gain control, mute button, headphone output for zero-latency monitoring.
- Sound Quality: Clear, crisp audio that captures your voice beautifully.
- Build: Solid, all-metal construction.
The Blue Yeti is a fantastic all-rounder. Its multiple polar patterns give you flexibility if you ever decide to do interviews or other types of content, but its Cardioid mode is perfect for solo streamers. For more detailed tips on optimizing your Blue Yeti, check out resources like B&H Photo’s guide to choosing a microphone.
2. Rode NT-USB+
Rode is another highly respected name in audio, and the Rode NT-USB+ is their answer to a premium USB microphone for creators. It builds on the success of the original NT-USB, offering even better performance and features.
- Ease of Use: Simple USB connection, plug-and-play.
- Sound Quality: Exceptionally clear, detailed, and warm audio. It really makes your voice sound rich.
- Internal Pop Filter: Helps reduce plosive sounds (like ‘p’ and ‘b’ sounds) that can cause audio pops.
- Zero-Latency Headphone Output: For monitoring your voice directly.
- Build: Premium feel and robust construction.
The NT-USB+ is a step up in audio fidelity for those who want a truly professional sound without the complexity of XLR. It’s a favorite for streamers who want their voice to be front and center.
3. HyperX QuadCast S
For gamers and streamers who love a bit of flair, the HyperX QuadCast S offers performance and aesthetics. It’s a feature-rich USB microphone that not only sounds good but also looks great on your desk.
- Plug-and-Play: Easy USB setup.
- Four Polar Patterns: Including Cardioid, Bidirectional, Omnidirectional, and Stereo, offering versatility.
- Built-in Pop Filter: To help reduce harsh plosive sounds.
- Tap-to-Mute Sensor: A convenient feature found at the top of the mic.
- RGB Lighting: Customizable dynamic RGB effects to match your setup.
- Monitoring: Built-in headphone jack for direct monitoring.
What sets the QuadCast S apart is its combination of good audio quality, easy features like the tap-to-mute, and the dynamic RGB lighting. It’s a popular choice for those who want their streaming gear to look as good as it sounds.
4. Samson Q2U (Dynamic USB/XLR Microphone)
The Samson Q2U is an incredibly versatile and budget-friendly option that punches well above its weight class. It’s a dynamic microphone that offers both USB and XLR outputs, giving you a pathway to upgrade later.
- Dual Connectivity: Use it as a USB mic straight out of the box, or connect it via XLR for a more professional setup down the line.
- Dynamic Microphone: Excellent at rejecting background noise and focusing on your voice.
- Polar Pattern: Cardioid, ideal for isolating your voice.
- Built-in Headphone Jack: For direct monitoring.
- Price: One of the most affordable, high-quality options available.
The Samson Q2U is a fantastic starting point. Its dynamic nature makes it forgiving in less-than-ideal acoustic environments, and the dual connectivity means it can grow with you. It truly offers exceptional value for money and is a top recommendation for budget-conscious streamers.
5. Elgato Wave:3
Elgato is well-known for its streaming and gaming peripherals, and the Wave:3 is their dedicated USB microphone designed for content creators. It focuses on simplicity, studio-quality sound, and integration with Elgato’s ecosystem.
- High-Quality Condenser Capsule: Delivers crisp, clear vocal reproduction.
- Cardioid Polar Pattern: Focuses on your voice, minimizing background noise.
- Clipguard Technology: Features dual capacitors to prevent clipping when your audio levels get too high, ensuring a clean signal even during loud moments.
- USB-C Connectivity: Modern and reliable.
- Intuitive Control Dial: Adjust mic gain, monitor mix, and headphone volume seamlessly.
- Includes Software: Wave Link software allows you to mix your mic input with other audio sources.
The Wave:3 is designed from the ground up for streamers and content creators. The Clipguard technology is a game-changer for maintaining clean audio without constant mic level adjustments. The seamless integration with Wave Link software offers advanced audio mixing capabilities that are surprisingly easy to use.
USB vs. XLR Microphones: Which is Best for You?
This is a common question for beginners: should you go with the simplicity of USB or the flexibility of XLR?
| Feature | USB Microphone | XLR Microphone |
|---|---|---|
| Setup Ease | Very Easy (Plug-and-play) | More Complex (Requires interface/mixer) |
| Sound Quality | Excellent, especially for the price. Great for most streamers. | Potentially Superior (Can be higher fidelity, more control) |
| Equipment Needed | Just the microphone and your computer. | Microphone, XLR cable, audio interface or mixer. |
| Cost | Generally more affordable for comparable quality. | Higher initial investment due to required accessories. |
| Flexibility/Upgradability | Limited (built-in interface). | High (can swap interfaces, mixers, and mics). |
| Best For | Beginners, budget-conscious streamers, simplicity seekers. | Those prioritizing absolute best audio fidelity, experienced users, or those planning complex setups. |
For most beginners, a high-quality USB microphone like the Blue Yeti, Rode NT-USB+, HyperX QuadCast S, or Elgato Wave:3 will more than suffice. They offer excellent sound and are incredibly easy to get up and running. If you’re on a tight budget, the Samson Q2U offers a fantastic entry point with an upgrade path.
Setting Up Your Streaming Microphone: A Simple Guide
Once you’ve chosen your microphone, setting it up is usually straightforward. Remember, the goal is to get your voice sounding clear and front-and-center.
- Connect Your Microphone:
- USB Mic: Plug the USB cable into your microphone and then into an available USB port on your computer. Your computer should automatically recognize it.
- XLR Mic: Connect the microphone to your audio interface or mixer using an XLR cable. Then, connect the audio interface/mixer to your computer via USB.
- Select Your Microphone as Input:
- On Windows: Go to Settings > System > Sound. Under “Input,” choose your microphone from the dropdown menu.
- On macOS: Go to System Preferences > Sound. Under the “Input” tab, select your microphone.
- In Your Streaming Software (OBS, Streamlabs, etc.): Go to your audio settings and ensure your chosen microphone is selected as the primary audio input source for your stream.
- Adjust Microphone Gain (Sensitivity):
- This is crucial! Too little gain, and you’ll sound quiet. Too much, and your audio will distort (clip).
- Speak into the microphone at your normal streaming volume. Adjust the gain knob (usually on the mic itself or in your software) until your audio levels in your streaming software are peaking around -10dB to -12dB. This leaves headroom and prevents distortion.
- Tip: You can often use your streaming software’s audio meter to monitor levels while speaking.
- Position Your Microphone:
This is extremely important for clean audio. For most USB mics with a Cardioid pattern (which you’ll likely use):
- Position the microphone about 4-8 inches (10-20 cm) in front of your mouth.
- Speak slightly across the front of the microphone, rather than directly into it head-on. This can help reduce plosives.
- If the mic came with a pop filter, use it! Place it between your mouth and the microphone to further reduce plosive sounds.
- If you have a desktop stand, try to keep it from touching your desk directly to avoid picking up keyboard or mouse noises. A boom arm is even better as it can get the mic off your desk entirely and closer to your mouth.
- Test Your Audio:
Before going live, do a test recording or a private stream. Listen back with headphones to ensure your voice is clear, balanced, and free of distracting background noise or echo. You can find great tutorials on audio setup for OBS, for example, from sources like the OBS Project Wiki, which offers detailed troubleshooting and setup advice.
Tips for Improving Your Streaming Audio Even Further
Your microphone is the star, but a few other things can make a big difference:
- Acoustic Treatment for Your Room: Even the best microphone can sound bad in a room with a lot of echo (reverb). Soft surfaces like carpets, curtains, blankets, or even strategically placed bookshelves can absorb sound and reduce echo. You don’t need to soundproof your entire room; small improvements make a huge difference.
- Use a Pop Filter or Windscreen: As mentioned, these are essential for reducing harsh ‘p’ and ‘b’ sounds (plosives) that can ruin an otherwise good recording.
- Minimize Background Noise: Turn off fans, close windows, and inform housemates when you’re about to stream. If you have a noisy computer, consider a quieter case or moving it further away.
- Headphone Monitoring: Always use headphones while streaming. This prevents your microphone from picking up the sound from your speakers, which causes echo and feedback. It also allows you to hear exactly what your audience is hearing.
- Software Processing: Your streaming software (like OBS Studio) often has built-in filters like Noise Suppression, Noise Gate, and Compressor. Use these sparingly after you’ve got your basic gain and positioning right. Too much processing can make your voice sound unnatural.
Troubleshooting Common Microphone Issues
Sometimes things don’t go perfectly. Here are a few common problems and how to fix them:
- Microphone Not Detected:
- USB: Try a different USB port. Ensure the USB cable is securely plugged into both the mic and computer. Restart your computer. Check if the mic is recognized in your computer’s sound settings.
- XLR: Make sure your audio interface/mixer is powered on and connected to your computer. Ensure phantom power (+48V) is enabled if your mic requires it (most condenser mics do, dynamic mics typically don’t).
- Low Volume:
- Check the microphone’s gain knob (if it has one) and your computer’s input volume. In your streaming software, ensure the mic level is turned up appropriately, and consider slightly increasing the gain on your audio interface if using XLR.
- Distorted or “Crackle-y” Sound:
- Your microphone gain is too high, causing clipping. Lower the gain until the audio levels in your software are no longer hitting the red (peaking around -10dB to -12dB is a good target).
- Lots