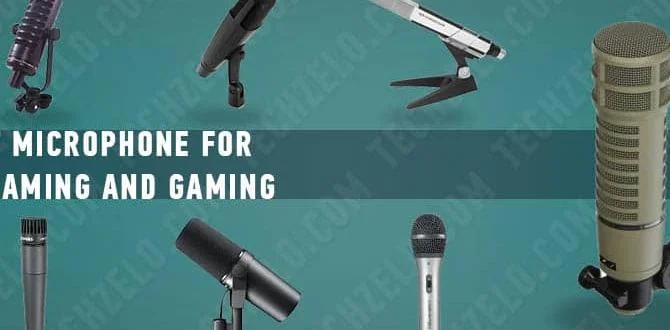
For the best microphone for streaming when you’re aiming for pro-level audio, consider a USB condenser microphone for ease of use and excellent voice clarity, or an XLR microphone paired with an audio interface for superior control and quality.
Hey there, streamers and content creators! Are you tired of your voice sounding a bit… meh? Maybe it’s thin, maybe there’s a hissing noise, or perhaps it just doesn’t capture the energy you bring to your streams. Getting your audio just right is crucial, and sometimes the built-in mic on your headset or webcam just doesn’t cut it. It’s a common frustration, but don’t worry! Finding the “best microphone for streaming” is totally achievable, and I’m here to break it down for you. We’ll explore what makes a mic great for streaming and how you can achieve that pro, polished sound without needing a sound engineering degree. Ready to level up your audio game?
Why Your Stream Needs a Great Microphone
Your voice is your brand as a streamer. Whether you’re chatting with viewers, narrating gameplay, or hosting a podcast, audio quality makes a huge difference in how viewers perceive you. A bad microphone can be a dealbreaker, driving people away faster than a laggy connection. On the flip side, a clear, rich microphone sound makes you sound professional, engaging, and trustworthy. It shows you care about your content and your audience. Think of it as the audio equivalent of high-definition video – it creates a much better overall experience.
Understanding Microphone Types for Streaming
When you start looking for a microphone, you’ll quickly notice two main types: USB microphones and XLR microphones. Both have their pros and cons, and the “best” one for you depends on your budget, technical comfort level, and desired sound quality.
USB Microphones: Plug-and-Play Perfection
USB microphones are the go-to for many beginners and even some experienced streamers. They are incredibly easy to set up: just plug them into your computer’s USB port, and you’re usually good to go! They have the microphone, preamp, and analog-to-digital converter all built into one unit.
Pros of USB Microphones
- Ease of Use: Seriously, just plug it in! No extra gear needed.
- Portability: Great for streamers who move around or travel.
- Cost-Effective: Often more affordable than their XLR counterparts, especially when you factor in the cost of an audio interface.
- Good for Beginners: Perfect for getting started without a steep learning curve.
Cons of USB Microphones
- Limited Upgrade Path: For the most part, you can’t upgrade just a part of a USB mic.
- Fewer Controls: Usually, you have fewer manual controls compared to an XLR setup.
- Can Be Susceptible to Interference: Though modern mics are better, some can be more prone to picking up computer noise.
Best For:
- Beginner streamers
- Podcasters
- Voice-over artists
- Anyone who wants a simple, high-quality setup
XLR Microphones: The Professional Standard
XLR microphones are what you see in professional studios and broadcast setups. Instead of plugging directly into your computer, they use an XLR cable to connect to an audio interface or mixer. This interface then connects to your computer, usually via USB.
Pros of XLR Microphones
- Superior Sound Quality: Generally offer a richer, more detailed sound.
- More Control: An audio interface or mixer gives you more control over gain, EQ, and other audio settings.
- Flexibility & Upgradeability: You can easily swap out microphones, interfaces, or other components as your needs change.
- Industry Standard: If you plan on expanding into music production or professional voice work, XLR is the way to go.
Cons of XLR Microphones
- More Complex Setup: Requires an audio interface or mixer, which means more cables and more to learn.
- Higher Cost: The microphone itself plus the necessary interface/mixer can be a significant investment.
- Less Portable: Not as convenient for frequently changing locations.
Best For:
- Streamers seeking the absolute best audio quality
- Those who want maximum control over their sound
- Creators planning to expand into music or professional audio work
- Anyone building a dedicated streaming studio
Microphone Polar Patterns Explained Simply
Polar patterns refer to how sensitive a microphone is to sound arriving from different directions. This is super important for streaming because it helps you capture your voice clearly while minimizing background noise.
Cardioid: The Streaming Hero
This is the most common and usually the best pattern for streaming. A cardioid microphone picks up sound primarily from the front, with reduced sensitivity from the sides and the least from the back. This means it will focus on your voice and reject sounds coming from behind the mic, like keyboard clicking or room echo.
Other Patterns to Know
- Omnidirectional: Picks up sound equally from all directions. Great for capturing an entire room but not ideal for focused vocals in a noisy environment.
- Bidirectional (Figure-8): Picks up sound from the front and back equally, with rejection from the sides. Useful for interviews with two people sitting opposite each other, but generally not for solo streaming.
- Cardioid vs. Supercardioid/Hypercardioid: Supercardioid and hypercardioid patterns are even more focused than standard cardioid, with a tighter pickup area to the front and a small lobe of sensitivity directly to the rear. They can be excellent for isolating sound but require precise positioning.
Condenser vs. Dynamic Microphones for Voice
You’ll also hear about condenser and dynamic microphones. For streaming, one usually stands out.
Condenser Microphones: Sensitive and Detailed
Condenser mics are known for their sensitivity and ability to capture subtle details and a wide frequency range. This makes them fantastic for vocals, as they can reproduce the nuances of your voice. They generally require phantom power (which is often built into USB interfaces or even directly provided by USB ports).
Pros of Condenser Mics
- Excellent for capturing clear, detailed vocals.
- Smooth and natural sound reproduction.
- Great for quieter environments where you want every detail.
Cons of Condenser Mics
- Can be more sensitive to background noise (e.g., air conditioning, traffic).
- Can be more fragile than dynamic mics.
- Often more expensive.
Dynamic Microphones: Robust and Forgiving
Dynamic mics are like the rugged workhorses of the microphone world. They are less sensitive and better at handling loud sounds without distortion. They don’t require external power.
Pros of Dynamic Mics
- Great at rejecting background noise.
- Can handle loud sound sources without clipping.
- Durable and less fragile.
- Often more affordable.
Cons of Dynamic Mics
- Can sometimes sound less detailed or “warm” than condensers.
- Require proximity to the sound source for best results.
Recommendation for Streaming
For most streamers, especially those starting out or in a typical home environment, a condenser microphone is generally the preferred choice for its clarity and detail. However, if your streaming space is very noisy, a dynamic microphone might be a better fit.
Top Microphone Picks for Professional Streaming
Let’s look at some excellent microphones that hit the sweet spot for quality, value, and ease of use for streamers. These are geared towards achieving that “pro essential” sound.
USB Microphone Recommendations
These are fantastic for getting pro sound with minimal fuss.
| Microphone Model | Type | Polar Pattern | Key Features | Price Range (Approx.) |
|---|---|---|---|---|
| Blue Yeti | Condenser USB | Cardioid, Bidirectional, Omnidirectional, Stereo | Multiple pickup patterns, plug-and-play, headphone jack for zero-latency monitoring. | $100 – $130 |
| Rode NT-USB+ | Condenser USB | Cardioid | Studio-grade sound, built-in pop filter, headphone monitoring, compact design. | $150 – $170 |
| HyperX QuadCast S | Condenser USB | Cardioid, Bidirectional, Omnidirectional, Stereo | RGB lighting, anti-vibration shock mount, tap-to-mute sensor, four polar patterns. | $120 – $140 |
| Shure MV7 | Hybrid USB/XLR | Cardioid | Mimics the legendary SM7B vocal sound, touch panel controls, auto-level mode. | $250 – $270 |
XLR Microphone Recommendations (with Audio Interface)
This setup offers the highest potential for professional audio. You’ll need to factor in the cost of an audio interface.
| Microphone Model | Type | Polar Pattern | Audio Interface (Example) | Key Features | Price Range (Bundle Approx.) |
|---|---|---|---|---|---|
| Rode NT-USB Mini (USB) has a sibling, the Rode NT1 (XLR) | Condenser XLR | Cardioid | Focusrite Scarlett Solo | Extremely low self-noise (4.5 dBA), warm and detailed sound, side-address design. | $350 – $450 |
| Shure SM58 (Dynamic) | Dynamic XLR | Cardioid | PreSonus AudioBox USB 96 | Industry standard for vocals, durable, great for live and broadcast, excellent background noise rejection. | $250 – $350 |
| Audio-Technica AT2020 (Condenser) | Condenser XLR | Cardioid | Behringer U-Phoria UMC202HD | Affordable entry into studio condenser quality, clear and articulate sound. | $200 – $300 |
| Shure SM7B (Dynamic) | Dynamic XLR | Cardioid | Cloudlifter CL-1 + Focusrite Scarlett 2i2 | The “gold standard” for broadcast and voice-over. Needs significant gain. Requires a good interface and possibly a preamp booster like a Cloudlifter. | $600 – $800+ (Miking & boosting) |
Note: Prices are approximate and can vary based on sales and retailers. Bundle prices assume purchasing a microphone and a recommended entry-level audio interface together.
Setting Up Your Microphone for Optimal Sound
Hardware is only half the battle! Proper setup and technique are crucial for getting that pro sound.
Placement is Key: Proximity Effect and Distance
Proximity Effect: Some microphones, particularly cardioid ones, will boost bass frequencies the closer you are to them. This can make your voice sound deeper and fuller, but too close can sound boomy. Experiment! A good starting point for a condenser mic is about 4-8 inches (10-20 cm) from your mouth.
Dynamic Mics: Tend to work best when you are closer to them, often within 1-3 inches (2-8 cm), especially if they are less sensitive like the SM7B. This helps them ignore background noise.
Using a Pop Filter or Windscreen
Ever heard those harsh “P” and “B” sounds, called plosives, blast through your mic? A pop filter (placed between you and the mic) or a windscreen (fits over the mic) will soften these. They are essential for clear vocal reproduction.
Shock Mounts to Eliminate Vibrations
Any bumps to your desk or mic stand can travel to the microphone, creating rumbling noises. A shock mount suspends your microphone via elastic bands, isolating it from these vibrations. Many USB mics come with one, or they can be purchased separately.
Dealing with Room Acoustics
Your room plays a huge role! Hard surfaces like bare walls, windows, and hard floors reflect sound, causing echo and reverb. This makes your audio sound less clear and professional.
- Soften the room: Add carpets, curtains, tapestries, or even bookshelves filled with books. These soft materials absorb sound.
- Acoustic Panels: For a more serious approach, consider placing foam acoustic panels on your walls, especially behind you and to your sides. You can find affordable options online.
- Mic Placement: Try to position yourself so the back of your microphone (where sensitivity is lowest) is facing any hard, reflective surfaces.
Software Settings: Gain and Monitoring
Gain: This controls how sensitive your microphone is to sound. Too little gain, and your voice will be too quiet. Too much gain, and your voice will be distorted and clipped (that harsh, crackling sound). For most USB microphones, gain is controlled via a dial on the mic or within your streaming software. For XLR, it’s a knob on your audio interface.
Aim for your voice to typically peak around -12dB to -6dB in your software’s meter. It’s better to have it a bit too quiet and boost it in post-production or streaming software than to have it distorted.
Monitoring: Most microphones and interfaces have a headphone jack. Plug your headphones in to listen to yourself in real-time. This is called zero-latency monitoring and is crucial for adjusting your mic placement and gain, and for overall stream comfort. You can usually adjust the balance between your voice and your computer’s audio through your mic or interface’s controls.
Advanced Tips for Pro Streaming Audio
Once you’ve got your basic setup dialed in, here are a few extra steps that can elevate your audio to the next level.
Consider an EQ and Compressor
These are audio processing tools that can dramatically improve your voice. They are typically found in your streaming software (like OBS Studio or Streamlabs Desktop) or on your audio interface/mixer.
- Equalization (EQ): Allows you to adjust specific frequencies. You can use it to boost clarity (often in the mid-range), reduce muddiness (lower frequencies), or tame harshness (higher frequencies). A simple EQ might cut a bit of the low rumble below 80-100Hz and a slight boost around 3-5kHz for presence.
- Compressor: This tool evens out your audio volume. It reduces the difference between your loudest and quietest passages, making your voice sound more consistent and present. It’