Quick Summary: Choosing the right microphone for your Mac is essential for clear vlogging audio. Invest in a quality USB or XLR microphone, consider your budget and needs, and learn basic setup for professional-sounding videos that captivate your audience.
Hey there, fellow creators! So, you’ve got a shiny Mac and a burning desire to dive into the world of vlogging. That’s awesome! But wait, is that built-in microphone sounding a little… tinny? Like you’re recording from inside a tin can? Don’t worry, you’re not alone. So many people run into this! The good news is, solving this is super simple and makes a HUGE difference. Your Mac is a powerhouse, and with the right audio setup, your vlogs will sound as professional as they look. Ready to upgrade your sound game and truly connect with your viewers? Let’s find that perfect microphone!
Why Your Mac Needs a Better Microphone for Vlogging
Your Mac’s built-in microphone is okay for quick video calls, but for vlogging, it’s like trying to paint a masterpiece with a crayon. It picks up too much background noise, sounds muffled, and just doesn’t capture the richness of your voice. Think about it: when you watch your favorite vloggers, what’s one of the first things you notice? Clear, crisp audio! Poor sound quality can instantly turn viewers away, no matter how great your visuals are.
Good audio does more than just make your videos listenable; it builds trust and professionalism. When viewers can clearly hear every word you say, they feel more connected to you and your message. It shows you care about your content and respect their time. Investing in a dedicated microphone for your Mac is one of the smartest, most impactful upgrades you can make for your vlogging journey. We’ll break down exactly what you need to know.
Understanding Microphone Types: USB vs. XLR
When you start looking for a microphone, you’ll quickly see two main types: USB and XLR. Don’t let the names scare you; they’re pretty straightforward, and understanding them is key to picking the right one. Each has its own benefits, and one might be perfect for your Mac vlogging setup.
USB Microphones
These are the superstars for beginners and most Mac vloggers. Why? Because they’re incredibly easy to use. You just plug them directly into a USB port on your Mac, and voilà – you’re ready to go! There’s no need for extra equipment like audio interfaces or mixers. They’re designed for plug-and-play simplicity.
- Pros:
- Super easy to set up – plug and play!
- No extra equipment needed.
- Great for beginners and budget-conscious users.
- Many portable and versatile options available.
- Cons:
- Sound quality, while good, might not reach the absolute peak professional level of a high-end XLR setup.
- Harder to upgrade or expand the setup later.
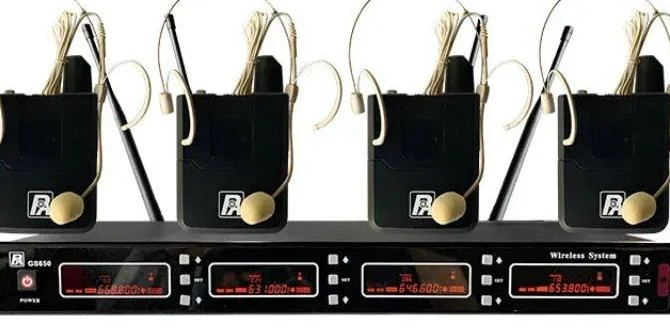
XLR Microphones
XLR microphones are the industry standard for professional audio. They offer fantastic sound quality and flexibility. However, they require a bit more gear. You’ll need an XLR cable to connect the mic to something like an audio interface or a mixer, which then connects to your Mac (usually via USB or Thunderbolt). This might sound complicated, but it opens the door to truly top-tier sound and more control.
- Pros:
- Superior sound quality and clarity.
- More control over your audio settings.
- Easier to expand your setup with other audio gear.
- Professional-grade performance.
- Cons:
- Requires additional equipment (audio interface/mixer, XLR cables).
- More complex setup process.
- Can be more expensive overall.
Top Microphone Recommendations for Mac Vlogging
Based on ease of use, sound quality, and popularity among creators, here are some genius tools that will elevate your Mac vlogging.
Best All-Around USB Microphone
For most Mac vloggers, a high-quality USB microphone hits the sweet spot. It’s simple, effective, and delivers excellent results without breaking the bank or demanding a steep learning curve.
- Blue Yeti: This is a legendary USB microphone for a reason. It’s incredibly versatile, featuring multiple polar patterns (which means it can pick up sound from different directions – great for solo vlogging or even interviews). It’s plug-and-play, sounds fantastic, and looks professional on camera. You can find it easily and it’s a solid investment for years to come.
- Rode NT-USB Mini: Rode is a respected name in audio. This compact mic offers a warm, broadcast-quality sound, perfect for voiceovers and vlogs. It’s simple to connect and use, and its small footprint is ideal if desk space is limited. It also features a headphone jack for zero-latency monitoring, meaning you can hear yourself speak in real-time without any delay.
- Audio-Technica AT2020USB+: A more budget-friendly option that doesn’t sacrifice quality. This mic is known for its clear, detailed sound reproduction. It’s a condenser microphone, which is great for capturing subtle nuances in your voice, making your vlogs sound polished and professional.
Best XLR Microphone for Mac Vlogging (with Interface)
If you’re aiming for the highest fidelity and have a bit more budget and patience for setup, an XLR setup is the way to go. You’ll need an audio interface to bridge the XLR mic to your Mac.
Recommended Audio Interfaces
- Focusrite Scarlett Solo (3rd Gen): This is a hugely popular and reliable interface. It’s compact, easy to use, and provides excellent preamps for your microphone. It connects to your Mac via USB and is a fantastic starting point for any XLR microphone setup. Learn more about the Focusrite Scarlett series on their official website.
- PreSonus AudioBox USB 96: Another solid choice, offering two inputs for microphones or instruments. It’s robust, delivers clean sound, and is a great companion for any aspiring podcaster or vlogger looking to go the XLR route.
Recommended XLR Microphones
- Shure SM58: A legendary dynamic microphone. It’s virtually indestructible, works great in less-than-ideal acoustic environments, and is famous for its clear vocal reproduction. It’s a workhorse that’s been used on stages worldwide for decades.
- Rode NT-USB+: (This is their newer USB model, but let’s talk about an XLR option from Rode) The Rode NT1-A is a top-tier condenser mic known for its incredibly low self-noise and studio-quality sound. It’s perfect for capturing detailed vocals with a rich tone.
Key Features to Look For in a Vlogging Microphone
When you’re browsing microphones, keep these essential features in mind to ensure you’re getting a tool that fits your vlogging needs perfectly. Not all mics are created equal, and understanding these will save you headaches down the line.
- Polar Patterns: This determines where the microphone picks up sound from.
- Cardioid: Picks up sound from the front; ideal for solo vlogging where you’re facing the mic. This is usually the best choice for solo vlogging.
- Omnidirectional: Picks up sound from all directions; good for capturing ambient sound or group conversations.
- Bi-directional: Picks up sound from the front and back; useful for interviews with two people sitting opposite each other.
- Stereo: Picks up sound from the left and right channels, offering a wider, more immersive soundstage.
- Connectivity: As we discussed, USB for simplicity, or XLR for professional flexibility. Ensure your Mac has the necessary ports (USB-A, USB-C).
- Build Quality: A well-built microphone will last longer and feel more robust. Metal construction is generally a good sign.
- Headphone Jack for Monitoring: This is crucial! It allows you to plug in headphones directly to the microphone (or interface) and hear exactly what the mic is picking up in real-time, without any delay (zero-latency monitoring). This helps you catch any plosives (harsh ‘p’ and ‘b’ sounds) or background noise as you record.
- Frequency Response: This refers to the range of sound frequencies the microphone can capture. For vlogging, you want a mic that captures natural-sounding vocals, typically in the 20Hz to 20kHz range, with a slight boost in the mid-range to make speech clear.
- Included Accessories: Some mics come with shock mounts (to reduce vibrations), pop filters (to soften plosive sounds), or desk stands. These can add significant value.
Setting Up Your Microphone on Mac: A Simple Guide
Getting your new microphone connected to your Mac and ready for vlogging is usually a breeze, especially with USB mics. Here’s a straightforward process.
Step-by-Step Setup
- Connect the Microphone:
- For USB microphones: Simply plug the USB cable from the microphone into an available USB port on your Mac. If you have a newer Mac with only USB-C ports, you might need a USB-C adapter or a USB-C microphone.
- For XLR microphones: Connect the XLR cable from the microphone to your audio interface. Then, connect the audio interface to your Mac using its USB or Thunderbolt cable.
- Select the Microphone in macOS:
Your Mac should automatically detect your new microphone. To confirm, go to System Settings (or System Preferences on older macOS versions) > Sound > Input tab. You should see your microphone listed. Select it as the input device. You’ll also see an input volume slider; make sure it’s set to a reasonable level (not too low, not maxed out).
- Select the Microphone in Your Vlogging Software:
Open your video recording software (like QuickTime Player, iMovie, Final Cut Pro, OBS Studio, Streamlabs, etc.). Within the software’s audio or recording settings, make sure you select your new microphone as the audio input source. This is a common step that sometimes gets overlooked!
- QuickTime Player: When creating a new recording (“File” > “New Movie Recording”), click the small arrow next to the record button to select your microphone.
- iMovie: When starting a new project, go to the microphone icon at the top of the screen and select your mic.
- OBS Studio: In the “Sources” panel, add an “Audio Input Capture” and select your microphone.
- Test Your Audio:
Hit record in your software and speak into the microphone at a normal volume. Play back the recording to check the sound quality. Is it clear? Is there any background noise? Are you getting any distortion? You can adjust the input volume in macOS or within your recording software.
- Adjust and Optimize:
If the sound isn’t quite right, consider:
- Mic Placement: Position the microphone about 6-12 inches (15-30 cm) from your mouth, slightly off to the side to avoid plosives if you don’t have a pop filter.
- Pop Filter/Windscreen: If you’re getting harsh ‘p’ and ‘b’ sounds, use a pop filter or a foam windscreen.
- Room Acoustics: Hard, bare surfaces can create echoes. Soft furnishings like curtains, rugs, or even a blanket can help absorb sound and reduce echo.
- Gain Staging: This is about setting the right input level. You want the signal to be strong enough but not so loud that it “clips” or distorts. Many recording programs have meters to help you visualize this.
Advanced Tips for Studio-Quality Vlogging Audio
Once you’ve got the basics down, you can take your audio to the next level. These tips will help your vlogs sound like they were recorded in a professional studio.
- Understanding Gain vs. Volume: Gain is the initial level of the signal coming from your mic. Volume is how loud you make that signal later. Setting your gain correctly during recording is vital. Too high, and you get distortion; too low, and you’ll have to boost it later, which also amplifies background noise. Aim for your audio levels to peak around -12dB to -6dB in your recording software.
- Using a Shock Mount and Pop Filter: A shock mount isolates the microphone from vibrations transmitted through your desk or stand, preventing those unwanted thumps and rumbles. A pop filter (or windscreen) is essential for controlling plosives – the strong puff of air produced by ‘p’ and ‘b’ sounds that can create an unpleasant popping noise on recordings.
- Microphone Placement is Key: Experiment with different distances and angles. For most speaking scenarios, a distance of about 6-12 inches (15-30 cm) is ideal. Position the mic slightly off-axis (not directly in front of your mouth) to further reduce plosives if a pop filter isn’t enough.
- Treating Your Recording Space: Even the best microphone will struggle in a room with a lot of echo. Soft surfaces absorb sound. Think about adding rugs, curtains, tapestries, or even strategically placed bookshelves. For a more serious approach, acoustic foam panels can make a significant difference in reducing reflections. The U.S. General Services Administration (GSA) offers Guidance on Acoustic Design that highlights the importance of sound absorption in built environments.
- Editing Your Audio: Don’t be afraid to edit! Most video editing software allows you to reduce background noise, equalize your voice (adjusting treble and bass for clarity), and compress the audio (evening out the loud and quiet parts). Tools like Audacity (free) or the audio features within your video editor are invaluable.
- Software Monitoring: If your microphone or interface doesn’t have a direct headphone jack, your Mac’s audio settings or your recording software will allow you to monitor. Ensure you’re listening to your microphone’s input to catch issues as they happen.
Troubleshooting Common Microphone Issues on Mac
Even with the best gear, sometimes things don’t work perfectly. Here are solutions to common problems you might encounter with your microphone on your Mac.
- Microphone Not Detected by Mac:
- Check Connections: Ensure the USB cable is securely plugged into both the mic and the Mac. Try a different USB port.
- Restart Your Mac: A simple restart can often resolve temporary glitches.
- Check Privacy Settings: On macOS Monterey and later, apps need permission to access your microphone. Go to System Settings > Privacy & Security > Microphone. Make sure your vlogging app is enabled.
- Update macOS: Ensure your operating system is up-to-date, as updates often include driver improvements.
- Low Audio Volume:
- Check Input Volume: In System Settings > Sound > Input, ensure the input volume slider is turned up.
- Check Software Settings: Verify the input level within your recording software isn’t set too low.
- Increase Gain (Carefully): If using an interface, ensure the gain knob for that input is appropriately set.
- Poor Sound Quality (Hissy, Distorted, Muffled):
- Reduce Input Gain/Volume: If the sound is distorted, the input level is likely too high and “clipping.” Turn it down.
- Check Microphone Placement: Move the mic further away or try a different angle.
- Use a Pop Filter/Windscreen: Essential for controlling harsh vocal sounds.
- Address Room Acoustics: Minimize echo and unwanted reverberation.
- Try a Different Cable/Port: Sometimes faulty hardware can cause issues.
- Background Noise:
- Reduce Input Gain: Lowering the mic’s sensitivity means it picks up less ambient noise.
- Get Closer to the Mic: If