Quick Summary: A headset microphone guide helps you choose and use the best mic for clear calls and great audio. Essential tips include understanding mic types, placement, settings, and background noise reduction for crystal-clear sound in gaming, work, or content creation.
Are you tired of callers telling you they can’t hear you clearly? Or maybe your gaming team misses crucial calls because your voice sounds muffled? Getting a headset with a good microphone can feel like a puzzle. So many options exist, and understanding what makes one microphone better than another can be confusing. Don’t worry! This guide is here to help. We’ll break down everything you need to know about headset microphones, from picking the right one to fine-tuning its settings. You’ll learn how to ensure your voice comes through loud and clear, every single time.
Why Your Headset Microphone Matters
Think about it: your microphone is your voice’s direct line to the world. Whether you’re leading a crucial work meeting, strategizing with your gaming squad, or chatting with friends, clear audio can make all the difference. A poor microphone can lead to misunderstandings, frustration, and a less enjoyable experience for everyone involved. Investing a little time to understand your headset’s microphone will pay off in clearer communication and a better overall audio presence.
Understanding Headset Microphone Types
Not all headset microphones are created equal. They vary in how they capture sound and where they’re placed. Knowing the basic types can help you find one that suits your needs best.
Condenser Microphones
Condenser mics are known for their sensitivity and ability to capture a wide range of frequencies with great detail. They often produce a brighter, more natural sound. However, they typically require external power (phantom power) and can be more susceptible to picking up background noise. While less common in basic gaming or communication headsets, you might find them in higher-end studio or podcasting headsets.
Dynamic Microphones
Dynamic mics are more rugged and less sensitive than condensers. They excel at handling loud sounds without distortion and are generally less prone to picking up background noise. This makes them a great choice for noisy environments or when you need a microphone that can handle a lot of volume. Many gaming and communication headsets use dynamic microphones for their durability and reliability.
Electret Condenser Microphones (ECM)
These are a type of condenser microphone that doesn’t require external phantom power. They have a built-in charge, making them self-powered and very common in everyday electronics, including many headset microphones. ECMs offer a good balance of sensitivity and cost-effectiveness, providing clear audio for most general purposes.
Key Features to Look For in a Headset Microphone
When you’re shopping for a new headset, pay attention to these microphone-specific features:
- Polar Pattern: This describes how sensitive the microphone is to sound coming from different directions. For most headsets, a cardioid pattern is ideal. Cardioid mics primarily pick up sound from the front and reject sound from the sides and rear. This helps isolate your voice and reduce background distractions.
- Frequency Response: This indicates the range of sound frequencies the microphone can capture. A wider frequency response generally means a more natural and detailed sound. Look for mics that cover the typical human voice range (roughly 20 Hz to 20 kHz), though specialized mics might focus on specific parts of this range.
- Connectivity: How does the microphone connect to your device? Common options include 3.5mm audio jacks (often split for mic and audio), USB-A, and USB-C. Wireless headsets use Bluetooth or proprietary dongles. USB connections often offer better digital audio quality than analog 3.5mm jacks.
- Noise Cancellation: Some headsets feature built-in noise cancellation for the microphone. This technology works to filter out ambient sounds (like keyboard clicks, fans, or traffic) so only your voice is transmitted clearly.
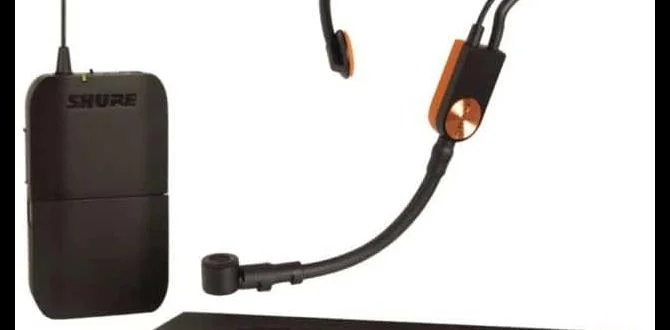
- Adjustability: A flexible boom arm allows you to position the microphone perfectly in front of your mouth. This is crucial for optimal sound quality. Some boom mics can also be flipped up or detached for convenience.
Microphone Placement: The Secret to Clear Audio
You might have the most advanced microphone, but if it’s not positioned correctly, your sound quality will suffer. Proper placement is one of the simplest yet most effective ways to improve your audio.
- Close to Your Mouth: The ideal distance is typically one to two finger-widths away from the corner of your mouth. This ensures your voice is picked up directly and clearly.
- Avoid the Direct Breath Stream: Don’t point the microphone directly into your mouth where air blows out when you speak or exhale. This can cause unpleasant popping sounds (plosives). Position it slightly off to the side of your mouth.
- Angle it Inward: Angle the microphone slightly towards your mouth. This helps capture your voice effectively while minimizing the pickup of sounds from the sides.
- Check for Overlap: If your headset has separate earcups, ensure the microphone boom arm isn’t positioned so it directly crosses in front of or behind your mouth.
Experimenting is key. Speak at your normal volume and listen back to recordings or ask a friend for feedback. Small adjustments can make a big difference.
Adjusting Your Headset Microphone Settings
Once your headset is plugged in and positioned correctly, you’ll likely need to configure its settings within your operating system or specific applications. These adjustments ensure your microphone is recognized and performs optimally.
For Windows Users
Navigating Windows’ audio settings is straightforward:
- Open Sound Settings: Right-click the speaker icon in your system tray (bottom right of the screen) and select “Open Sound settings”.
- Select Your Input Device: Under the “Input” section, make sure your headset microphone is selected from the dropdown menu labeled “Choose your input device”.
- Test Your Microphone: Click the “Device properties” button below your selected microphone. You should see a meter that jumps when you speak. You can also record a short test if you wish.
- Adjust Volume: In the same “Device properties” window, you’ll find a “Volume” slider. Adjust this to a level where your voice is audible without being too loud or distorted. A good starting point is 75-90%.
- Microphone Boost (Use with Caution): Some sound drivers offer a “Microphone Boost” option. This can amplify your signal further but can also increase background noise. Use it sparingly if your voice is still too quiet after adjusting the main volume. You can find this under “Additional device properties” > “Levels” tab.
For macOS Users
macOS makes audio settings easy to find:
- Open System Preferences: Click the Apple menu in the top left corner and select “System Preferences”.
- Navigate to Sound: Click on the “Sound” icon.
- Select Input Device: Go to the “Input” tab. Choose your headset microphone from the list of available devices.
- Adjust Input Volume: You’ll see an “Input volume” slider. Speak into the microphone and watch the input level meter. Adjust the slider so the meter bounces nicely when you speak but doesn’t constantly hit the red.
In-Application Settings
Many applications, especially communication tools like Discord, Zoom, Skype, and games, have their own audio settings. It’s essential to check these too:
- Select the Correct Device: Within the app’s audio or microphone settings, ensure your headset microphone is selected as the input device. Sometimes, apps might default to your computer’s built-in microphone.
- Adjust Levels: Similar to system settings, you can usually adjust microphone input levels within the application itself.
- Noise Suppression/Gate: Most communication apps offer built-in noise suppression or a noise gate. Experiment with these settings to help reduce background distractions. A noise gate, for instance, will mute your microphone when you’re not speaking.
Tips for Reducing Background Noise
Even with the best microphone, background noise can be a real problem. Here’s how to combat it:
- Find a Quiet Space: The simplest solution is to record or communicate from the quietest room you can find. Turn off fans, close windows, and move away from noisy appliances.
- Adjust Microphone Sensitivity: If your microphone has a physical sensitivity dial, turn it down. For software settings, reduce the input volume or enable noise reduction features.
- Use Noise Cancellation Software: Advanced software like Nvidia Broadcast (if you have compatible Nvidia hardware) or Krisp.ai can work wonders in real-time to filter out background noise. These tools are incredibly effective for streamers and remote workers.
- Positioning is Key: As mentioned, aiming the mic away from noise sources (like your keyboard or an air vent) is paramount.
- Consider a Desk Mat: For keyboard and mouse noise, a thick desk mat can help dampen vibrations that might otherwise travel up to your microphone if it’s on the desk.
- Headset Design: Some headset designs naturally offer better isolation from environmental noise than others in terms of their earcups, which can indirectly reduce the amount of ambient sound that reaches the microphone capsule.
Troubleshooting Common Headset Microphone Issues
Encountering problems? Here are some common issues and how to fix them:
| Problem | Potential Causes | Solutions |
|---|---|---|
| Microphone not detected by computer. | Not plugged in properly, incorrect device selected, driver issue, mic muted. | Ensure the plug is fully inserted. Check system sound input settings. Restart your computer. Look for a physical mute button on the headset or cable. For USB, try a different port. |
| Low volume or quiet sound. | Mic volume too low, mic boost not enabled, faulty mic. | Increase mic volume in system and app settings. Enable mic boost (carefully). Test on another device. |
| Cracking, static, or popping sounds. | Poor connection, interference, damaged cable, mic capsule issue, speaking too loudly. | Check all connections. Move headset away from other electronics. Test with a different cable if possible. Speak at a normal volume. Try a different mic input if available. |
| Background noise picked up excessively. | Mic sensitivity too high, loud environment, mic pointed at noise source. | Lower mic volume/gain in settings. Use noise cancellation software. Move to a quieter location. Adjust mic placement to avoid noise sources. |
| No sound at all. | Mic is muted, software conflict, hardware failure. | Check for mute switches. Close and reopen applications. Test mic in different applications and on a different computer. |
When to Upgrade Your Headset Microphone
You’ve tried all the tips, but your audio still isn’t cutting it. When is it time for an upgrade?
- Persistent Poor Quality: If even after adjustments, your audio remains consistently muffled, staticky, or too quiet, the microphone itself might be the limitation.
- Specific Professional Needs: For content creators, streamers, or professionals who rely on pristine audio for their livelihood, a dedicated microphone or a high-end headset with a superior microphone becomes essential. Consider microphones reviewed by reputable audio sites like Rtings.com for in-depth testing.
- Advanced Features: If you need specific features like advanced noise cancellation, a wider frequency response for richer voice tones, or a more robust build quality from your microphone, upgrading might be necessary.
- Comfort and Ergonomics: Sometimes, the headset itself might be fine, but the microphone’s position or flexibility is causing issues. A new headset with a better-designed boom arm could solve this.
Frequently Asked Questions (FAQ)
Q1: What’s the best way to test my headset microphone?
A: The easiest way is to use your computer’s built-in voice recorder or a communication app like Discord or Zoom. Record yourself speaking and play it back. Ask a friend or colleague to listen during a call and give feedback on clarity and volume.
Q2: Should I use a USB or 3.5mm headset microphone?
A: USB microphones often provide better digital audio quality and can bypass your computer’s internal sound card, which might introduce noise. 3.5mm jacks are more universal and can be convenient, but analog signal transmission can sometimes be more susceptible to interference.
Q3: How do I stop my microphone from picking up my keyboard typing?
A: Position the microphone as far from your keyboard as possible. Lower the microphone’s sensitivity (gain) in your computer or application settings. Utilize noise gate or noise suppression features in your communication software. Some advanced software solutions can also filter out typing sounds.
Q4: Can I use my headset microphone for streaming?
A: Yes, many headset microphones are capable of basic streaming. However, for professional-quality streams, many streamers opt for dedicated USB or XLR microphones, which offer superior audio fidelity and control, though they come at a higher cost. Check reviews and listen to audio samples.
Q5: My microphone is muted, but it still shows up in settings. What’s wrong?
A: Ensure you haven’t accidentally muted it using a physical button on the headset cable or earcup. Also, check the mute settings within the specific application you’re using. Sometimes, a quick restart of the application or computer can resolve software glitches.
Q6: What does “gain” mean for a microphone?
A: Gain is essentially the amplification level for your microphone’s signal. Higher gain means a stronger signal, but it also amplifies any background noise. It’s similar to the volume slider but specifically for the microphone input.
Conclusion
Mastering your headset microphone is all about understanding the basics and applying a few smart techniques. From choosing the right type of mic and positioning it correctly to tweaking your software settings and minimizing background noise, you now have a comprehensive guide to ensure your voice is heardcrystal clear. Don’t let muffled audio hold you back in gaming, work, or any communication. With these essential tips, you’re well on your way to achieving top-notch audio quality that brings your voice to the forefront.