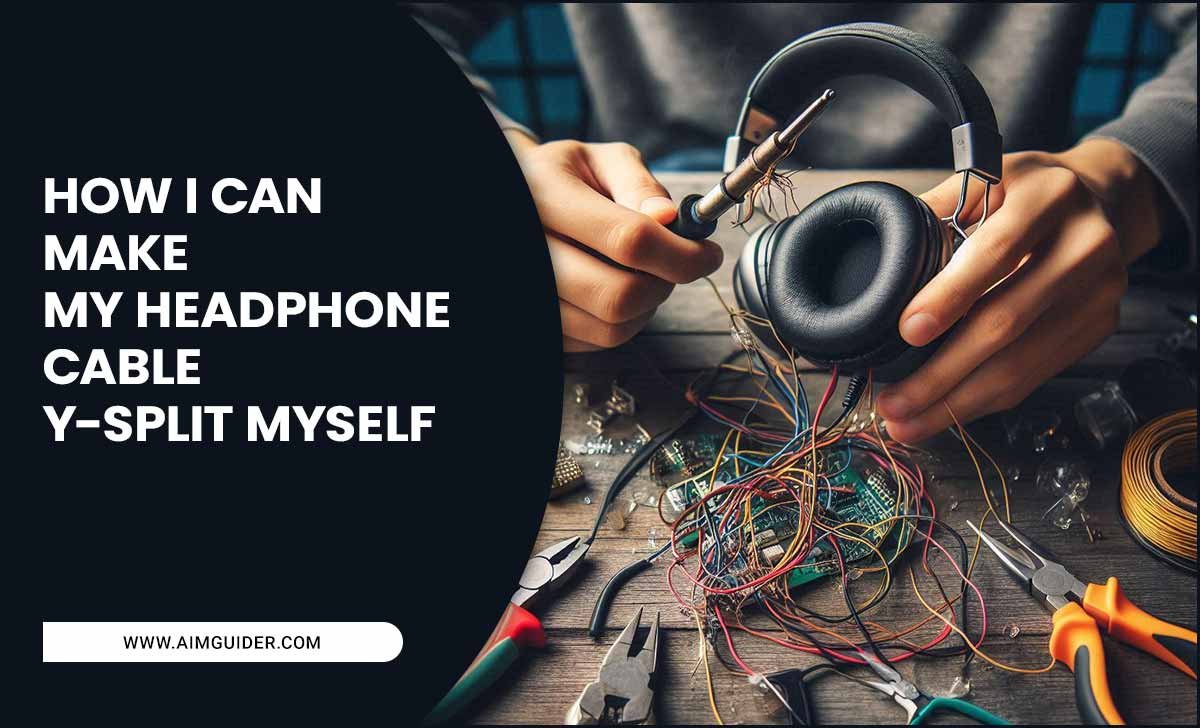
“I love listening to music through exploring different kinds of Headphones. I have used a huge number of headphones so far. But this time, I want to design my headphone. I guess making my headphones will be cheaper than buying one.
Besides, there is something different kind of joy when you use the headphones you designed with your hand. But the thing is, I have never made headphones in my life. How can I design my headphones?” How to make your own headphones cable?
Well. Don’t worry. You will get proper methods and guidelines for making headphones on your own just by going through the whole article.
Making your headphone cable is not as difficult as you think. However, making a pair of headphones cable surely takes a lot of money. So, get ready to put a big hole in your wallet while making one.
You will need to invest initially in order to get started with making a pair of headphones cable. But after investing your money, you will get to know that building your own additional cables, amps, or sources is not that costly or difficult.
Headphone cables can be a hassle to keep up with – especially if you’re constantly on the go. But fear not! With this simple tutorial, you can make your headphones cables in minutes without spending a fortune on store-bought versions.
All you need is some wire cutters, solder, and a cable connector. Assembling the connectors is straightforward – follow the instructions carefully, and you’ll have a perfect pair of headphones cables in no time.

How To Make Your Own Headphones Cable?

Soldering Iron

The main tool you will need to make your headphones cable is the soldering iron. You can use a different kind of soldering iron in the process.
- cheaper ones having a fixed temperature (terminated by the help of an electrical outlet plug)
- Expensive ones ( the ones where the soldering iron is attached to a power supply unit with a soldering station)
- Soldering stations that have a digital display ( contain various programmable modes of varying heat)
We will recommend using a heavier model having enormous power. Who knows, you may need to solder bigger kinds of stuff like thick cables or heat stinks in the future. You can search for this kind of soldering iron on eBay or AliExpress.
A Wide Stripper, Snipped Nose Pliers, And A Side Cutter

It would be best if you have a wide stripper, snipped nose pliers, and a side cutter to build the cable. Make sure to keep those things on your buying list. Make sure to buy the wire stripper, which is capable of striping AWG22 – AWG 27 gauge cables.
Third Hand

The next material you need is a third hand, required to avoid burning your hands while messing with hot wires.
A Solder Sucker

As you are just a beginner at making cables, you will definitely make a lot of mistakes. So, you just need a solder sucker to remove solder. A solder sucker is basically capable of heating up the misplaced solder.
So, now we will be able to strip wire, hold wire and cut wire.
Wire & Solder

Of course, we will need good wire and solder to make headphones cable.
Connectors

And now, we need connectors. Make sure not to use connectors with thinner gauges. Please do not forget to examine the maximum number of wire diameters the connector is capable of accepting.
Remember, we will use a minimum of 2-4 wires braided together ( 4 wires of the amp end and two wires on the headphone end)
A Heat Gun And Heat-Shrink Tubing

You will need a heat gun and heat-shrink tubing in order to make your cables sturdier. Keep three things in mind about the characteristics of heat-shrink.
- shrink factor should be 9:3 or 4:1
- Appearance, which means color, transparency, and thickness matter.
- Diameter.
Using the higher shrink factor will save your life at the end of the day.
You can easily create smooth transitions from a wide diameter to a narrower one. You can buy it from eBay. Make sure to pick up four sizes that have the capability of suiting most requirements with a 9:3 factor.
The heat gun is basically all about a hair-drier on steroids. It does not cost much.
Okay! We have finally got all the stuff we need to make great headphones cable.
The Process Of Raiding A Cable

You will need four wires if you are making a balanced cable or an unbalanced cable. First, And now, make the wires as long as you need them. And then you need to add 10% to that.
You will surely need connectors that are capable of accepting a lengthy diameter.
Then there comes the process of braiding.
A quad-braid is literally marvelous when it comes to fulfill all the requirements.
Now that you have got four wires, you can name these wires A, B, C, D for your benefit. First, you have to create the top and bottom. Now you need to shift the B to the right side of C and C to the left and up.
In this way, you have basically made four basic wires which are LEFT, RIGHT, UP, DOWN. Now you have to take Red on the left side above Black part.
You have to also shift Black part on the right side. Then it will be best if you take the yellow, drag it down on the entire thing. and retain it to the right in such a way that it comes over Blue and takes the sequent to the left side.
Now, you have a fresh set up of A, B, C, D. But A and D have exchanged their places, and so do B and C. Now that you have made a three dimensional knot, please do not pull it while giving too much pressure.
Now, you are on level two. Then, keep repeating the process as much as it requires. When you have about 24-32 centimeters remained of wire, you should finish braiding the wire. Then you need to start rotating a couple of the wires in the region.
Now, you have to tie the three edge with a compatible thing. You can use some thin heat-shrink tubing to do that. Do not worry if it turns out to be ugly. And make sure to check that the cables and two of the headphone edges are equally tight and equally long.
The Process Of Soldering The Ends

You have to start the process by unbending all the wires at all the ends. 1/6 inch will be okay. If you strip too much, you will risk creaking shorts. So strip as much as you need to solder the connection.
After stripping all of the edges, heat up those edges of the wires with your soldering iron. Then you have to cover all the wire taking the help of solder. Now, you need to color the wires.
Okay, now your wire is fully prepared. Now you have to work with the connector part. At the edge of the headphone, L+ will be attached with the positive edge and L- will be attached with the negative edge. Then it will be best to give some heat to the end which was colored.
When the pin touché the wire, you should hold them without moving your hands as long as the solder is cooling down. To enhance the power of the connection, you can add some extra solder after their soldering together.
Now, with the help of solder, connect A and D, C and D. Please, be creative.
Okay. So you have become successful in soldering the connectors situated on the edges of the headphone. Now you have to manage the edge of the amp.
You can take the help of your multimeter to recognize the various kind of wires. It is really necessary for you to know which wire goes where to solder the edge of the amp.
By the way, make sure to put the barrel over the cable. Then you can start soldering. After soldering the cable fully, test it first.
You can test it using an O2-amp. You can start the process with one side at the same moment. If everything turns out cool, try both of the sides at the same time. You will surely find out what went wrong after hearing.
If that happens, desolder the fishy parts.
If everything is absolutely perfect out there, you can affix few heat shrink. You may use clear heat shrink as the ultimate emollient of your cable, as I am recommending you that.
Now, please be careful enough with the heat gun. Do not heat it up very much. It won’t shrink anymore if it does not start shrinking after 6 to 10 seconds.
Okay! So you are finished making headphones cable on your own. Congratulations!
Assembling the Connectors

Headphone cables can be a pain to find and replace. Not to mention, they can be expensive. That’s why investing in a DIY cable project is worth saving you time and hassle.
Headphones are a popular item and are often regularly replaced or upgraded. Finding the right cord can be challenging if you’re looking for a curent equal of headphones or just upgrading your old ones.
That’s where a DIY cable project comes in handy – you can easily find and buy the correct connector type for your headphones.
There are many different connector types available on the market, so choosing one compatible with your headphones is important.
Assembling the connectors is simple – follow these steps, and you’re ready to go!
For Overnight Trips

When it comes to traveling, there are a few things that you can’t leave home without – your passport, travel documents, and of course, your laptop.
But what about your audio gear? With today’s portable audio players, taking them on the go is easier than ever. If you’re looking for an easy way to organize and keep your belongings safe while on the go, try making your headphones cable.
This simple DIY project can be done in just a few minutes. All you need are some cable ties and a pair of headphones.
Once you’ve completed the project, you can use it to charge your phone, connect your audio player to your laptop, or even organize your cables!
So, this DIY project is definitely for you, whether you’re on an overnight trip or want to make some space in your backpack.
Conclusion
I hope now you know how to make your own headphones cable.
Making your headphones cable is a simple and easy task that can significantly improve your audio experience.
By assembling the connectors yourself, you can avoid dealing with cheaply made cables that can often disappoint. Plus, making your cables can be a fun and creative project that you can take on anytim.
So, make your headphones cable today if you want to improve your audio expertise.
Frequently Asked Questions
1.What Materials Do I Need To Make My Headphones Cable?
Ans: One can purchase cable connectors and headphone cables from many sources, including electronics retailers, audio-visual equipment stores, and online retailers.
2.Can I Use Any Wire For The Cable Of My Headphone?
Ans: Headphone cables are typically wires of copper, silver, or another metal. Copper wire is the most common because it is flexible and can carry a high electrical current.
3.How Do I Connect The Audio Cables To The Headphone Jack On My Device?
Ans: Audio cables can be connected to the headphone jack by plugging one end into the headphone jack and the other into the audio cable.
4.Is It Safe To Use A 3-Prong Plug With The Cable Of My New Headphone?
Ans: There is no definitive answer, as the safety of using a 3-prong plug with a headphone cable depends on various factors, such as the length and type of headphone cable.
Some headphone cables are designed to accommodate 3-prong plugs, while others may not be compatible. Ultimately, it’s advised that you check the compatibility information for your headphones before using a 3-prong pin.
5.How Do I Know Which Cable Size To Buy?
Ans: The cable size you need depends on the device and port you use to connect to. For cables labeled “A/V” (analog audio/video), buy the largest cable you can that will still fit into your device’s connector. For lines labeled “network,” buy the most miniature cable possible.
6.What Are Some Tips For Ensuring My Cables Are Durable And Sound Great?
Ans: Here are some tips from audio cables specialist DB Technologies:
- Select quality cables. Cheap audio cables may not meet your expectations regarding sound quality or durability.
- Enclose the cables in a suitable audio cable shielding material. It will help to reduce wire noise and keep the cable looking new for longer.
- Don’t overload your audio cables. Overloading can lead to stressed cables, reducing audio quality, and failure of connectors.