One of the best headphones of the time is the Logitech microphone. Especially Logitech mic is the first choice for gamers. Its versatility, sound quality, and durability help it achieve the top list charts. But recently, many users complain about some issues with the Logitech microphone.
Sometimes its stop working and does not respond. So, what to do when the Logitech microphone not working on computer? We know that it is very annoying for you when playing a video game or watching a movie; in the meantime, your microphone is not working. You try a couple of times to fix this issue but cannot find any practical way.
So here we come with some excellent suggestions about how to fix the Logitech microphone not working. We hope if you follow our instructions carefully, you can overcome this problem easily.
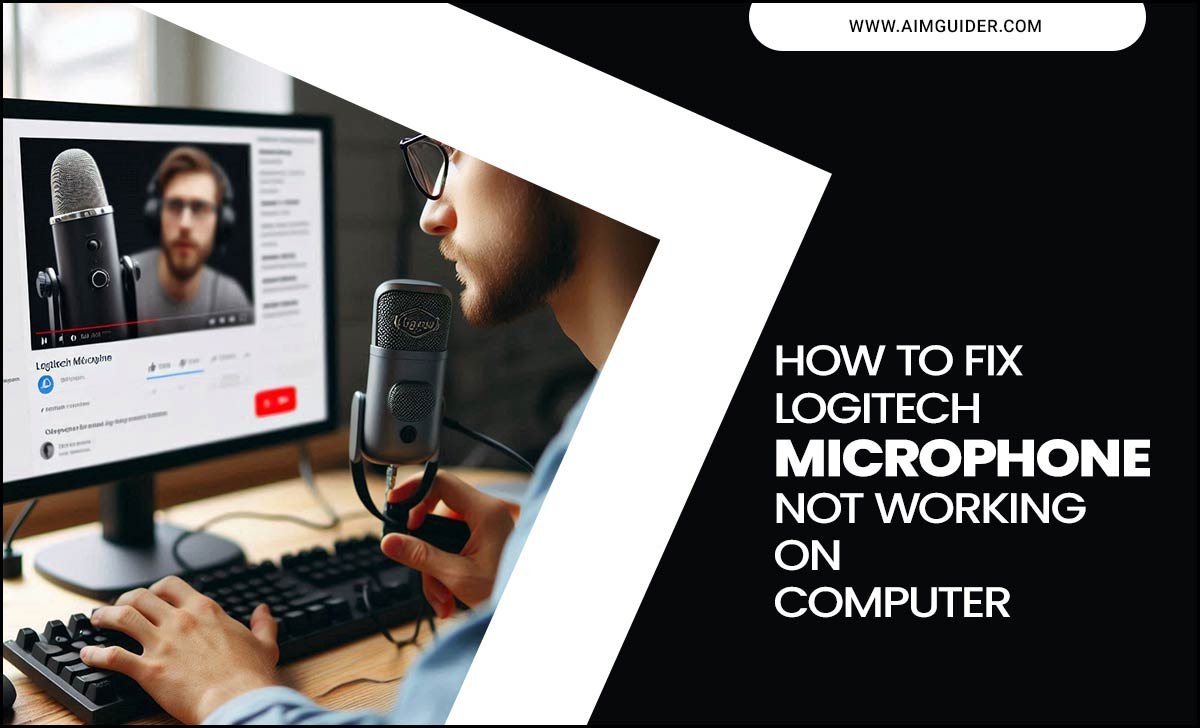
Logitech Microphone Not Working On Computer

If you’re having trouble with your Logitech microphone not working on your computer. There are a several items you can do to attempt and fix the troubel. So it includes troubleshooting issues with your audio hardware, software, or drivers.
If all else fails, you can attempt resetting your computer’s settings. Keep in mind that other factors are interfering with the Microphone’s performance, so don’t hesitate to consult a specialist if necessary.
Why Logitech Microphone Not Working

Let’s start with the possible reason behind this issue. There can be many reasons behind the microphone not working. The most common problems are:
- Corrupted and expired software: Software plays a vital role for any device to work on a computer. An updated version of software helps the mic run smoothly. If you install a corrupted version of software on your computer, that will not allow you to run your device correctly. Corrupted software means unofficial software, which is not downloading from the original website.
- Expired windows: Some settings will automatically change if your window is out of date. Even if you have no registered windows key, you cannot smoothly use your microphone or any other device on your computer.
- Driver issue: Computer driver is a common reason for Logitech microphone not working on a computer. A corrupted driver means bug attacks your driver, or maybe there was a hardware issue.
- Expired anti-virus: Sometimes, outdated anti-virus can create several problems like an unrecognized device. So if your computer cannot recognize an external device, it is challenging to run a microphone on a desktop.
- Hardware issue: Maybe there is some hardware issue that exists, such as a damaged port. If your computer has damaged ports, you cannot run your microphone on pc because the microphone is connected the computer via USB cable.
- Maybe your microphone is muted.
- Low battery
- Privacy setting issue.
How To Fix Logitech Microphone Not Working On Computer – Effective Answer

The real solution is to find out the reasons behind the microphone not working and solve it. We already know the reason why the Logitech microphone is not working. By solving this problem, we can fix this issue. We also need to fix some additional difficulties besides this issue.
Solution 1: Reinstall Your Computer Driver

Problems with the microphone are nothing new to anyone. Outdated drivers often cause problems with the microphone. So, if you want to use the microphone peacefully, quickly check if your driver is updated or not.
You can update your driver in many ways. Windows maintain all the update automatically. But if you don’t turn the option automatically update, then windows cannot edit your audio driver by itself. So you can download the latest version of windows driver from the website and download and install it from the website if you want.
- First of all, go to the Device Manager.
- Select Audio output and input Now go to the Microphone option – Right-click- Select Uninstall device
- Open sound window
- Go to the Microphone option
- Uninstall the driver
- Restart your computer
Solution 2: Fix Internal Damage

Check if any part of the microphone or anything else is damaged. Connect to another computer to see if the microphone is working. If it’s working on another computer, you have to understand that the problem is not with the mic.
Solution 3: Change The Privacy Setting

Many times updating the new windows changes the privacy setting a lot. So you can fix the problem Logitech microphone not working by changing the privacy setting. Follow the instruction:
- Go to Start Menu and click on the setting tab.
- Now select the Privacy setting.
- Here you find the Microphone option; click on it.
- Now go to change and enabled the option.
Solution 4: Update Sound/audio Driver

Update when your audio driver expires. Follow the step to update your audio driver.
- Click on the Windows icon.
- Select Audio output and input
- Now go to Realtek High Definition Audio.
- Click on Update Audio Driver
- After finishing the update, restart your computer.
Solution 5: Unmute The Logitech Microphone
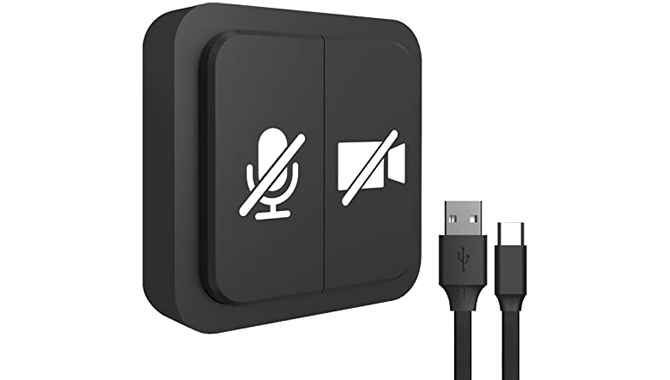
Are you mistakenly unmuting your microphone and looking for a solution for fixing the Logitech microphone not working. It’s hilarious if that happened. To unmute your follow the steps:
- You can find a speaker icon on the right bottom corner of the windows.
- Click on the icon.
- Now unmute the headphone.
Solution 6: Enable The Headphone
Did you forget to turn on the microphone on your computer? Logitech microphone may not work on Windows 10 because of this problem. Follow the instruction to enable a Logitech microphone on your computer.
- Go to Control Panel or type it in the windows search box.
- Click on the Sound option.
- Now select Recording Option and open it.
- From here, choose Enable tab.
Solution 7: Change The Sound Setting
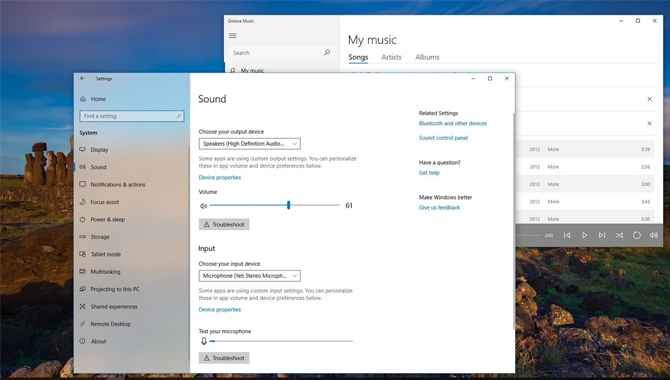
You can solve the problem Logitech microphone may not work by changing the sound setting. Follow the instruction:
- Go to Control Panel or type it in the windows search box.
- Click on the Sound option.
- Press Recording Option
- Go to the microphone and open its properties.
- Now change the sound setting.
Solution 8: Troubleshoot

Windows has a troubleshooter that can fix minor issues. Do the things that make troubleshooting:
- Go to Control Panel
- Then All Control Panel Items
- Now enter Troubleshoot
- Here you find a couple of setting options such as programs, hardware and sound: network and internet, and security and system.
- Click on security and system.
- Run the troubleshooter
Solution 9: Replace The Battery

Maybe your headphone battery is run out of charge. So please charge the battery fully and placed it on your microphone. If it’s not working correctly, I mean the battery down many times, buy a new one.
What Causes Microphone Not To Work In G403?
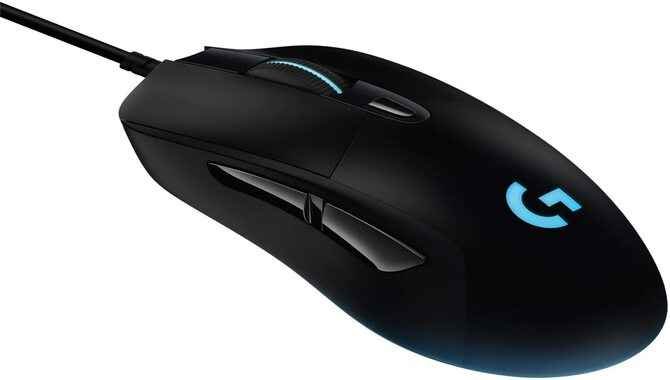
There are several potential reasons of the Microphone not working on the G403, including:
- The cable may be damaged or disconnected
- A hardware problem with either the PC or headset
- Windows updates may have caused changes to your audio driver
- The software on the PC might be managing the Microphone in an incorrect way
- If none of these answer work, it may be need to contact Logitech support.
Check For Updates
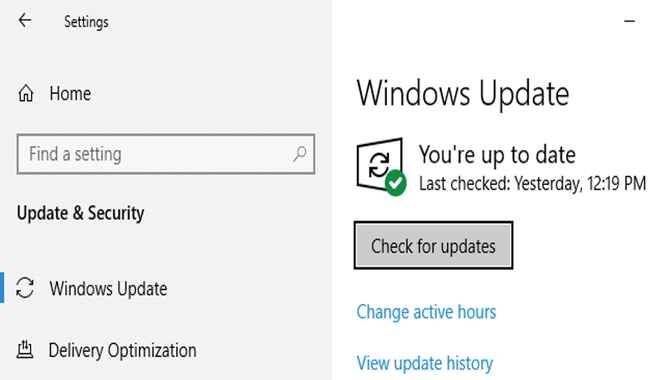
One potential solution is to check for updates on your computer. Windows Updates can sometimes change the audio drivers, which may interfere with the Microphone. If you’re unsure if there have been any recent updates, you can try restarting your PC and checking for updates afterward.
Check Cable Connection

Another solution is to check your cable connection between the headset and the computer. Sometimes a loose or damaged connector will check the Microphone from working rightly. You can try using another cable or swapping out the headset for a known good unit to troubleshoot this issue.
Test The Microphone
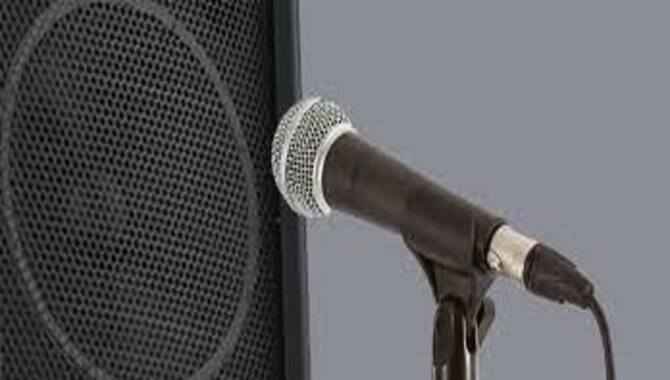
If none of these solutions work. So you can test the Microphone by speaking into it directly. Ensure the device is plugged in and properly connected to your PC. Try narrating a short story or singing a song into the mic to see if anything happens. If everything appears to be working correctly. So there may be an issue with the software on your computer incorrectly managing the Microphone.
In this case, you might need to contact Logitech support for assistance troubleshooting this problem remotely. If you’re still having problem getting the Microphone to work, you should consult a specialist.
How To Test A Microphone

Check your microphone after purchase to see if your computer is working correctly. There are several ways to check microphones effectiveness. To prevent your microphone, follows the steps:
- Connect your Logitech microphone to the computer; both USB and 3.5 mm are available in the entire computer.
- After connecting the microphone cable, adjust the setting.
- Start → Control Panel → Sound → Record Tab → Logitech Microphone
- Now test the microphone by recording a song or speak through it.
Make A Test
To determine if the Microphone is working, you can make a test recording and see if it playback correctly. This method won’t help to troubleshoot any software issues, but it should give you an idea of whether or not the Microphone is functioning correctly.
Troubleshooting For Windows

If you’re using Windows 10 or 8, try these steps: First, open the Control Panel. Click on “Sound and Video.” In the Sound window, click on “Recording devices,” and then ensure that your Microphone is listed under “Built-in multimedia audio capture device.”
If you’re using a previous version of Windows (Windows 7 or Vista), search for “mic” in the Start menu’s search bar, select it from the results list, and then follow these steps:
Click on Recording Devices on the left side of your screen. The Input tab will appear. If the Microphone isn’t listed under “Built-in audio capture devices,” then you’ll need to install a driver from Logitech or the manufacturer of your computer’s sound card. Once you have installed the driver, ensure it is enabled and selected in the Recording Devices settings.
How To Fix Logitech G430 Mic Not Working

If the Microphone on your Logitech G430 is not working, you can try troubleshooting it as follows: Unplug the device from your computer and plug it back in after a few seconds. If that does not work. You may need to update the software on your computer or contact Logitech support for assistance.
Check The Sound Input Settings

If the Microphone is not registering sounds correctly, you may need to adjust your sound input settings. To do this:
- Open Control Panel and click on Sound and Video.
- Click on Recording devices (if it isn’t already selected).
- In the list of recording devices, right-click on your Microphone and select Properties from the shortcut menu that appears (or press Ctrl + Properties in Windows 7 or Vista). The Mic Properties window will open.
- Ensure that other programs to access this device are checked under the General tab and that the Driver settings are compatible with your Microphone.
- Click OK to save your changes and exit the Mic Properties window.
Reset The NVRAM/PRAM
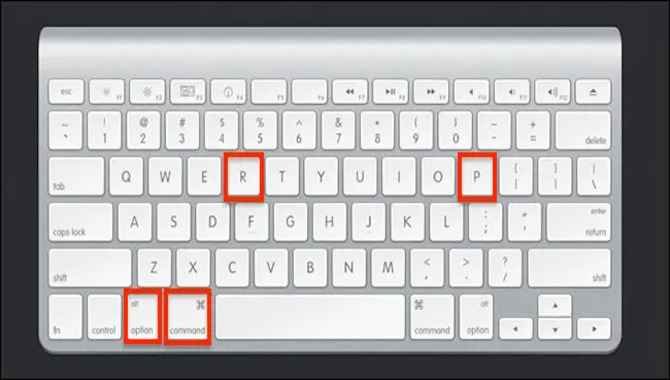
If your computer has a reset button, use it to reset the NVRAM/PRAM. To do this:
- Turn off your computer and press and hold the power button until you see an indicator light that says “on (the) standby” or similar.
- Keep holding the power button while you connect one end of an AC power cord to the back of your computer and wait until prompted to release the Power Button. After about 5-7 seconds, release the Power Button but keep holding onto the AC power cord!
- Hold down the reset button on your motherboard for about 5-7 seconds, or until you see a green light start to blink.
- Remove the AC power cord and Immediately press and hold down the F11 key while plugging in an IDE/ATA cable from your hard drive into one of two newly created USB ports on your computer (nearby). The system should then boot into Safe Mode with Networking. When it does, release both keys when prompted to do so.
- Once in Safe Mode with Networking, you will be able to use your computer’s built-in tools to reset the NVRAM/PRAM by following these steps:
- a) Locate and open the System Configuration Utility, which can be found by clicking on Start, All Programs, Accessories, and System Tools.
- b) Click on Advanced system settings near the bottom of the window.
- c) Navigate to the Hardware tab and click on Device Manager. So the Device Manager should now show all devices associated with your computer
Try Enabling Dictation
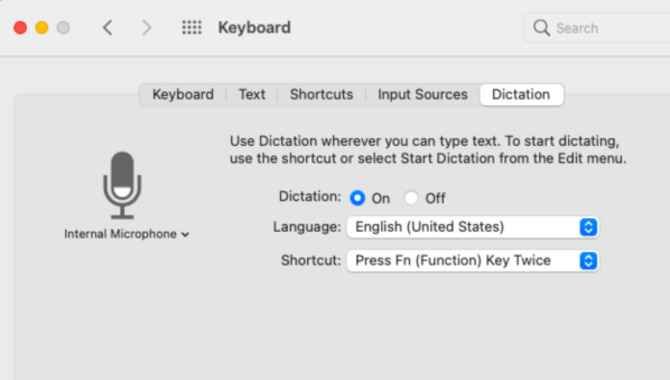
If you are still having trouble logging in, please try enabling Dictation.
- Open the Settings app on your device.
- Under Languages & input, scroll down to Dictation and tap it.
- Toggle the toggle next to Enable Dictation on/off if needed and enter a password if prompted ( Droid Preferences > Language & Input > Dictation ).
- If you have an Android Wear device, enable Dictation under the Voice tab of your app settings.
Check The Levels On Your External Microphone

If you still have trouble logging in, please ensure your Microphone is activated and at the proper levels.
- Open the Settings app on your device.
- Under Audio & devices, tap Microphone.
- If the toggle next to the Microphone is off (the light isn’t green), turn it on by tapping it and entering your password if prompted ( Droid Preferences > Language & Input > Microphone ).
- Tap OK when finished to return to the main screen of the Settings app.
Why Is My Windows 11 Microphone Not Working?

If you are using a Windows 11 device and the Microphone is not working, so ensure that Skype is up to date and that your audio settings are correct.
- In the Start menu, search for “Skype” and click on it.
- On the main screen of Skype, tap on Menu > Settings.
- Under Audio, ensure that Allow webcam is used in call checks.
- If your Microphone isn’t working after making these changes, please try restarting your device or contacting customer service for further assistance.
Conclusion
The Logitech microphone is a popular microphone of excellent quality. There are no complaints against these microphones regarding durability, parts etc. The problem is that sometimes Logitech microphones do not work due to various technical issues like an expired driver, expire software, audio setting etc.
To overcome this problem, check your audio setting and update the sound driver regularly. I hope now you know what to do when the Logitech microphone not working on computer.
Microphone quality can be improved by adjusting settings on your computer, but ultimately the audio quality depends on the Microphone itself and how well it plugs in. If you experience poor audio quality when using your computer’s Microphone, it might be best to try another recording method (such as a USB microphone).
FAQs
1.How Can I Check If The Microphone Is Working On My Computer?
Ans: To check if the Microphone is working on your computer, you need to open a VoIP application such as Skype and click the Microphone button. If the Mic icon is green, then your Microphone is functioning correctly.
2.If The Microphone Isn’t Working, What Can I Do To Troubleshoot The Issue?
Ans:There are several possible reasons of a microphone not working:
- The Mic may not plug in properly – Ensure that the Microphone is turned on and plugged into an obtainable Audio jack on your computer.
- If you are using a laptop, the mic may block by the keyboard or screen – try moving it to another area of your computer.
- If you are using a desktop PC, one possibility is that there is too much background noise – then turn down the volume levels for your audio equipment and try again.
3.What Are The Various Causes Of A Microphone Not Working On My Computer?
Ans:There are a few possible causes of a microphone not working on your computer. One possibility is that the Microphone may not plug in correctly.
4.How Can I Fix A Problem With Windows Audio Capture Services?
Ans: If you are experiencing problems with your Microphone being captured by Windows audio capture services, try to follow these steps:
- Ensure that the volume on your computer is turned up and that the Microphone is plugged into an available audio jack.
- Disconnect all other devices from your system (including USB speakers and microphones).
- Open Sound Manager (by pressing “Windows key + X” or searching for “sound manager” in Start Menu search results) and click on the Recording tab.
- In the Capture Channel drop-down list, choose Digital Audio.
5.Can I Improve Audio Quality By Adjusting My Computer’s Microphone Settings?
Ans: There are a few possible reasons why the audio quality might not be optimal when using your computer’s Microphone. One possibility is that the Microphone may not be plugged in correctly, or there may be too much background noise.
6.How Can I Delete An Old Audio File From My Computer’s Hard Drive?
Ans: If you want to delete an old audio file from your computer’s hard drive, follow these steps:
- Open File Explorer (by pressing “Windows key + E” or searching for “file explorer” in Start Menu search results).
- In the left column, click on My Computer.
- In the right column, double-click on C: and then double-click on Temp folders.
- Locate the audio file you want to delete (if it is not located in one of the Temporary folders) and drag it onto the Trash icon at the bottom of the window.
- Click on the Trash icon to confirm that you want to delete the audio file.

